Issue
- You want to connect the ESET PROTECT Virtual Appliance (VA) to an existing domain in Active Directory
Solution
- Initial configuration of ESET PROTECT Virtual Appliance
- Using ESET PROTECT VA Management console (after the ESET PROTECT Server VA is already set up)
- Using the Webmin management interface (after the ESET PROTECT Server VA is already set up)
I. Initial configuration of a new ESET PROTECT Server Virtual Appliance
While configuring a new Virtual Appliance, the following settings are mandatory to use ESET PROTECT VA on a domain:
- Windows workgroup - A workgroup or NETBIOS domain name for this server.
- Windows domain - A domain for this server.
- Windows domain controller - A domain controller for this server. Enter the ESET PROTECT Server fully qualified domain name (FQDN).
- Windows domain administrator - An account used to join the domain.
- Windows Domain administrator password - An administrator password used to join the domain.
- DNS1 - A domain name server for this virtual machine. Type the IP address of the domain controller.
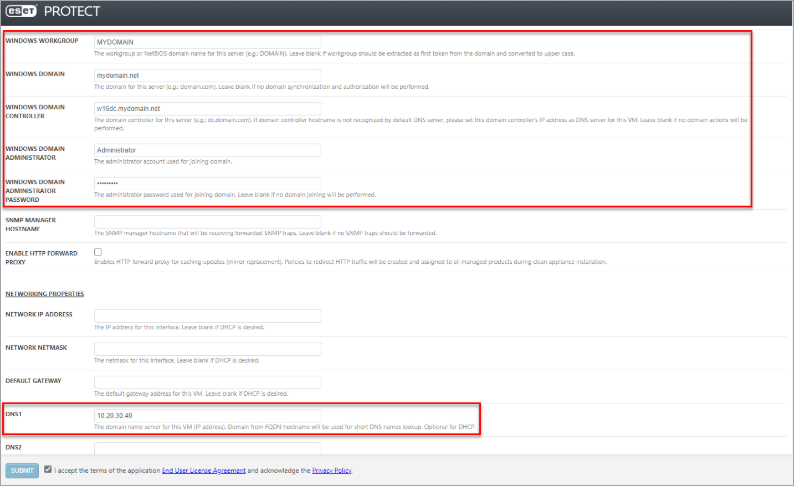
Figure 1-1
II. Using ESET PROTECT VA Management console (after the ESET PROTECT Server VA is already set up)
-
Open the ESET PROTECT VA Management Console, press ENTER, type the password and then press ENTER → ENTER.
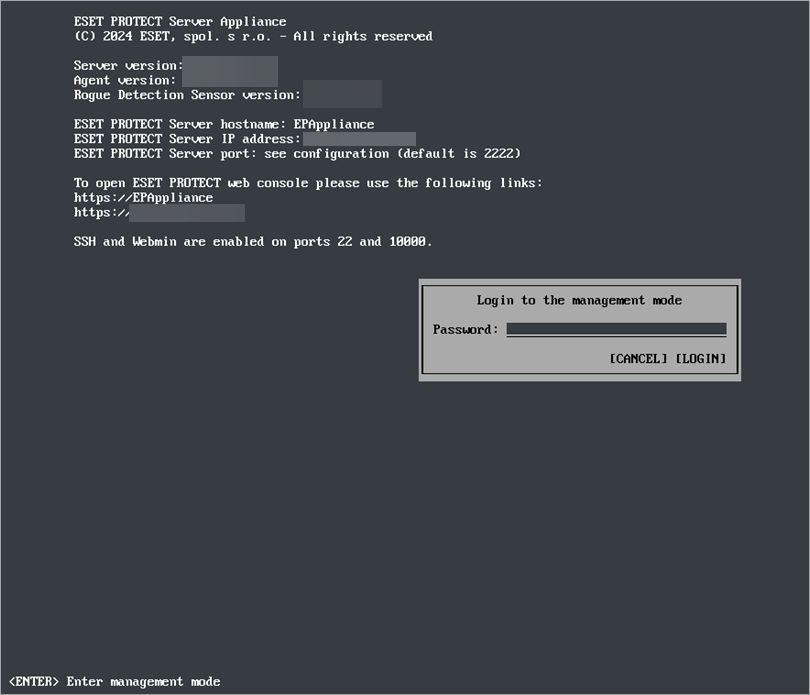
Figure 2-1 -
Select Configure domain.
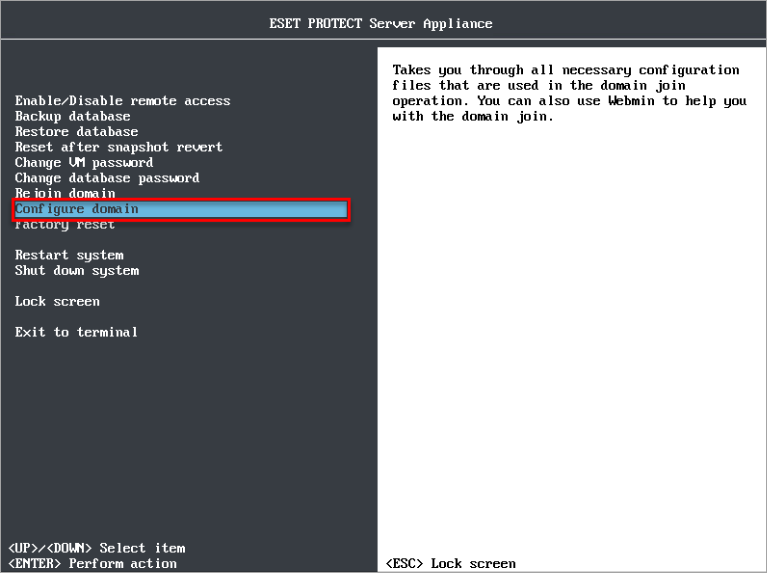
Figure 2-2 -
You will be guided through four configuration files. Press ENTER to edit each configuration file and then press CTRL+X to close the text editor. Press Y to save changes (or N to discard changes).
-
/etc/hosts
Hosts file maps hostnames and IP addresses. Add a line to map the IP address and hostname of your domain server, for example:
10.20.30.40 w16dc.mydomain.net -
/etc/ntp.conf
Configure the VA to synchronize its time against the domain controller. Add the following line at the end of the configuration file:
server w16dc.mydomain.net true
-
/etc/krb5.conf
Configure Kerberos - fill in your domain name and domain controller, for example:
default_realm=MYDOMAIN.NET

				MYDOMAIN.NET = {

				          kdc = w16dc.mydomain.net

				}

				.mydomain.net = MYDOMAIN.NET
-
/etc/samba/smb.conf
In Samba configuration, ensure that the correct workgroup and realm are set, for example:
workgroup = MYDOMAIN

				realm = mydomain.net
-
-
Domain connection is now configured. Run Rejoin Domain from the ESET PROTECT VA menu to initiate domain join. Type the administrator name and password for the domain connection. You may also need to restart the ESET PROTECT VA.
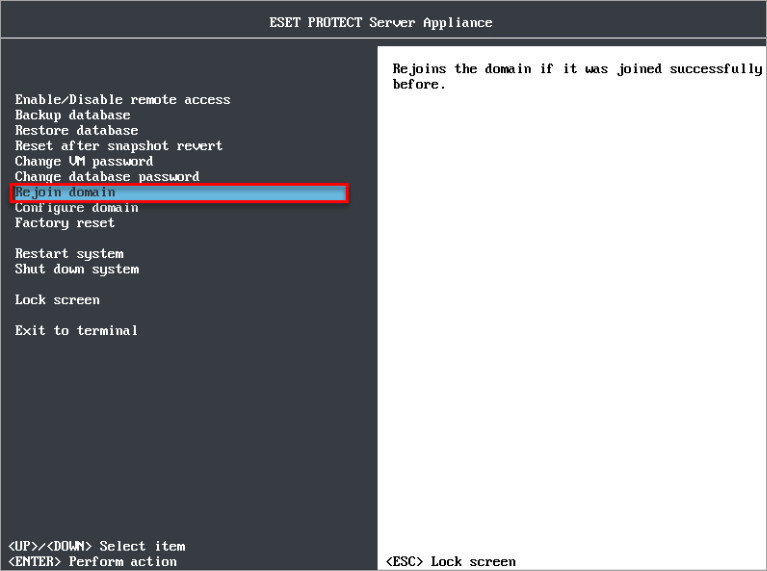
Figure 2-3
III. Using the Webmin management interface (after the ESET PROTECT Server VA is already set up)
-
Open the ESET PROTECT VA Management Console, press ENTER, type the password and then press ENTER twice.

Figure 3-1 -
Select Enable/Disable remote access to enable Webmin on port 10000.
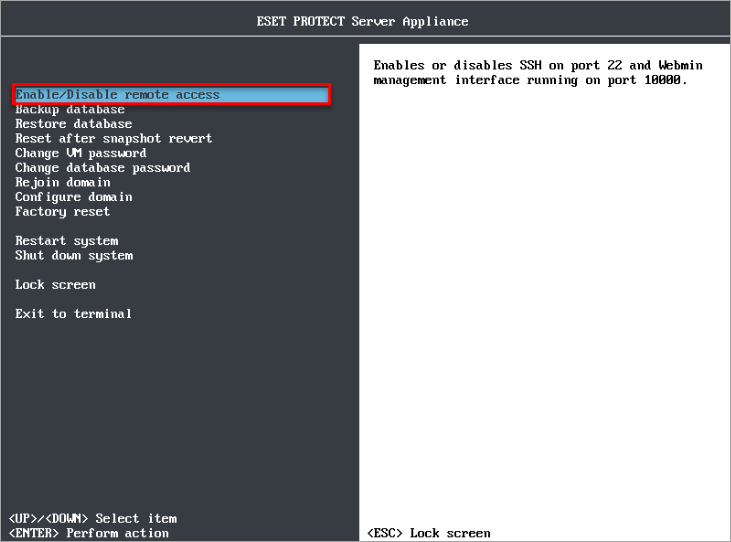
Figure 3-2 -
Open the internet browser and log in to the Webmin Management interface of the ESET PROTECT VA.
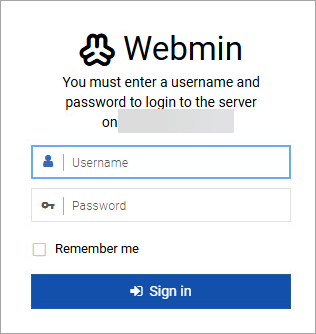
Figure 3-3 -
Set the domain controller and DNS server. Click Networking → Network Configuration → Host Addresses.
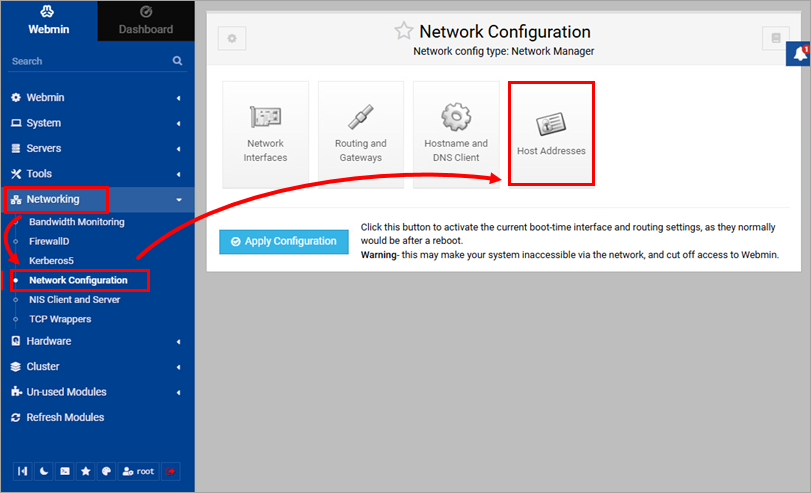
Figure 3-4 -
Click Add a new host address.

Figure 3-5 -
Type the IP Address (10.20.30.40) and Hostname (w16dc.mydomain.net) of the domain controller and click Create.
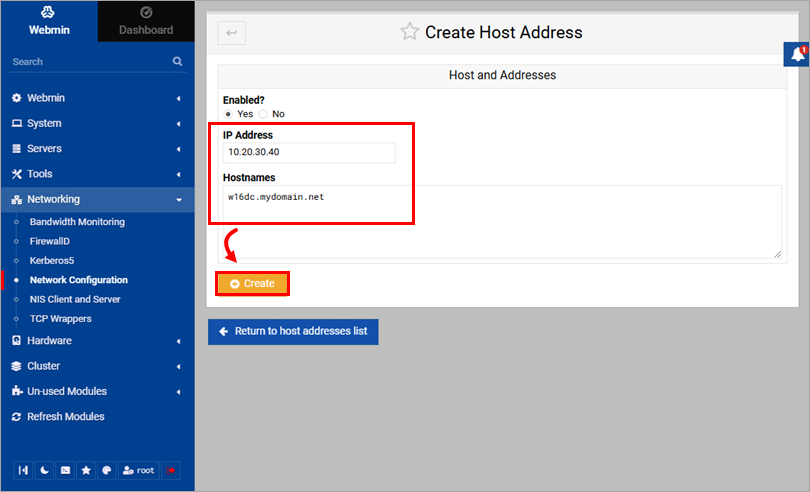
Figure 3-6 -
Click Return to Network Configuration.
-
Click Hostname and DNS Client.
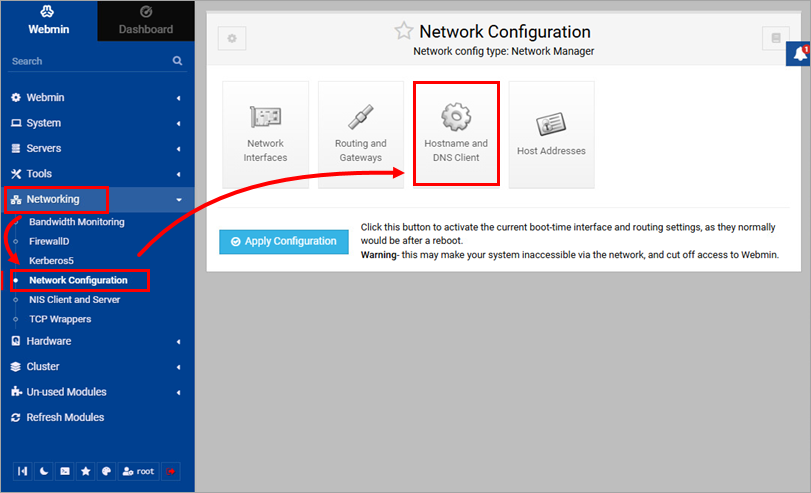
Figure 3-7 -
Type the IP address (10.20.30.40) of the domain server in DNS servers. Click Save.
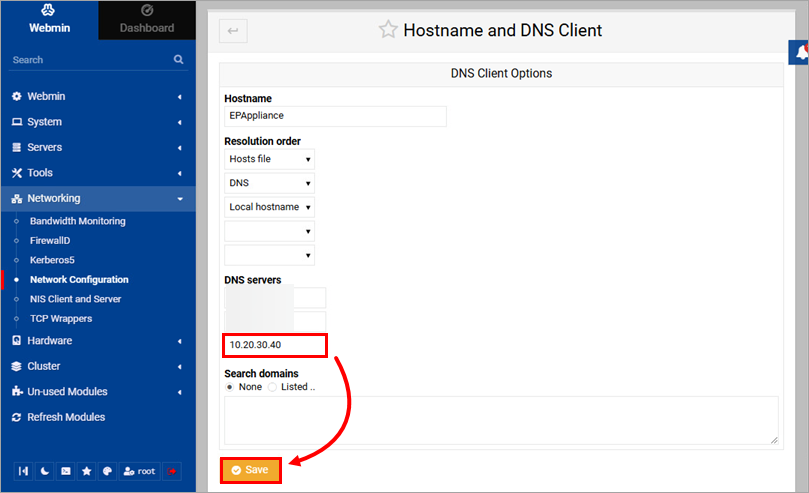
Figure 3-8 -
Configure time synchronization with the domain controller. Click Hardware → System Time → Time server sync. In Timeserver hostnames or addresses, type the domain controller hostname (w16dc.mydomain.net). Click Sync and Apply.
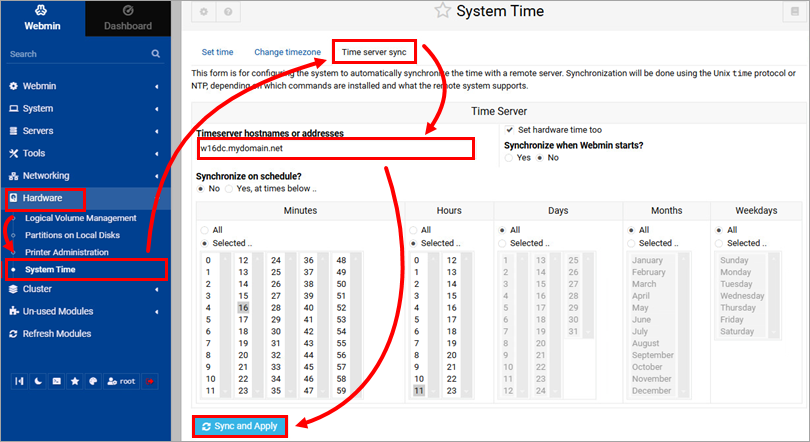
Figure 3-9 -
Configure the domain connection details. Click Networking → Kerberos5. Type the Realm (MYDOMAIN.NET), Domain name (type a period at the beginning: .mydomain.net) and KDC (w16dc.mydomain.net). Select Yes to Use DNS to lookup KDC. Click Update Configuration.
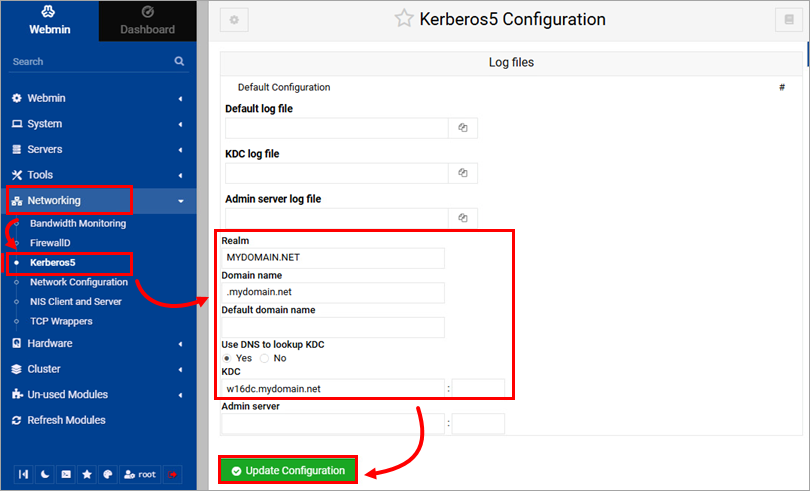
Figure 3-10 -
From the ESET PROTECT VA Management Console menu run Rejoin Domain to initiate domain join. Type the administrator name and password for the domain connection. You may also need to restart the ESET PROTECT VA.
Figure 3-11