Riešenie
Getting Started with ERA for MSPs: Step 4 of 5
← Install ESET Remote Administrator for Managed MSPs | Deploy ESET ERA Agent and security products →
Configure ERA License Management (Add Security Admin)
- Open ESET Remote Administrator Web Console (ERA Web Console) in your web browser and log in.
-
Click Admin
 → License Management.
-
Click Add Licenses, expand Security Admin Credentials, type your Security Admin Login and Password provided to you by your license distributor and click Add Licenses.
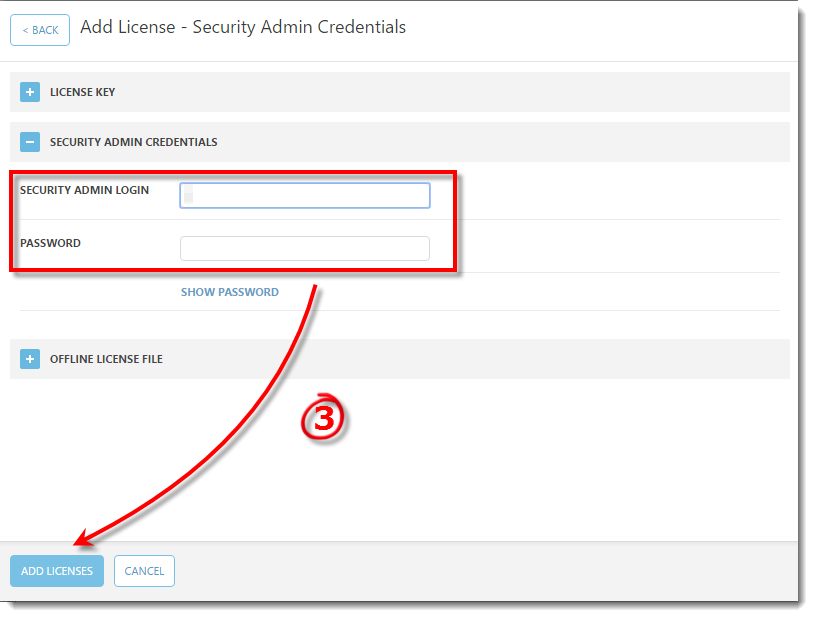
Figure 1-1
Once these credentials have been added to ERA, click Synchronize Licenses to sync changes made in EMA to ERA.
Create Dynamic Groups
- Open ESET Remote Administrator Web Console (ERA Web Console) in your web browser and log in.
-
Click Admin → Dynamic Group Templates.
- Click New Template.
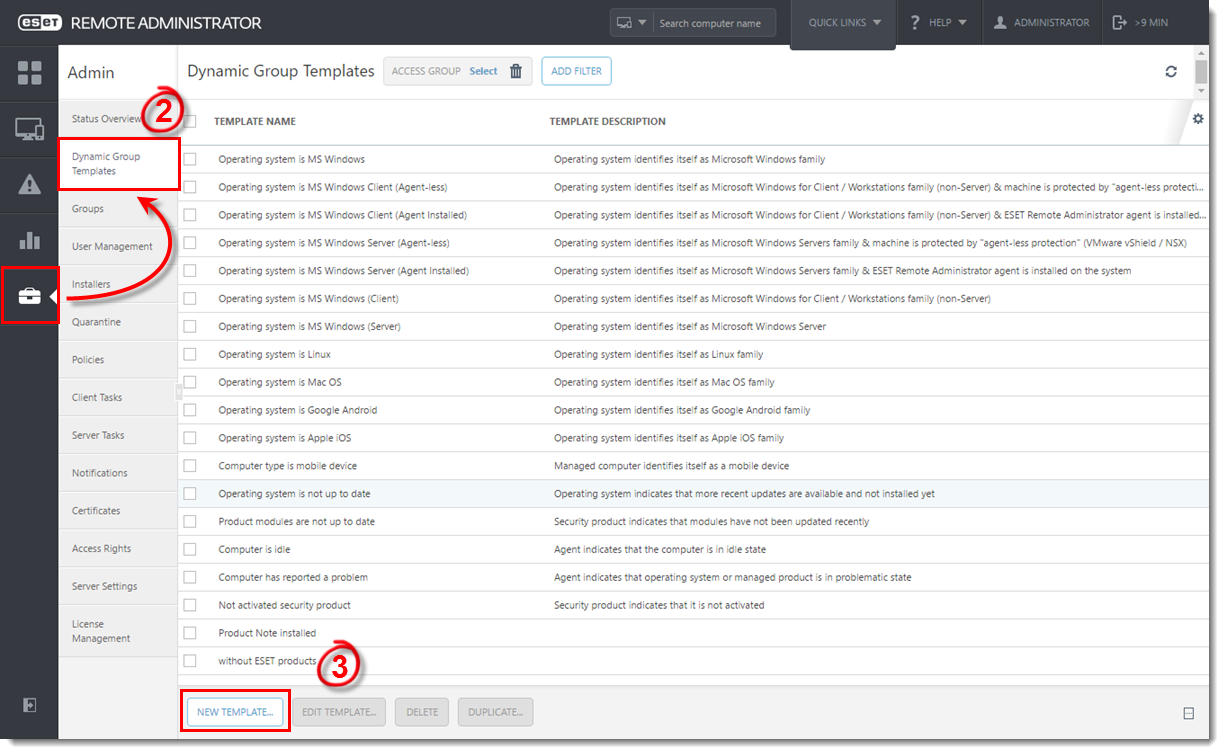
Figure 1-1
Click the image to view larger in new window
- Type the name "No ESET Security product" into the Name field.

Figure 1-2
Click the image to view larger in new window
- Expand Expression, from the Operation drop-down menu, select NOR (All conditions have to be false) and click + Add Rule.
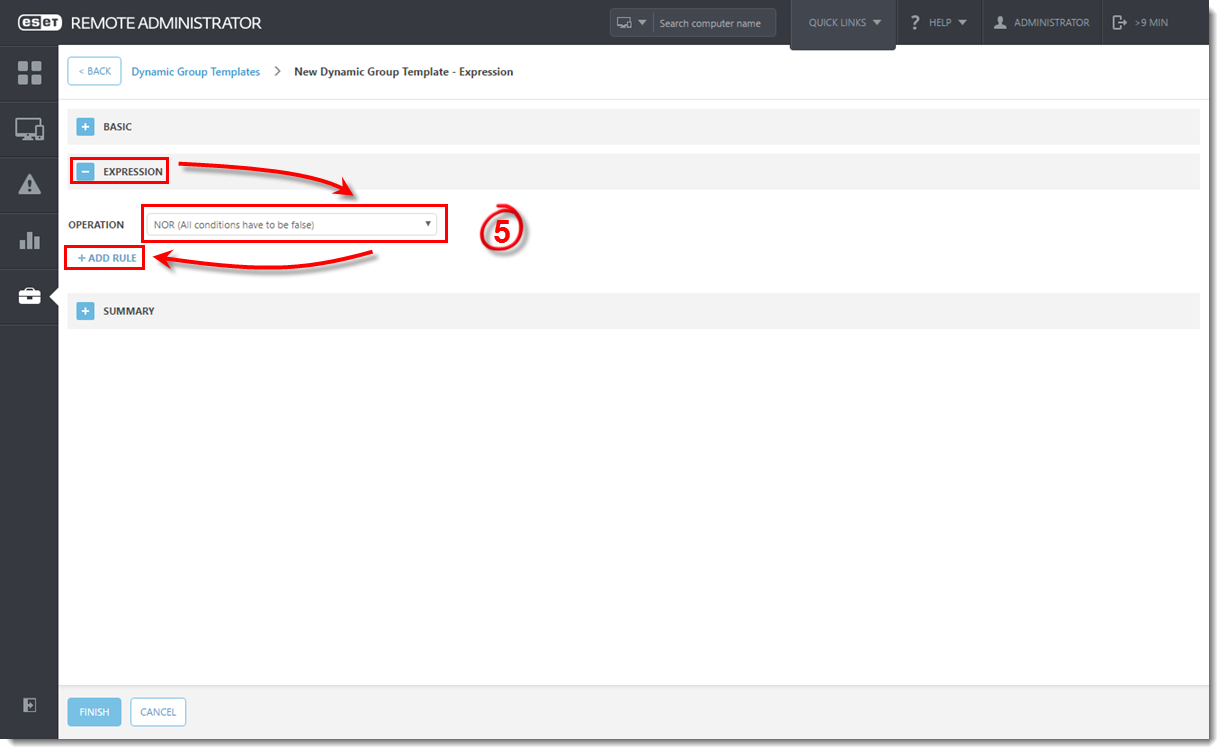
Figure 1-3
Click the image to view larger in new window
- Set the Rules to Installed Software → Application Name → Contains → ESET Endpoint. Do the same for each of the following applications: ESET File / ESET Mail / NOD32.
For example, expand Installed software, select Application name and then click OK. Set the rules for each product as instructed above.
Figure 1-4
- Click Finish when you are finished editing the template. ERA will automatically recognize when a new computer meets the criteria defined in a Dynamic Group template and add it to the appropriate Dynamic Group.

Figure 1-5
Click the image to view larger in new window
The completed Dynamic Group templates should look similar to the following example:

Figure 1-6
Click the image to view larger in new window
Create Static Groups (with Dynamic Group subgroups)
-
Click Admin → Groups and click the ALL folder group at the top.
-
Click the gear icon
 next to All and then click New Static Group.
-
Type the name "_CUSTOMERS" into the Name field and click Finish.
-
Repeat steps 1 and 2 to create a new static group and name it "_INTERNAL" and then click Finish.
-
From Admin → Groups, select the _CUSTOMERS group you created, click the gear icon and then click New Static Group.
-
In the Name field, type the same EMA Client Site name that you created previously and click Finish.
-
Select the new EMA Client Site, click the gear icon and then click New Dynamic Group.
-
Expand Basic and in the Name field type "Client Workstations".
-
Expand Template and for the Dynamic Group Template "Operating system in MS Windows Client (Agent Installed)," click Choose Existing.
-
Click Finish.
-
Select the new Windows Clients Dynamic Group, click the gear icon and then click New Dynamic Group.
-
Expand Basic and in the Name field type "Not Activated Workstations".
-
Expand Template and for the Dynamic Group Template, click Choose Existing.
-
Select "Not activated security product" under Template Name, click OK and then click Finish twice.
- Repeat these steps for all managed products per client (for additional EMA Client Sites) and for each client.
Configure ERA Base/Global Policies
-
Click Admin → Groups and under the Windows dynamic group subgroup within the ALL static group, click the gear icon, name it Clients and choose the Windows Client OS dynamic group template.
-
From Admin → Groups, under the Servers dynamic group, click the gear icon, name it Servers and choose the Windows Client OS dynamic group template.
Create Base ERA Agent Policy
-
Click Admin → Policies and click New Policy. Name the policy _BASE ERA Agent Policy.
-
Expand Settings and from the Select product drop-down menu, choose ESET Remote Administrator Agent.
-
Expand Advanced Settings and make the following configurations:
-
Under HTTP Proxy, ensure that the setting for “Use proxy server” is set to off.
-
Scroll down to Operating System and configure the settings as follows:
- Report non-ESET-installed applications—On
-
Report if operating system is not up-to-date—On
- Report network firewall issues—Off
-
Report virus and spyware protection issues—On
- Scroll down to Setup and enter a password to protect the uninstall or modification of settings of the
agent on the endpoint.
-
Under HTTP Proxy, ensure that the setting for “Use proxy server” is set to off.
-
Expand Assign, select the check box next to the All static group to assign the base ERA agent policy to all agents in the Web Console.
- Click Finish.
Create Base ESET Security Product for Windows Clients Policy
-
Click Admin → Policies and click New Policy. Name the policy _BASE
Windows Client Policy (for example, "_BASE EES Windows Client Policy").
-
Expand Settings and from the Select product drop-down menu, choose ESET Security Product for Windows.
-
Click the Antivirus tab and make the following configurations:
-
Expand Basic and configure the settings as follows:
- Enable detection of potentially unwanted applications—On
-
Enable detection of potentially unsafe applications—On
- Under Antivirus, click the Real-time file system protection tab. Expand Threatsense Parameters and configure the settings as follows:
- Runtime packers—On
-
Advanced heuristics/DNA signatures—On
- Under Antivirus, click On-demand computer scan and configure the settings as follows:
- Expand Basic and for Selected Profile, select In-Depth Scan.
-
Expand Threatsense Parameters and for Cleaning level, select Strict cleaning.
-
Under Antivirus, click Removable Media and for Action, select Automatic device scan.
-
Expand Basic and configure the settings as follows:
-
Click the Personal Firewall tab (these settings only apply to ESET Endpoint Security) and make the following configurations:
-
Expand Basic and click the slider bar next to Enable Personal Firewall to disable it.
-
Click the Tools tab, expand Microsoft Windows Update and for Notify about Microsoft Windows system updates, configure the setting as follows:
- Recommended updates
- Recommended updates
-
Under Tools, click Email notifications and configure SMTP email notifications from teh endpoint, it wanted.
-
Expand Basic and click the slider bar next to Enable Personal Firewall to disable it.
-
Click the User Interface tab and make the following configurations:
-
Expand User Interface Elements and configure the settings as follows:
- Start Mode—Minimal
- Show splash-screen at startup—Off
- Use sound signal—Off
- Show license information—Off
-
Show license messages and notifications—Off
- Expand Alerts and Notifications and configure the settings as follows:
- Display alerts—Off
-
Display notifications on desktop—Off
- Expand Access Setup and set a password to protect the advanced settings and uninstall of Windows client security product.
-
Expand User Interface Elements and configure the settings as follows:
-
Expand Assign, click the Assign button, and assign the policy to the All → Windows → Clients dynamic group created in step 1 of this section.
- Click Finish.
Create Base ESET Security Product for Windows Server Policy
-
Click Admin → Policies and click New Policy. Name the policy _BASE EFS Windows Server Policy.
-
Expand Settings and from the Select product drop-down menu, choose ESET File Security for Windows Server (V6+).
-
Click the Antivirus tab and make the following configurations:
-
Expand Basic and configure the settings as follows:
- Enable detection of potentially unwanted applications—On
-
Enable detection of potentially unsafe applications—On
- Under Antivirus, click the Real-time file system protection tab. Expand Threatsense Parameters and configure the settings as follows:
- Runtime packers—On
- Advanced heuristics/DNA signatures—On
-
Cleaning level—Strict cleaning
-
Under Antivirus, click On-demand computer scan and configure the settings as follows:
- Expand Basic and for Selected profile, select Smart Scan.
- Expand Threatsense Parameters and for Cleaning level, select Strict cleaning.
- Expand Basic again and for Selected profile, select In-depth Scan.
- Expand Threatsense Parameters and for Cleaning level, select Strict cleaning.
-
Expand Basic and configure the settings as follows:
- Under Antivirus, click Startup scan, expand Threatsense Parameters and for Cleaning level, select Strict cleaning.
-
Click the Tools tab and make the following configurations:
-
Expand Microsoft Windows Update and from the Notify about Microsoft Windows system updates drop-down menu, select Recommended updates.
-
Expand Microsoft Windows Update and from the Notify about Microsoft Windows system updates drop-down menu, select Recommended updates.
-
Under Tools, click Presentation mode and click the slider bar next to Enable Presentation mode when running applications in full-screen mode automatically to disable it.
-
Click the User Interface tab and make the following configurations:
-
Expand User Interface Elements and configure the settings as follows:
- Start Mode—Terminal
- Show splash-screen at startup—Off
- Use sound signal—Off
- Show license information—Off
-
Show license messages and notifications—Off
- Expand Alerts and Notifications and configure the settings as follows:
- Display alerts—Off
-
Display notifications on desktop—Off
- Expand Access Setup and set a password to protect the advanced settings and uninstall of Windows server security product.
-
Expand User Interface Elements and configure the settings as follows:
-
Expand Assign, click the Assign button, select the check box next to the ALL static group to assign the base Windows Server policy to all agents in the console.
- Click Finish.