Issue
Details
Click to expand
Web control allows you to block web pages that may contain potentially offensive material. It also enables employers or system administrators to prohibit access to 27 pre-defined website categories and over 140 subcategories.
Web control is used primarily for regulating web content that can be accessed by client workstations in a company network. The goal of Web control is to prevent users from accessing pages with inappropriate or harmful content, or pages that may have a negative impact on work productivity. This is achieved by filtering specific URLs, or pre-defined categories, including legal liability sites, pornography, sites that violate intellectual property rights, or sites that may impact a company's IT infrastructure.
See Web Control in the ESET Endpoint Security or ESET Server Security User Guide for more information on this feature.
Solution
Enable and edit Web control
![]() Endpoint or Server Security users
Endpoint or Server Security users
-
Click Policies and select the Built-in policy that you want to modify. Select the check box next to the policy for client computers to which you want to apply Web control and click Actions → Edit.
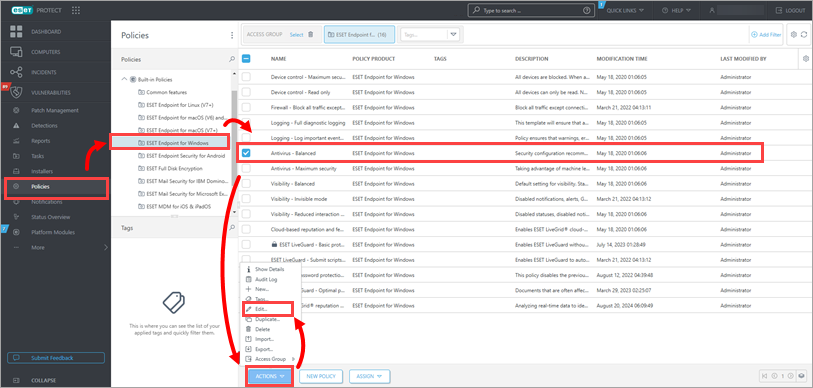
Figure 1-1
-
Click Settings → Protections → Web access protection → expand Web control and click the toggle next to Enable Web control to enable it.
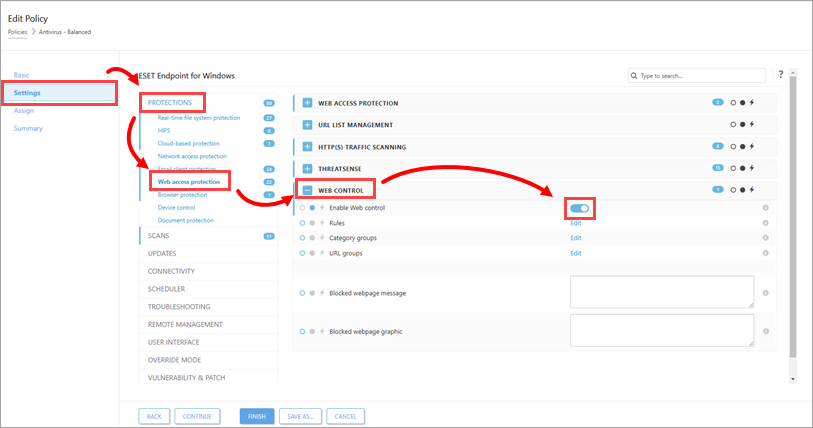
Figure 1-2
-
Click Edit next to either Rules, Category groups, or URL groups to modify the setting. See the sections below for a description of each setting and how to use it.
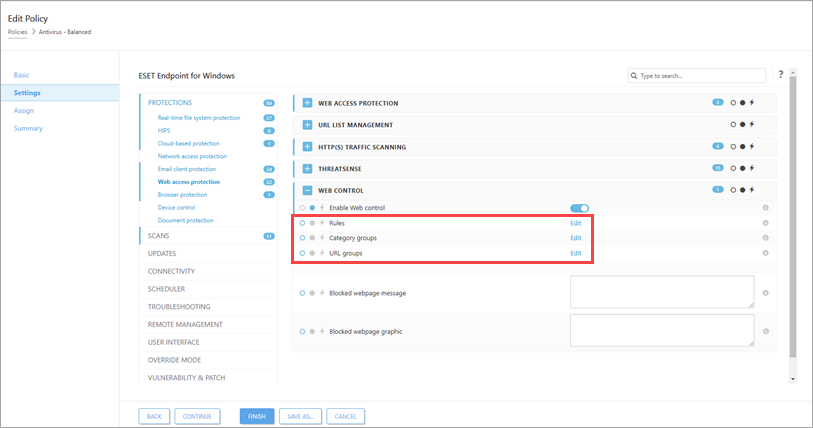
Figure 1-3
Manage Web control Rules
Manage the rules for a specific URL or category of web content.
-
Click Edit next to Rules (see Step 4 of Section 1).
-
Click Add to create a new rule.
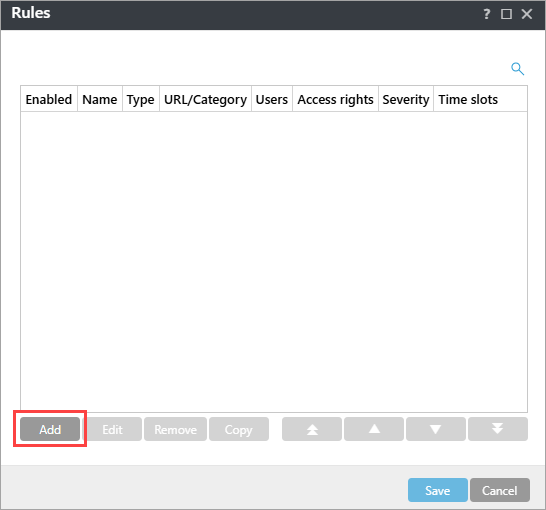
Figure 2-1
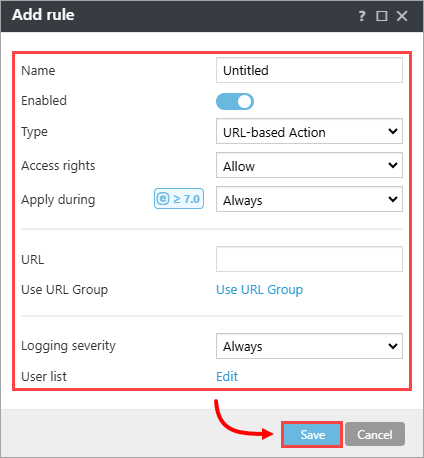
- The settings shown below are available in the Add rule dialog. Click Save → Save when you are finished changing the Rules settings.
- Name: The name of the rule, used for editing in ESET PROTECT On-Prem.
- Enabled: Click the toggle to enable or disable the rule.
- Type: Set the rule to act on a URL or a category of web content.
- Access rights: Set the permitted access rights for this content to Allow, Warn or Block to have your ESET business product take the corresponding action when the specified content is accessed.
- Apply during: Set when the rule will be applied.
- URL or URL Group: Type the URL or use the drop-down menu to specify the target for this rule.
- Use URL Group: You can define groups of URLs to filter more web content using a single rule. Click to toggle URL Group instead of a single URL.
- Logging severity: Select the level of severity required for the logs to record when this rule is activated. Logging severity must be set to Warning for ESET PROTECT or ESET PROTECT On-Prem to log Web control rules. You can create a new ESET PROTECT or ESET PROTECT On-Prem Dashboard report for blocked URLs.
- User list: Specify the users to whom this rule applies
Manage Web control Category groups
Category groups allow you to group multiple URLs and URL categories together so you can target all of them using a single rule.
-
Click Edit next to Category groups (see Step 4 of Section 1). Click Add to create a new category group. Type a name for the new category group and click OK.
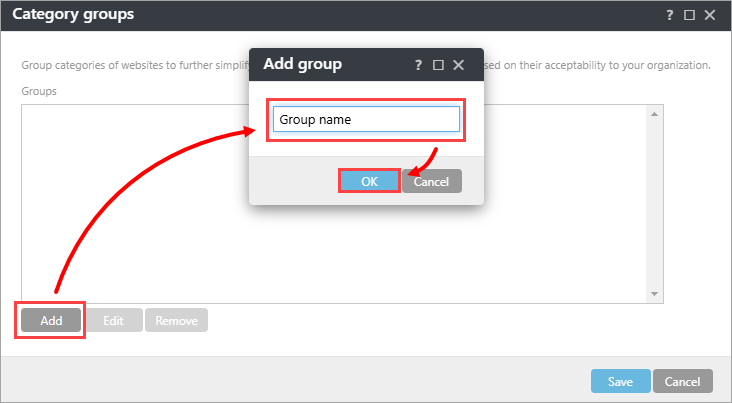
Figure 3-1
-
Click the group in the Groups section on the left side of the window. Select the check boxes next to a given category to select it and all its sub-categories (in this example, Adult Materials category is selected). Expand the category to display its sub-categories that can be selected by clicking their corresponding check boxes (in this example, Tobacco sub-category is selected in the Alcohol and Tobacco category). Click Save.

Figure 3-2
Manage Web control URL groups
URL groups allow you to group multiple blocked URLs and URL categories together so you can target all of them using a single rule.
-
Click Edit next to URL groups (see Step 4 of Section 1) to open a dialog window and then click Add to create a new URL group. Type a name for the new URL group and click OK.
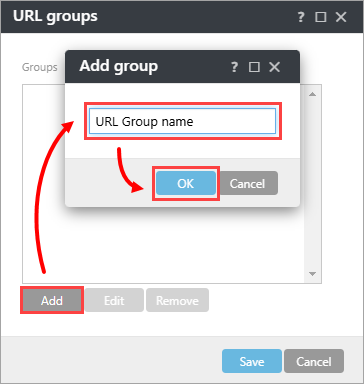
Figure 4-1
-
Select the URL group and click Add on the right side of the window.
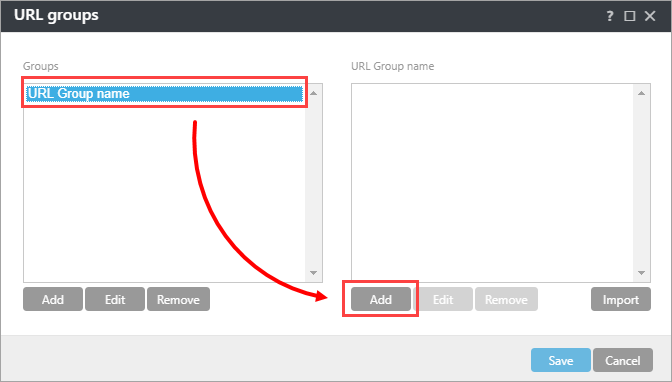
Figure 4-2
-
Type a URL that you want to include in your new URL group. You can also click Enter multiple values in the bottom left corner to add more URLs at once. Type your URLs in the new dialog window. You can click the drop-down menu next to Separator for multiple values and select the way how the URLs will be separated from each other: New line (pre-selected), Comma, or Semicolon. Click OK when you are finished adding URLs.
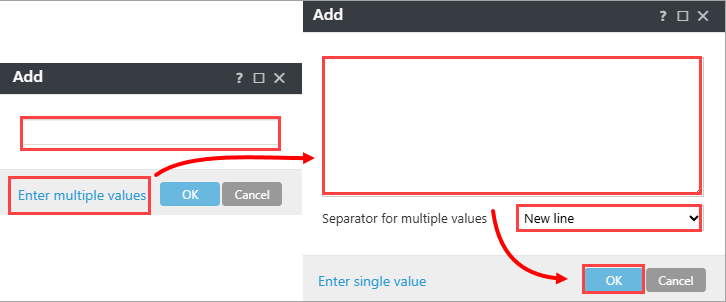
Figure 4-3
-
Click Save.
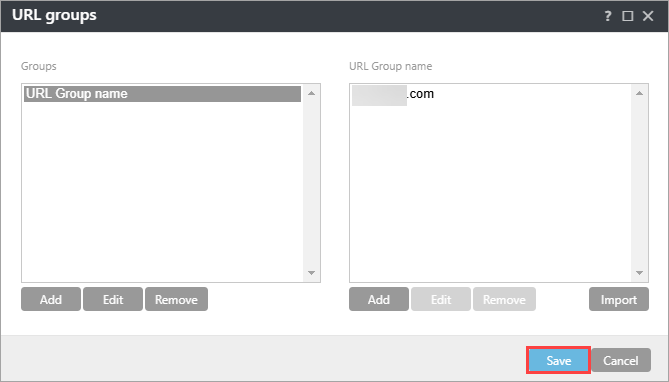
Figure 4-4
Add Blocked webpage message and Blocked webpage graphic
You can add a blocked webpage text message and graphics to the blocked webpage text message which will be displayed when a client computer attempts to access blocked content.
-
Type a message that you want to display in the Blocked webpage message field, then type a URL for the graphic in the Blocked webpage graphic field to display a graphic with your blocked content message. Click Finish.

Figure 5-1