Issue
- Create a policy to exclude potentially unwanted applications (PUAs) by their hash value in ESET PROTECT On-Prem
Solution
-
On the client machine that has already detected the PUA, open your ESET endpoint product and click Tools → Quarantine. Verify that the PUA is listed in the Quarantine list.
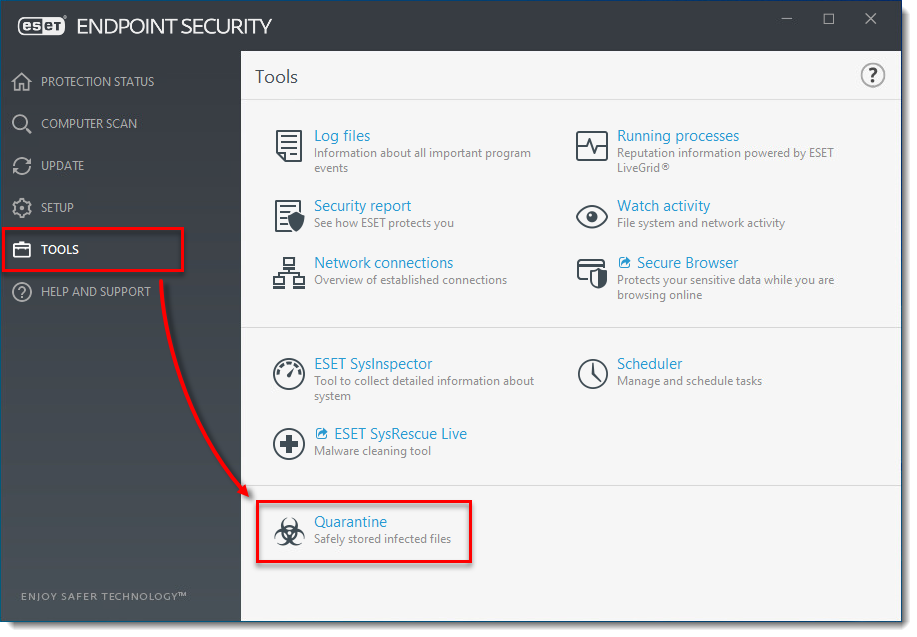
Figure 1-1
Click the image to view larger in new window -
Click More → Quarantine. Verify that the PUA found on the client machine is listed in the Quarantine list.
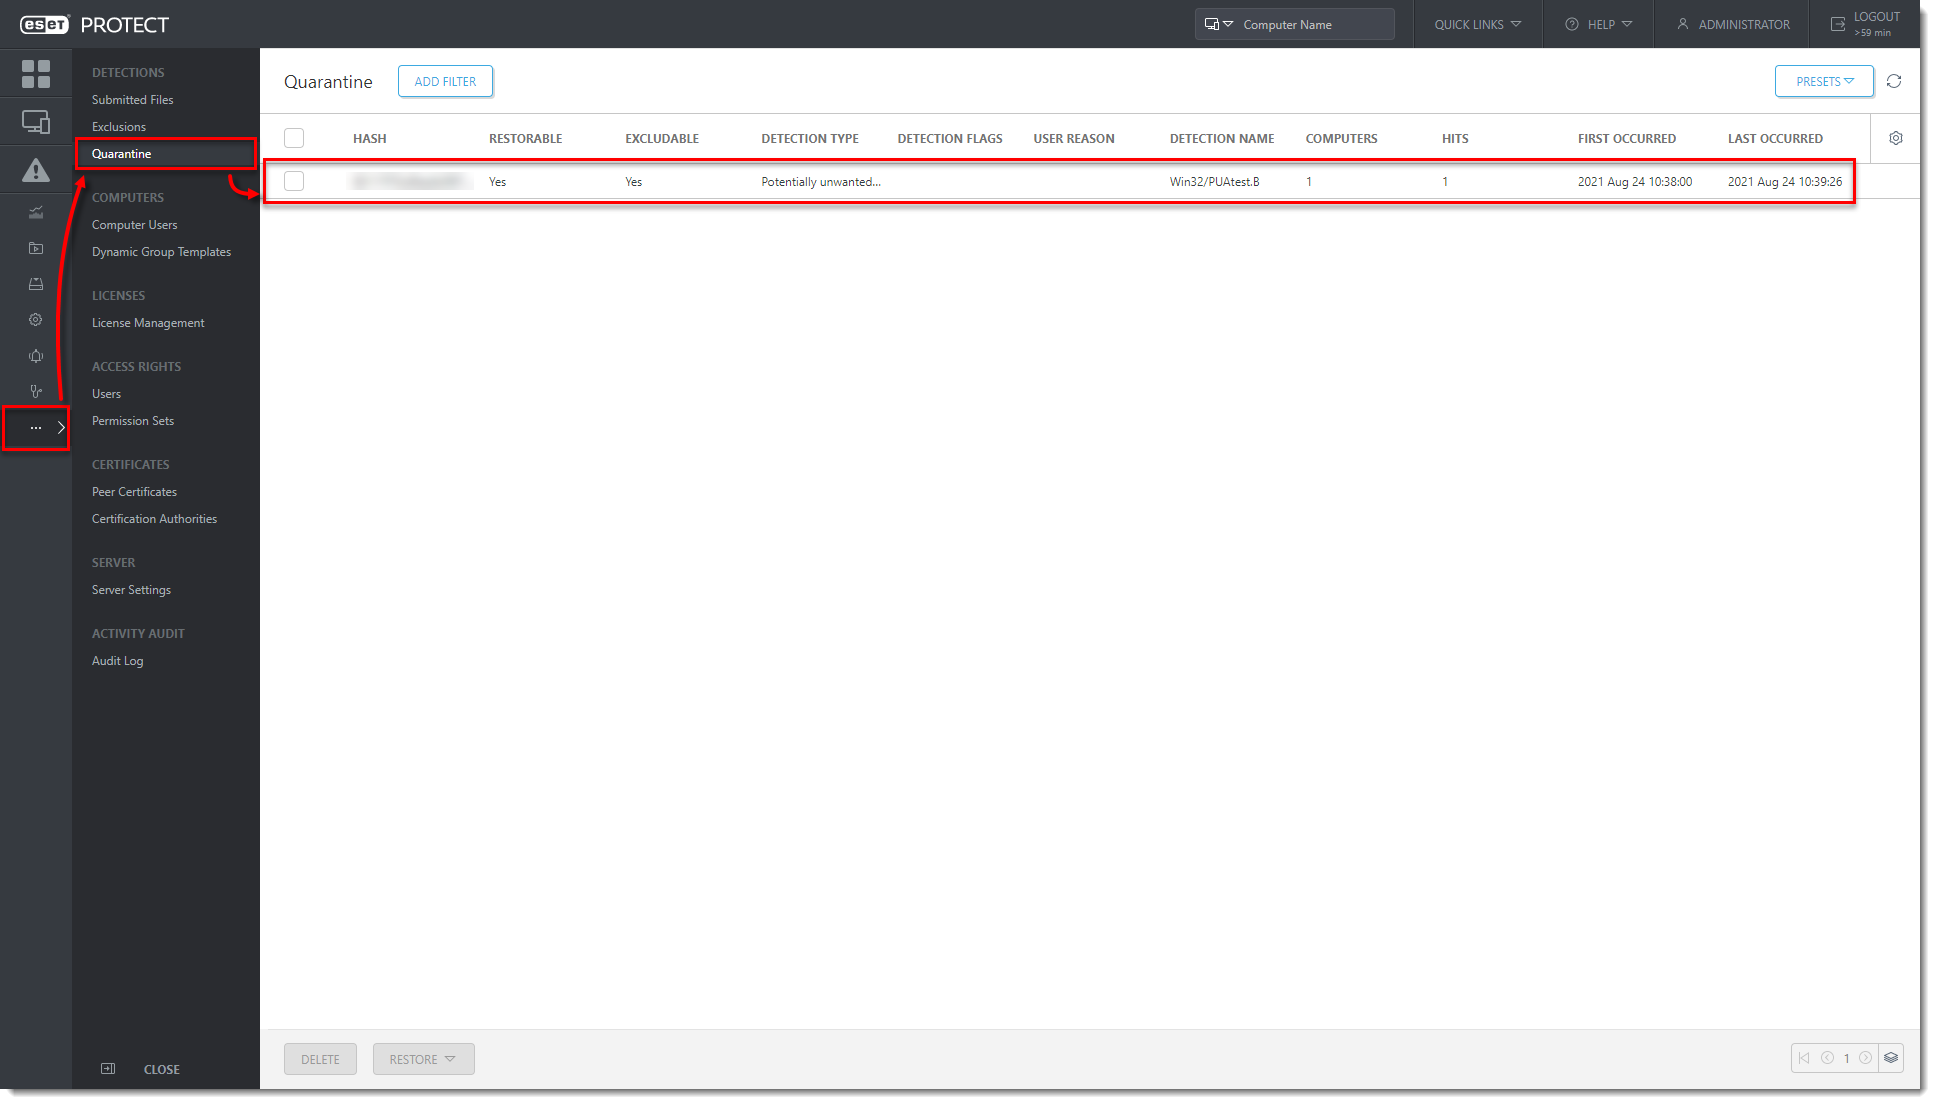
Figure 1-2
Click the image to view larger in new window -
Click Tasks → Client Tasks → ESET Security Product → Quarantine Management → New → Client Task.
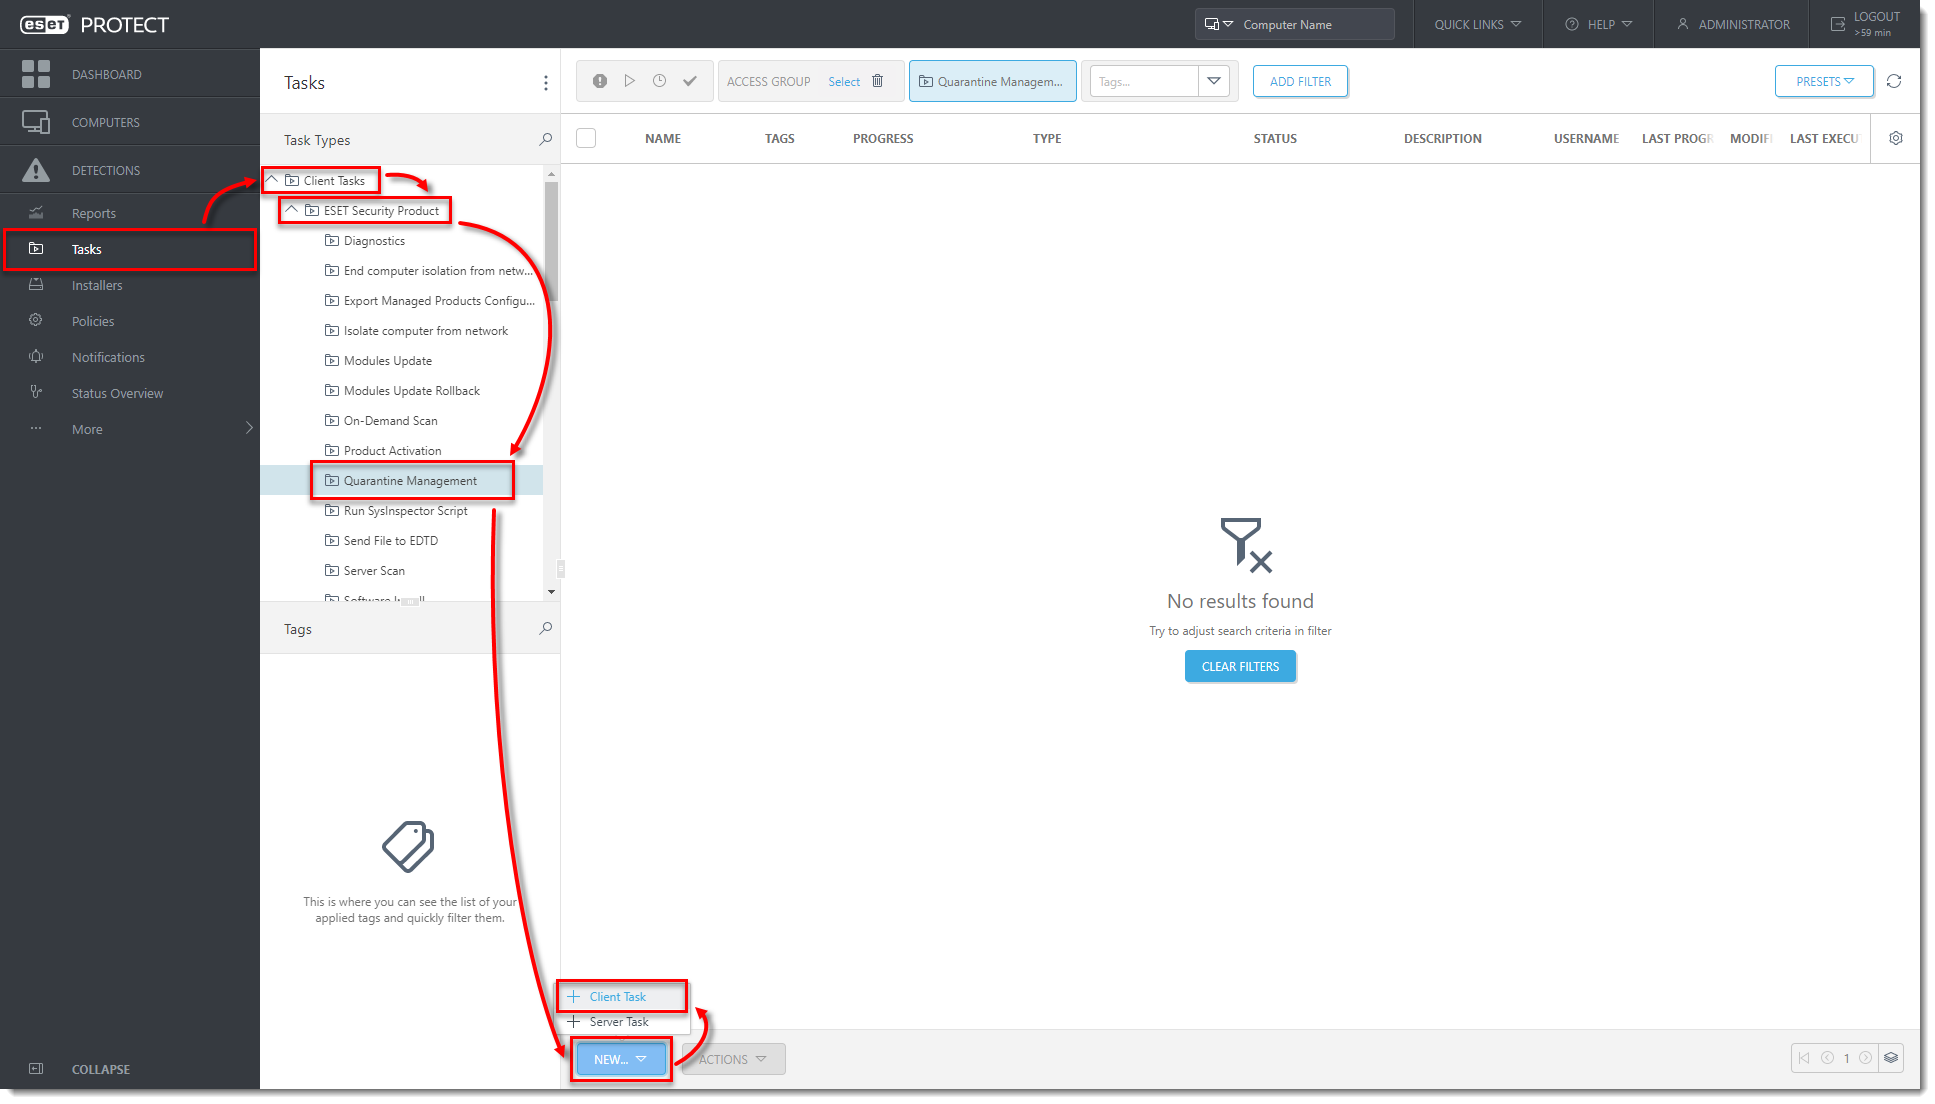
Figure 1-3
Click the image to view larger in new window -
In the Basic section, type the name for the task. Click Settings and from the Action drop-down menu select Restore Object(s) and Exclude in Future. From the Filter type drop-down menu, select Hash items. In the Hash item(s) section, click Add.
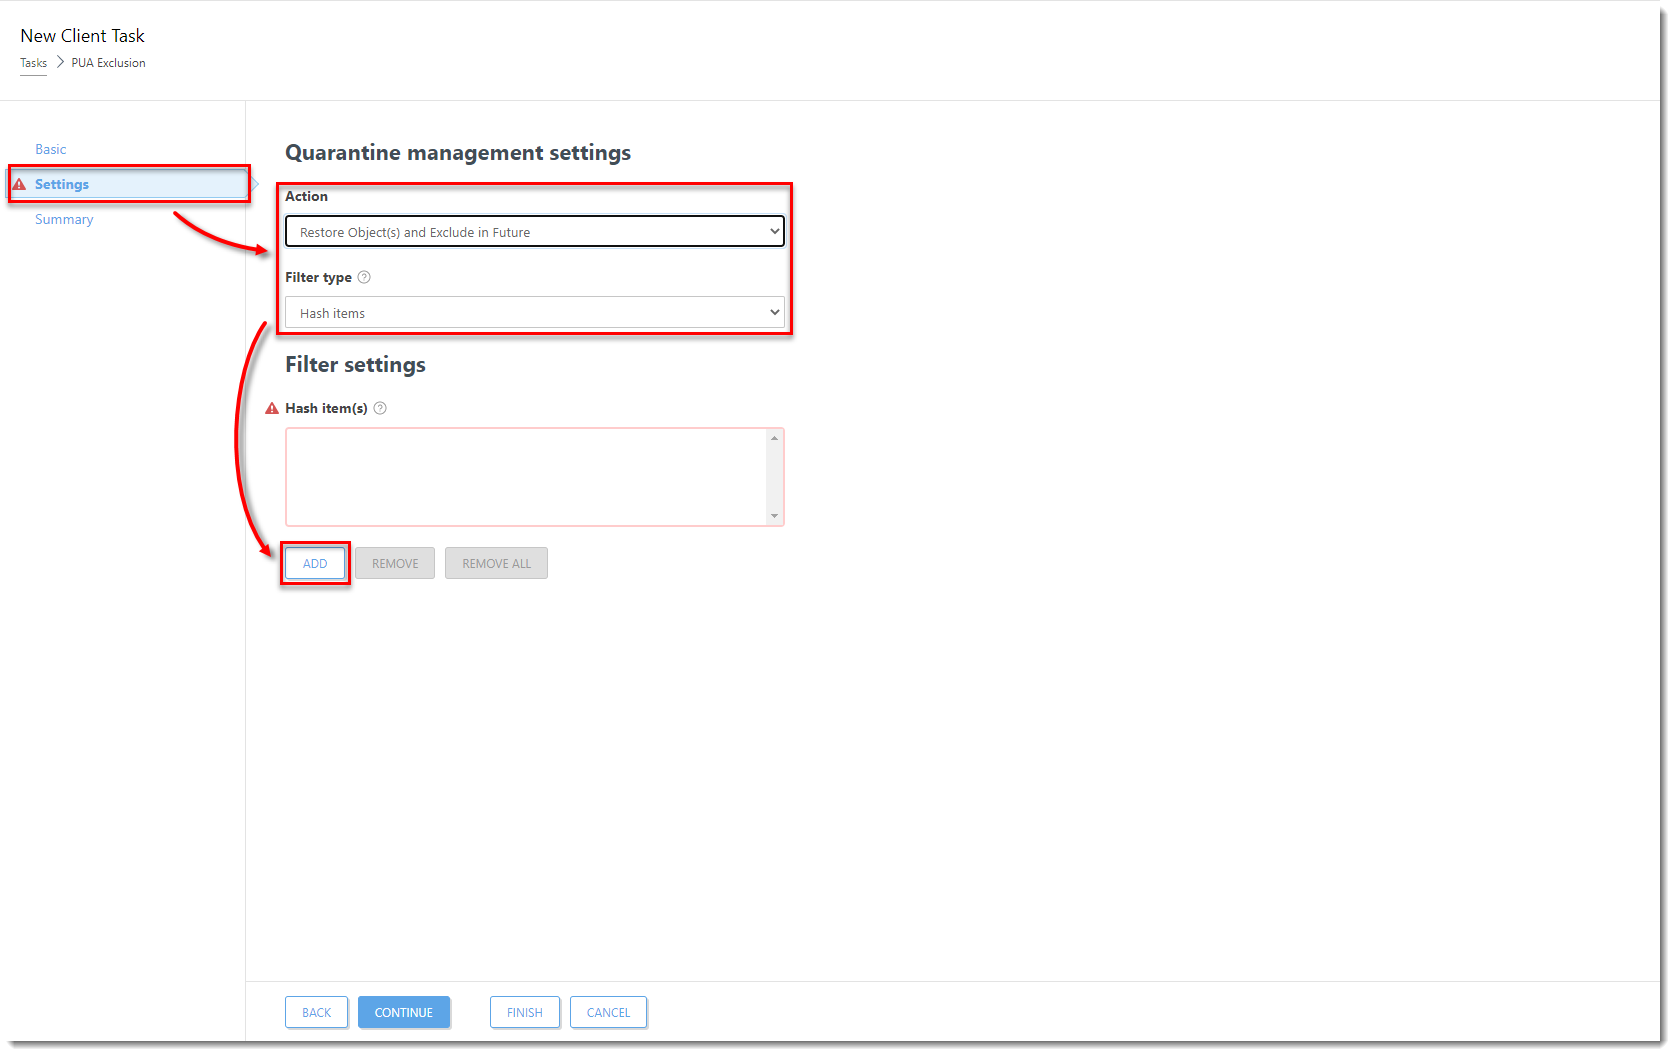
Figure 1-4
Click the image to view larger in new window -
Select the check boxes next to the PUAs that you want to create an exclusion for and click OK.
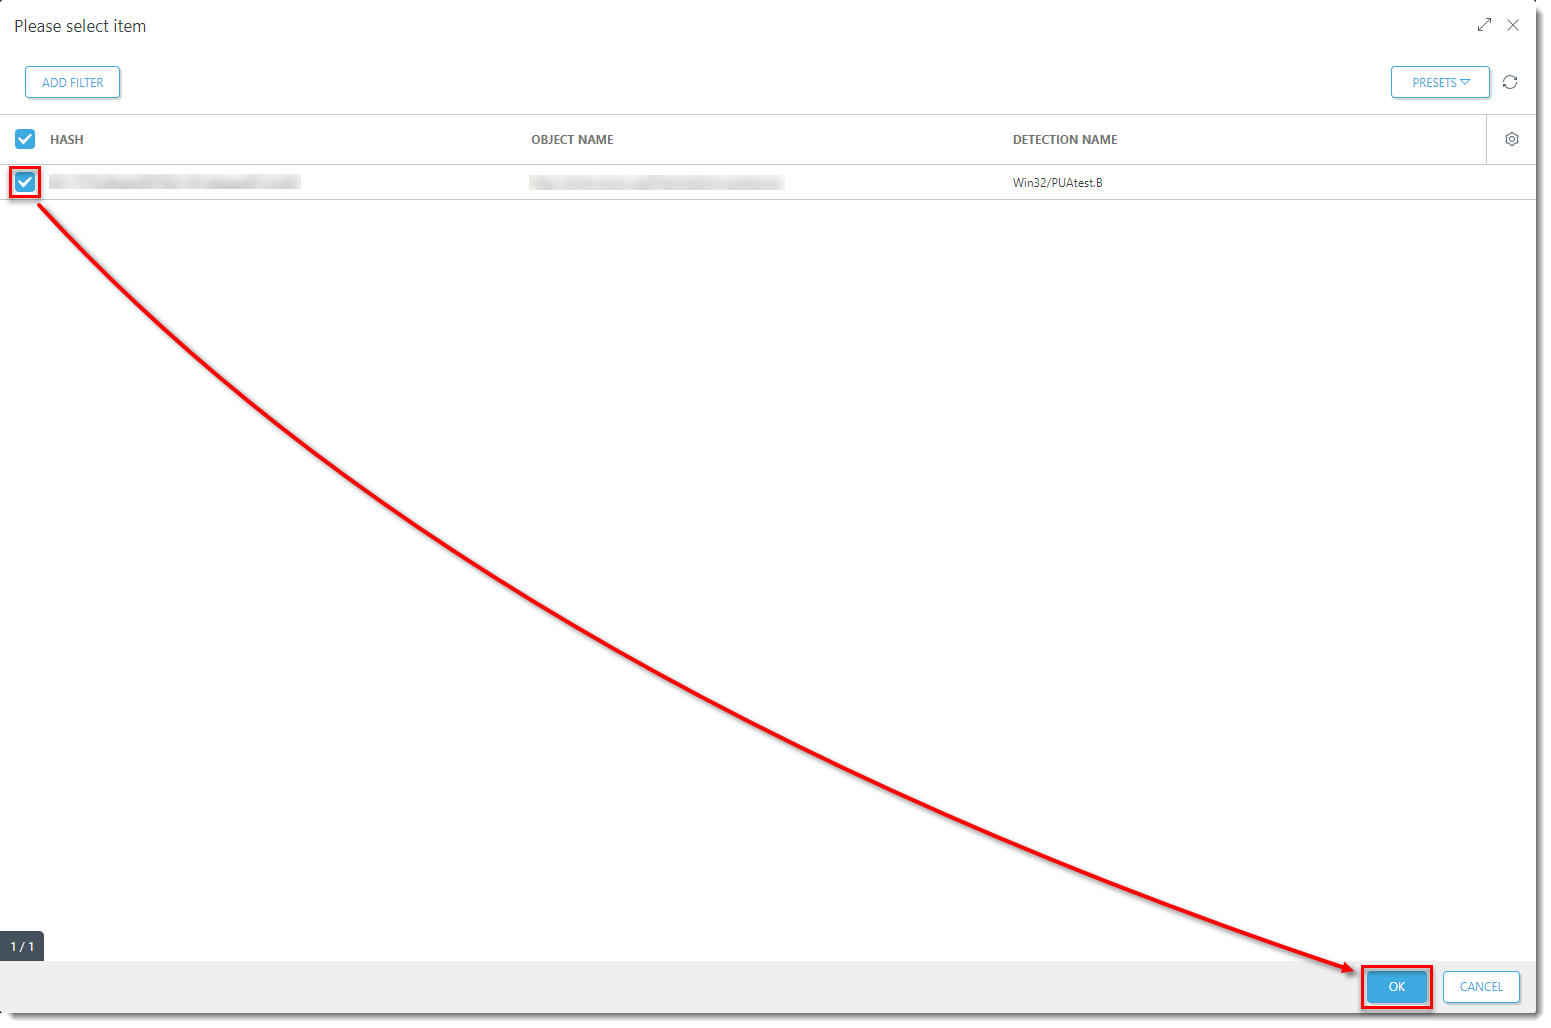
Figure 1-5
Click the image to view larger in new window -
Click Finish to complete the task and create a Trigger for this Client Task.
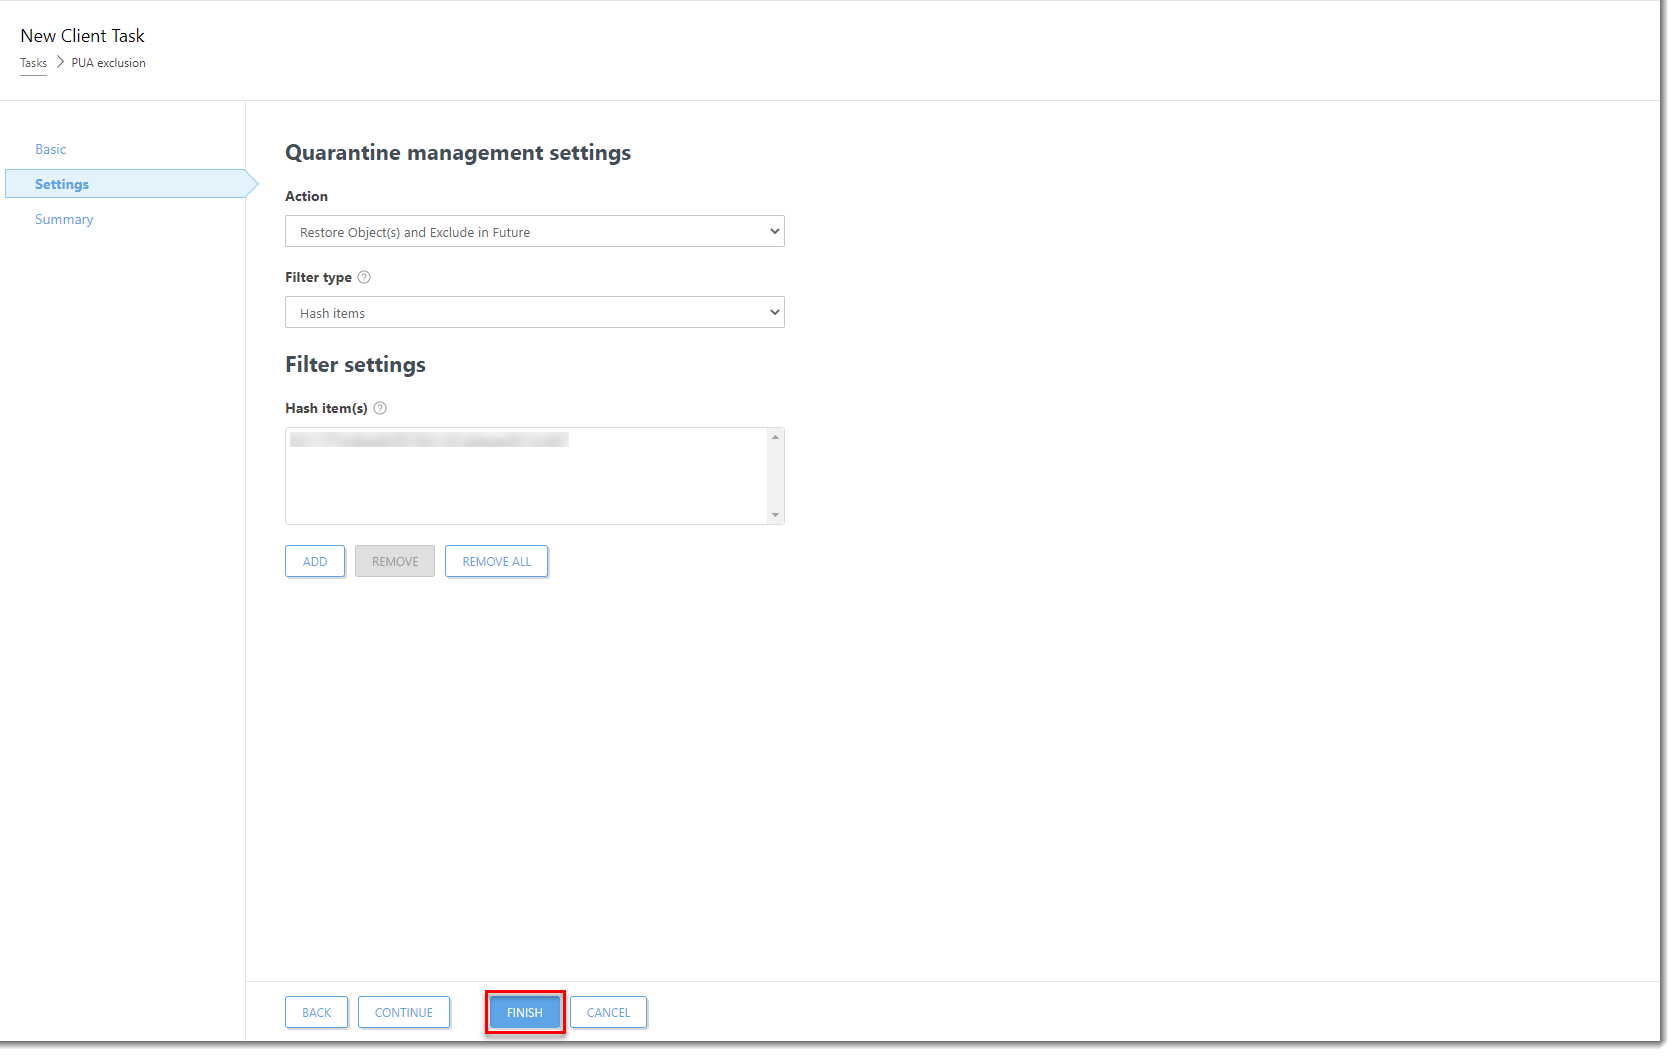
Figure 1-6
Click the image to view larger in new window -
On the client machine, open the main program window of your Windows ESET endpoint product. Press the F5 key on your keyboard to open Advanced Setup.
-
Click Detection Engine, expand Exclusions, and click Edit next to Detection exclusions. The PUA is now listed as an exclusion in the Exclusions list.
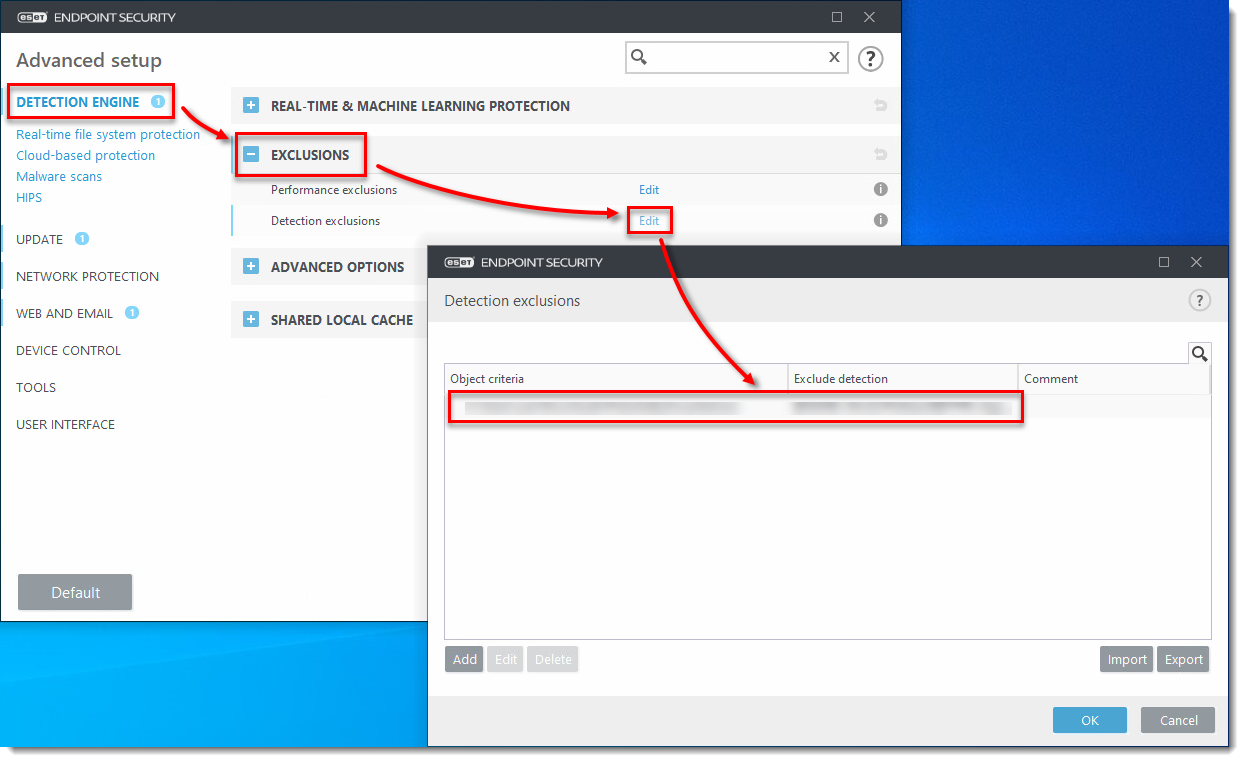
Figure 1-7
Click the image to view larger in new window -
In the ESET PROTECT On-Prem Web Console, click Computers, select the client computer and click Actions → Show Details.
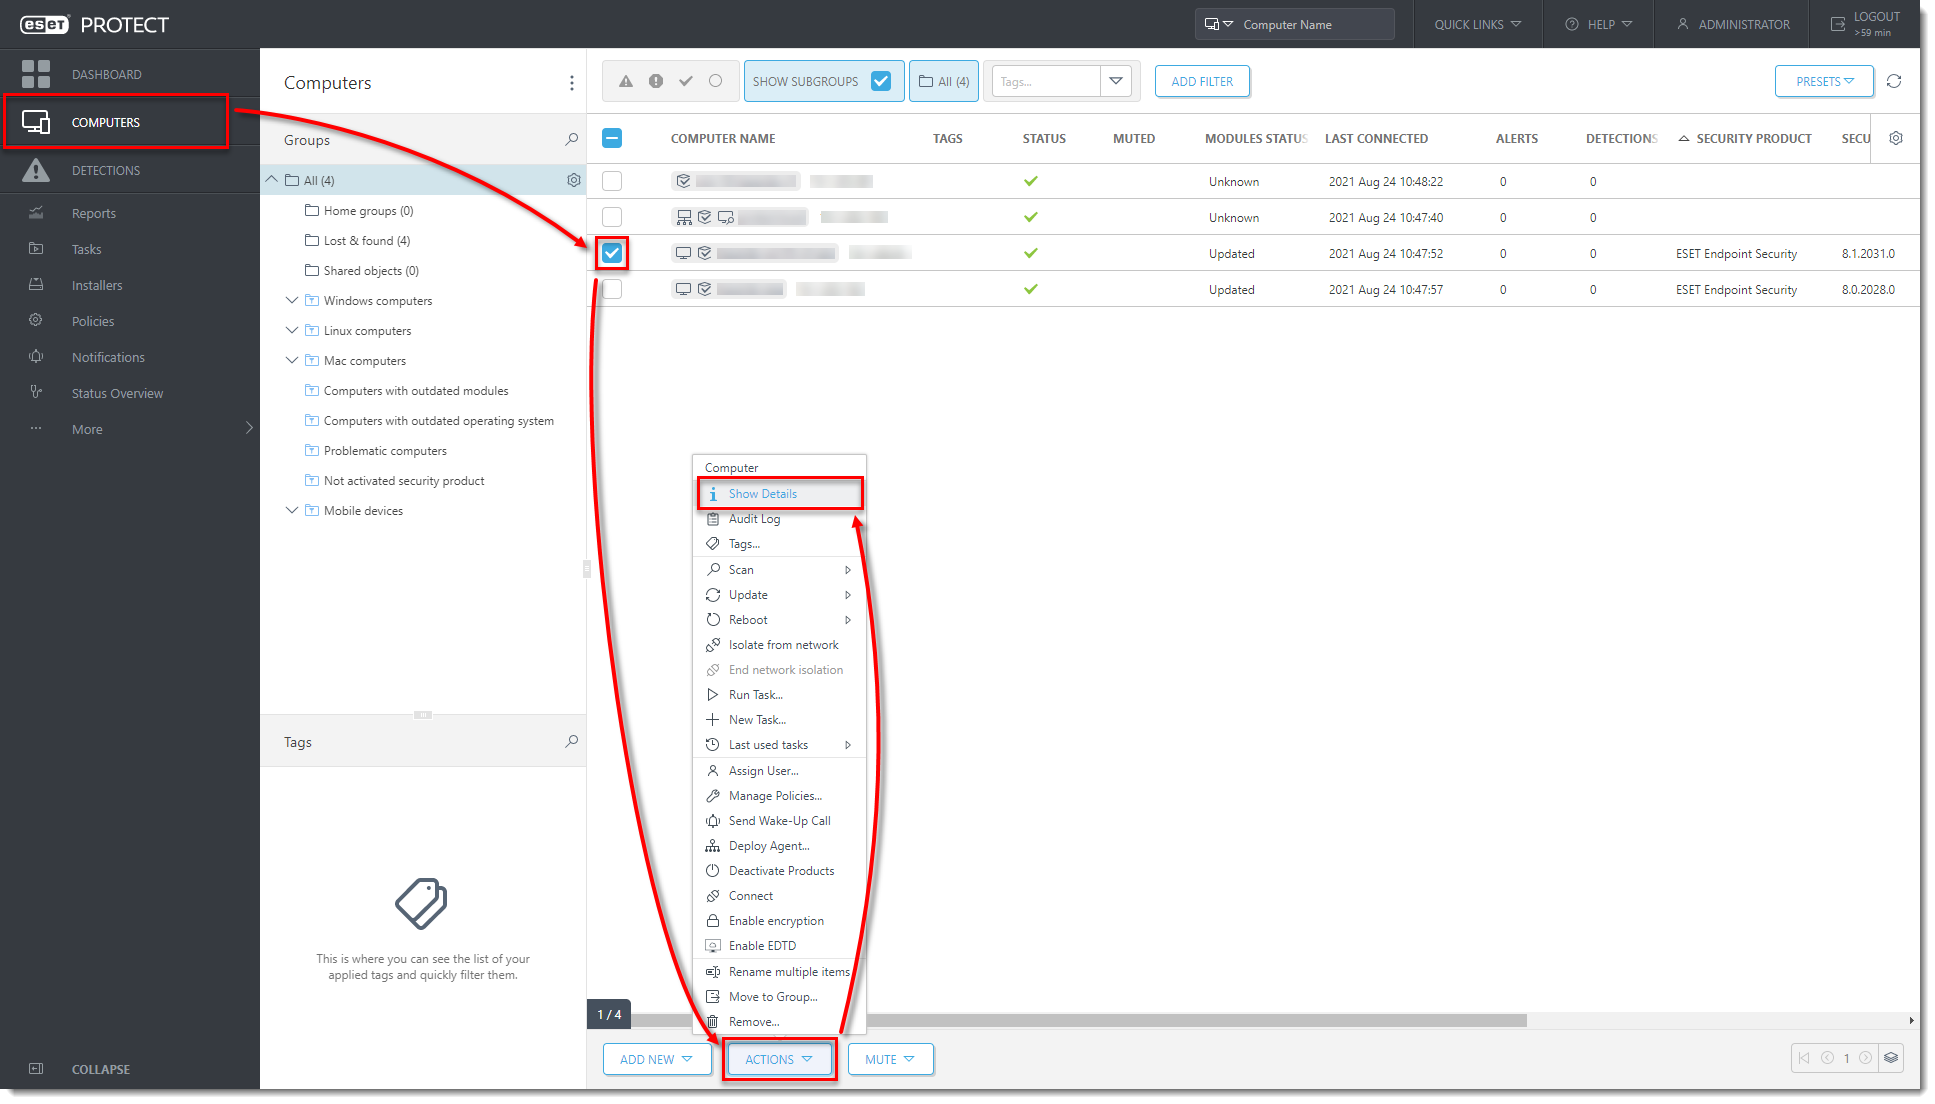
Figure 1-8
Click the image to view larger in new window -
Click Request Configuration. When the configuration opens, click Security product → Open configuration.
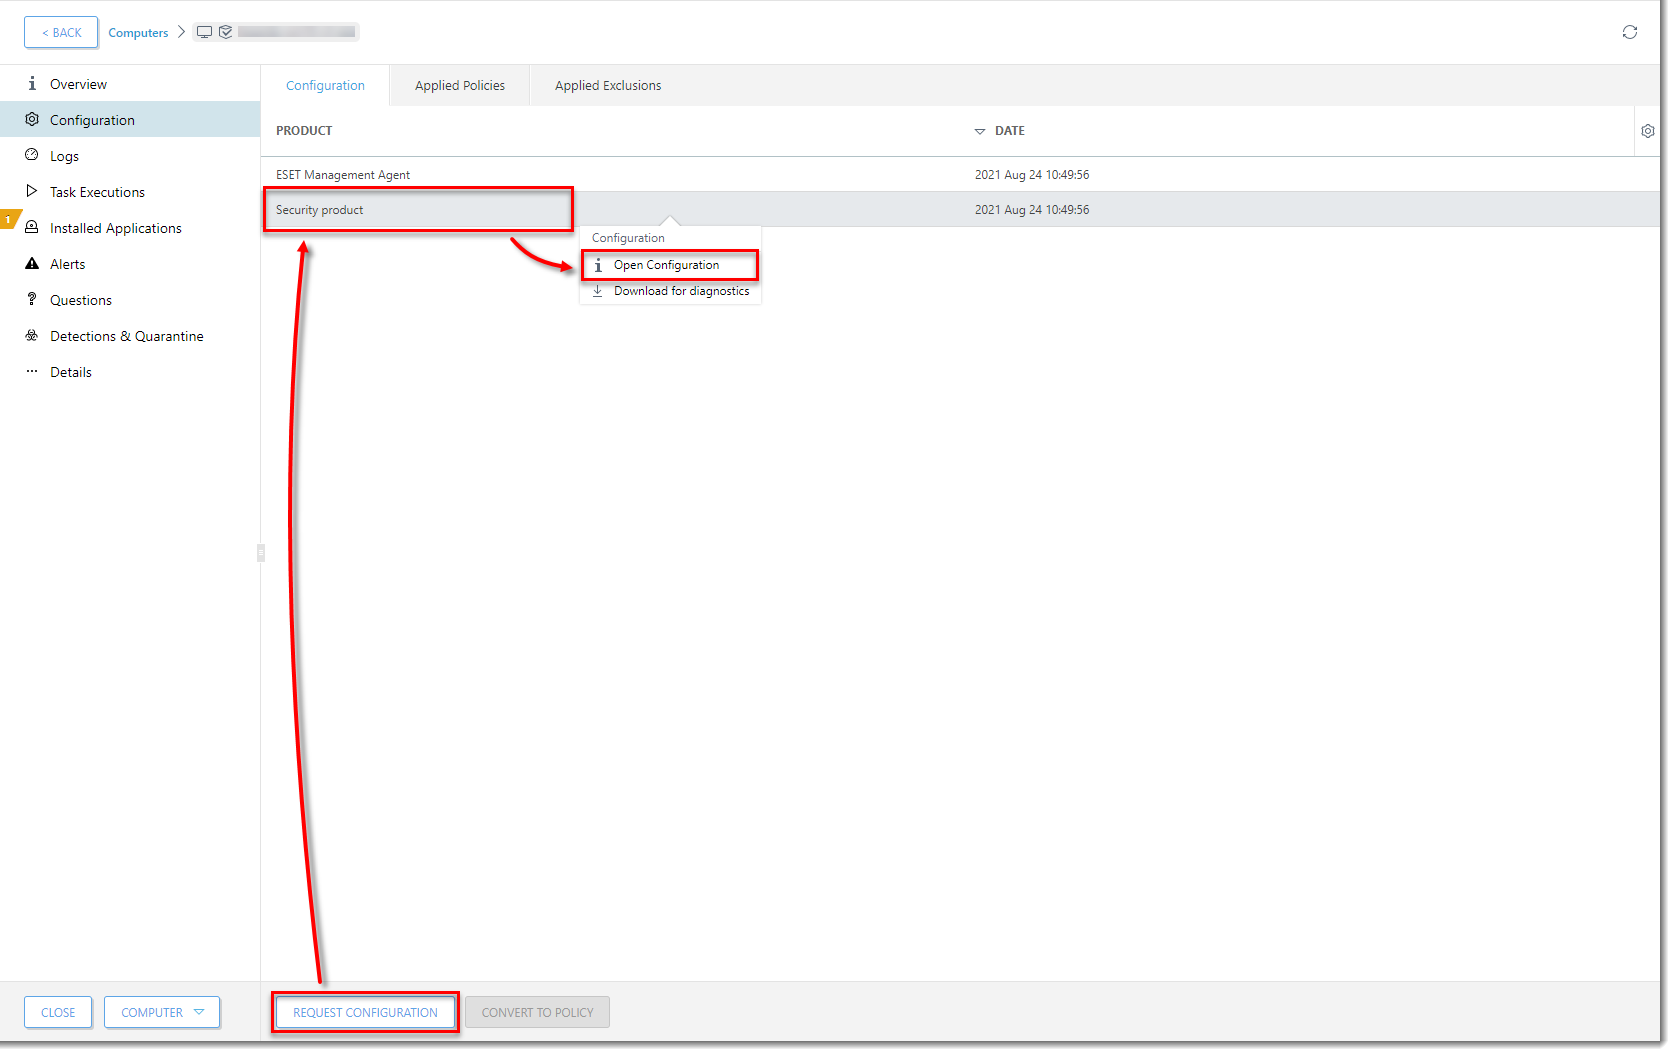
Figure 1-9
Click the image to view larger in new window -
Click Convert to Policy.
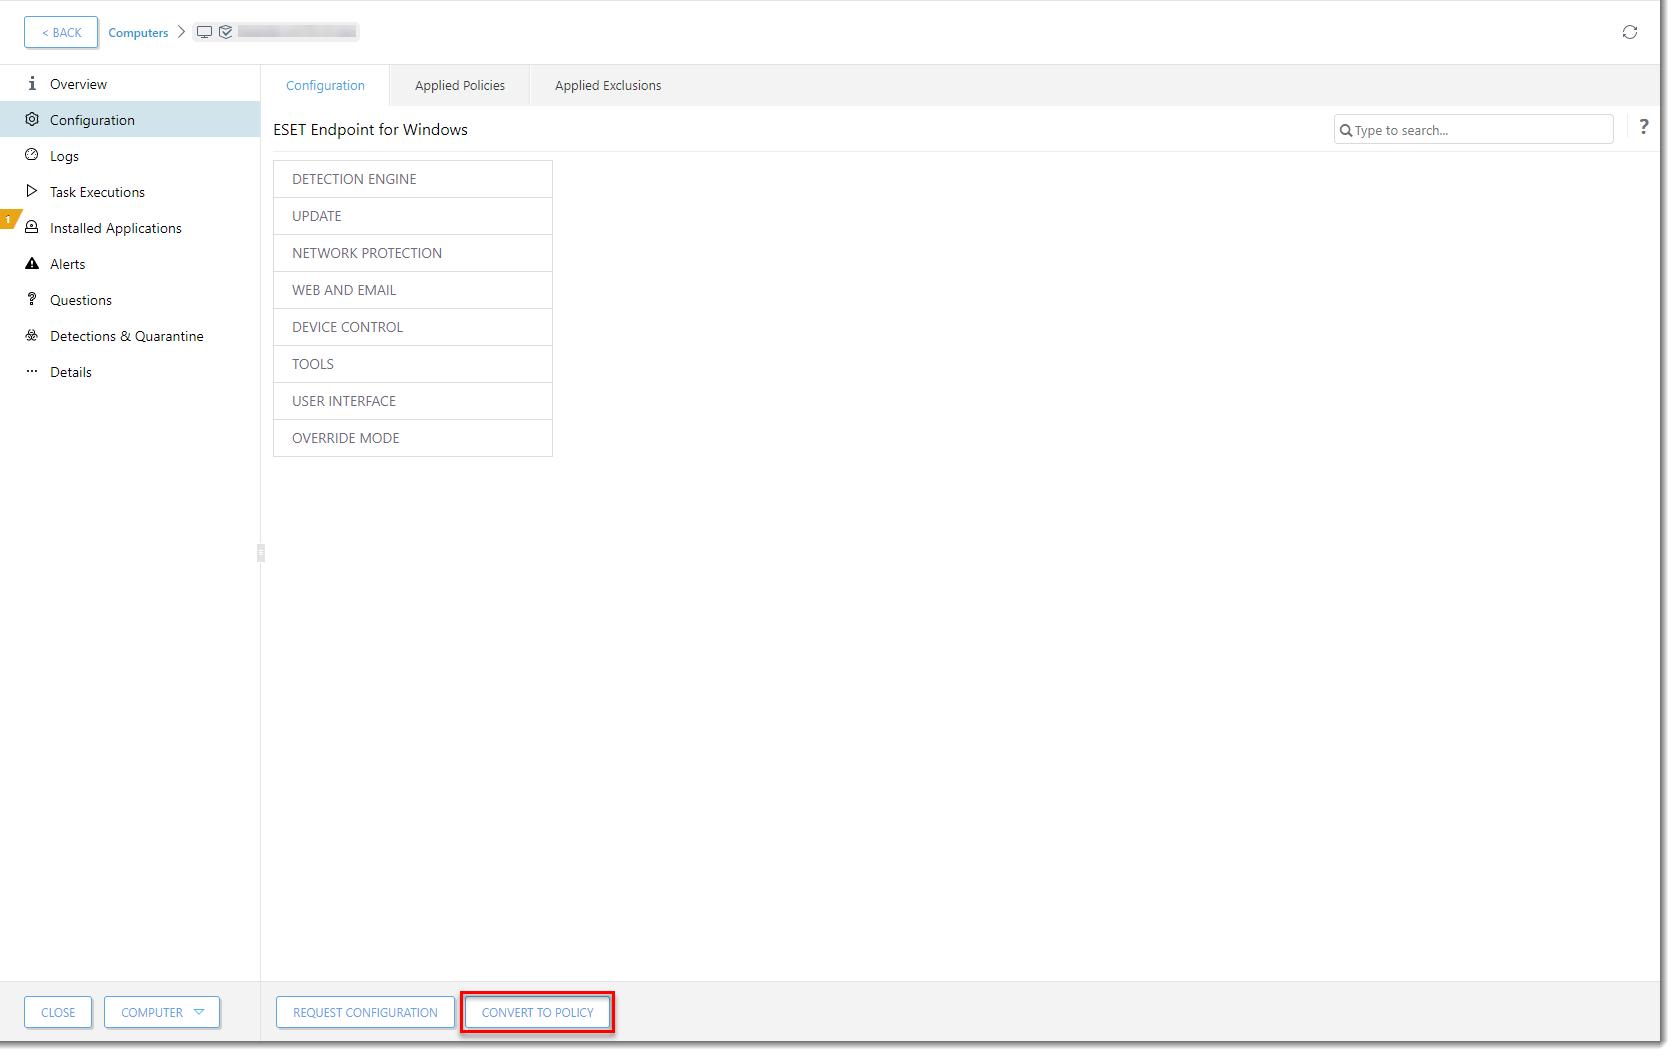
Figure 1-10
Click the image to view larger in new window -
In the Name field, type a name for your policy and click Finish. The policy with this excluded PUA is now available to use for any client computer.
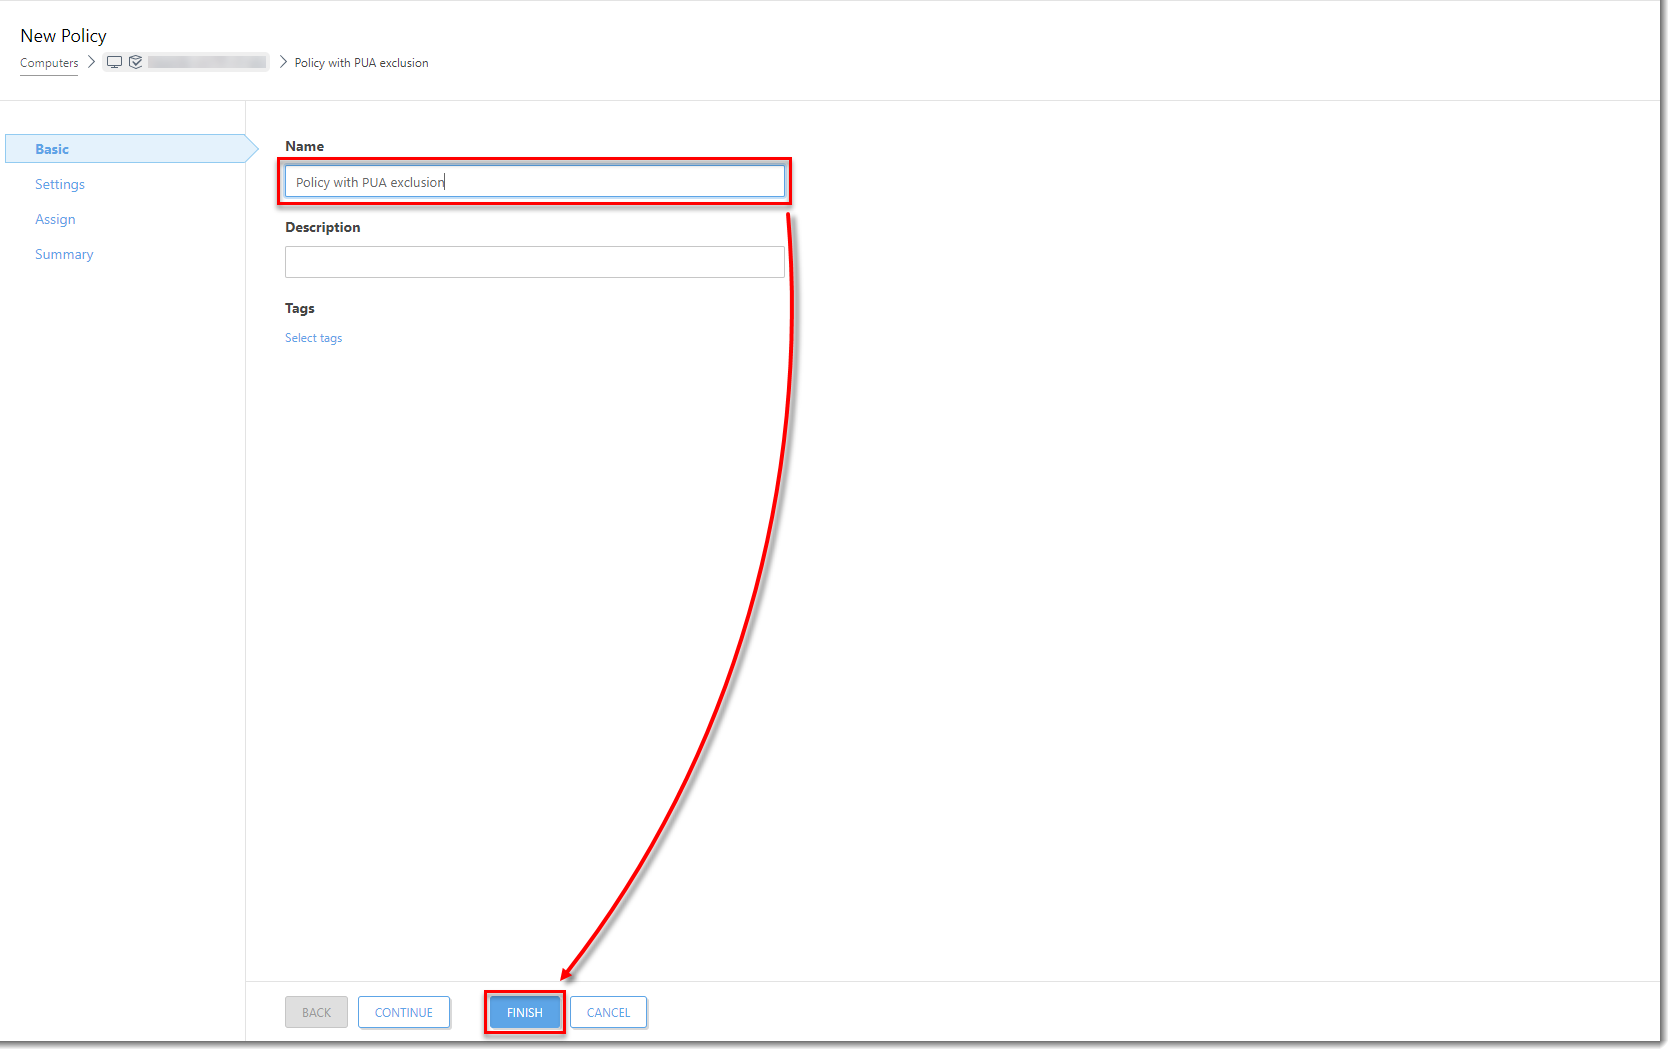
Figure 1-11
Click the image to view larger in new window -
Assign the policy with the PUA exclusion to other computers.