Issue
- Network traffic scanner
- Exclude an Application or IP address from Network traffic scanner
- SSL/TLS
- Remove a certificate from the list of Certificate rules
- SSL/TLS mode
- SSL/TLS application scan rules
Details
Click to expand
ESET products automatically check the security of communications to and from your computer by default. In addition to standard network communications, SSL and TLS communications are also checked for security.
See more information about Protocol Filtering and SSL/TLS scanning in ESET Security Ultimate, ESET Smart Security Premium, ESET Small Business Security, or ESET Safe Server.
Solution
Network traffic scanner
Network traffic scanner is enabled by default. To disable or re-enable protocol filtering for troubleshooting:
-
Press the F5 key to open Advanced setup.
-
Click Detection engine, expand Network traffic scanner and click the toggle next to Enable Network traffic scanner to enable or disable this feature. Click OK to save the changes and exit Advanced setup.
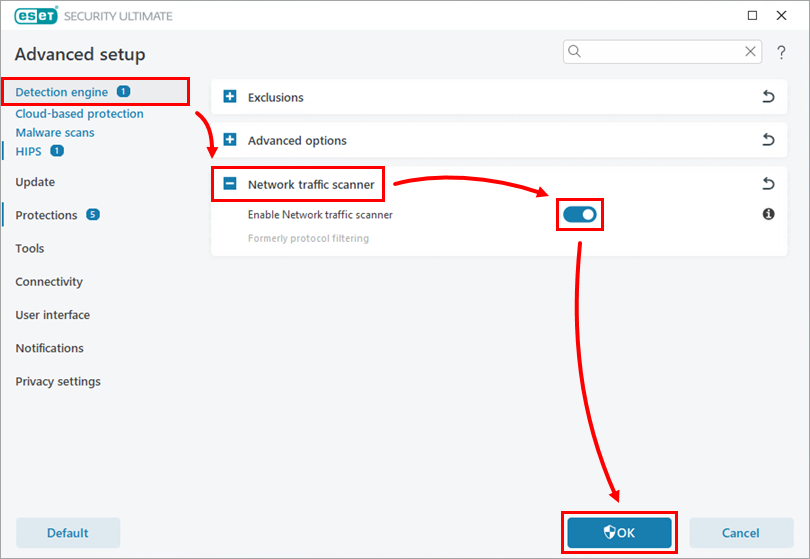
Figure 1-1
Exclude an Application or IP address from Network traffic scanner
-
Press the F5 key to open Advanced setup.
-
Click Protections → Web access protection, expand Web access protection and click Edit next to Excluded applications or Excluded IPs (the example below applies to Excluded applications option).
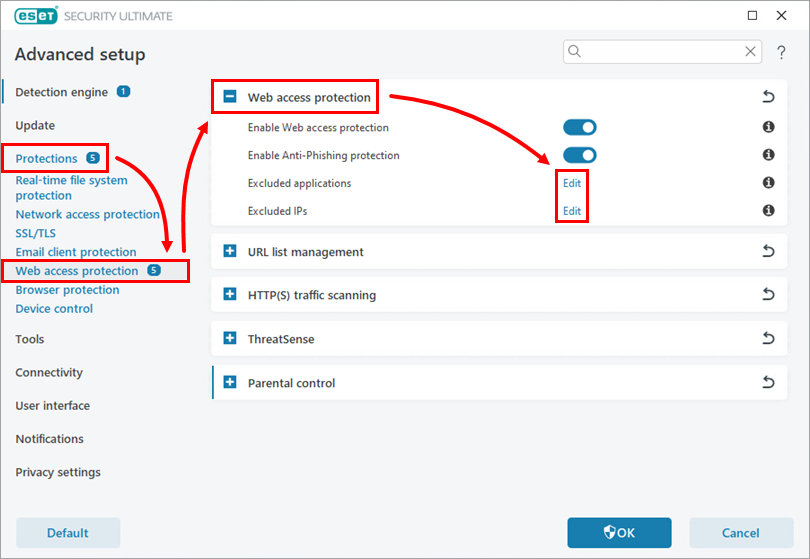
Figure 2-1 -
Click Add. Select an application or type in an IP address and click OK → OK.
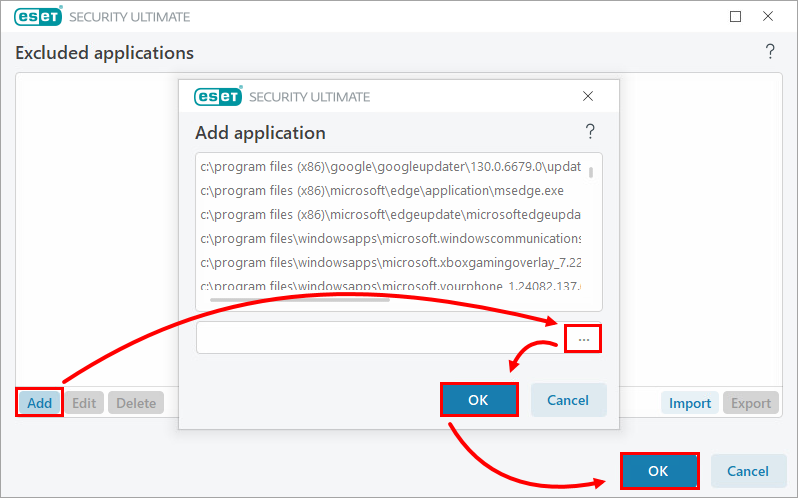
Figure 2-2 -
The new application/IP address has been added to the Protocol filtering exclusion list. To edit or remove an application/IP address, select the applicable application/IP address and click Edit or Delete. Click OK → OK to save the changes and exit Advanced setup.
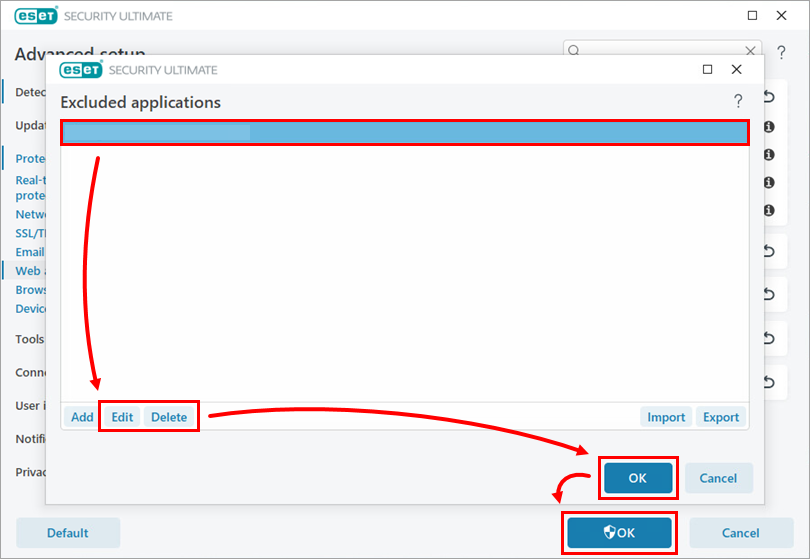
Figure 2-3
SSL/TLS
SSL/TLS is enabled by default. You can disable or re-enable SSL/TLS Scanning for troubleshooting purposes.
-
Press the F5 key to open Advanced setup.
-
Click Protections → SSL/TLS and click the toggle next to Enable SSL/TLS protocol filtering to enable or disable this feature. Click OK to save the changes and exit Advanced setup.
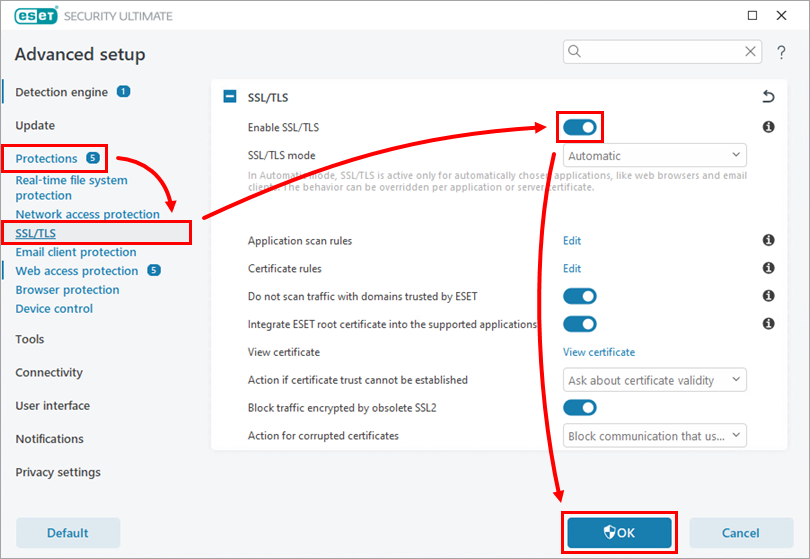
Figure 3-1
Remove a certificate from the list of Certificate rules
-
Press the F5 key to open Advanced setup.
-
Click Protections → SSL/TLS and click Edit next to Certificate rules.
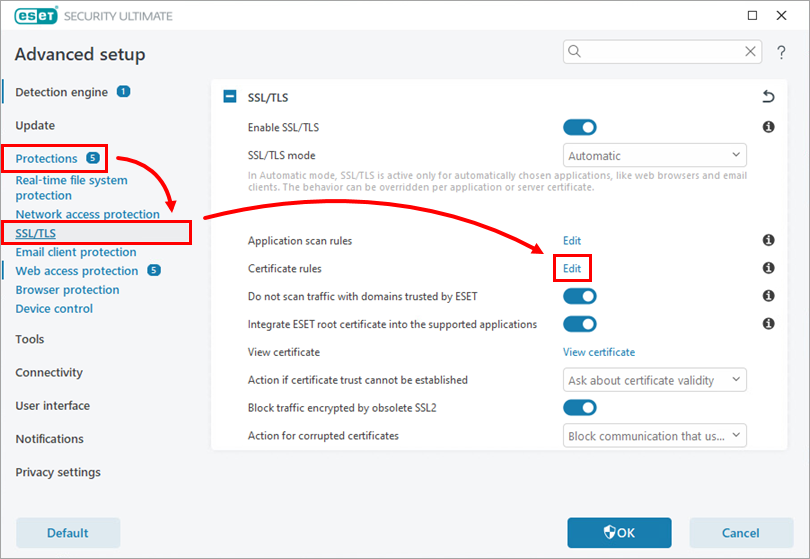
Figure 4-1 -
Select the applicable certificate, click Delete and click OK → OK to save the changes and exit Advanced setup.
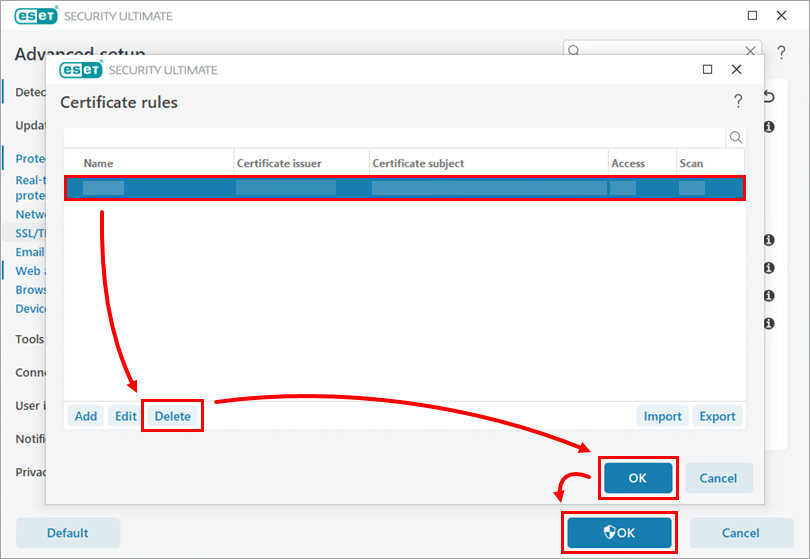
Figure 4-2
SSL/TLS mode
Use the drop-down menu to select the filtering mode you want to use. See detailed descriptions of each available filtering mode.
-
Press the F5 key to open Advanced setup.
-
Click Protections → SSL/TLS and select a mode from the SSL/TLS mode drop-down menu. Click OK to save the changes and exit Advanced setup.
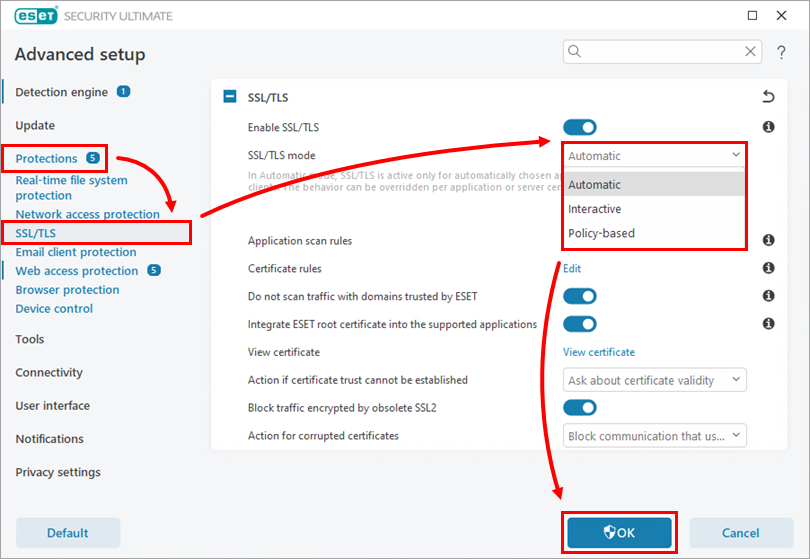
Figure 5-1
SSL/TLS application scan rules
Exclude a new application from SSL/TLS scanning. See additional information about SSL/TLS application scan rules.
-
Press the F5 key to open Advanced setup.
-
Click Protections → SSL/TLS and click Edit next to Application scan rules.
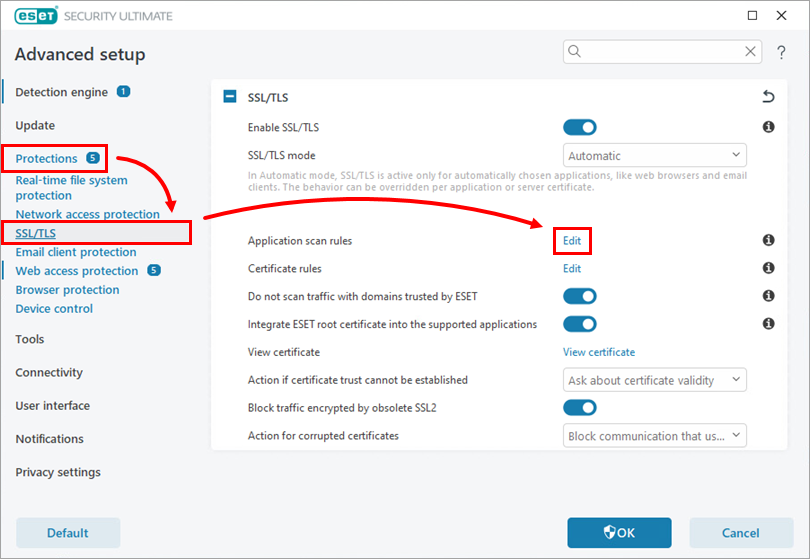
Figure 6-1 -
Click Add. Click the Browse icon next to the Application field and select the applicable application. Select the Scan action and click OK → OK → OK to save the changes and exit Advanced setup.
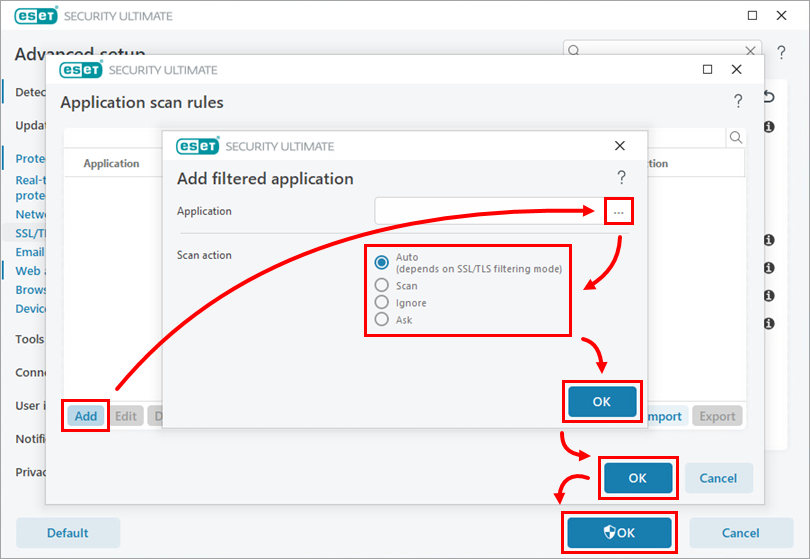
Figure 6-2