Issue
- Increase the level of protection of your environment with ESET LiveGuard Advanced (formerly ESET Dynamic Threat Defense)
- Submit suspicious samples to be executed and analyzed in a sandbox, an isolated test environment
Solution
- Import your ESET LiveGuard Advanced license into ESET Business Account
- Synchronize ESET PROTECT with your ESET Business Account
- Activate ESET LiveGuard Advanced license on your endpoint computers
- Enable ESET LiveGuard Advanced license on your endpoint computers

I. Import your ESET LiveGuard Advanced license into ESET Business Account
-
In your web browser, open ESET Business Account and log in.
- Click Licenses → Enter license key. If you already have a license in your ESET Business Account, click Add License → Enter license key.
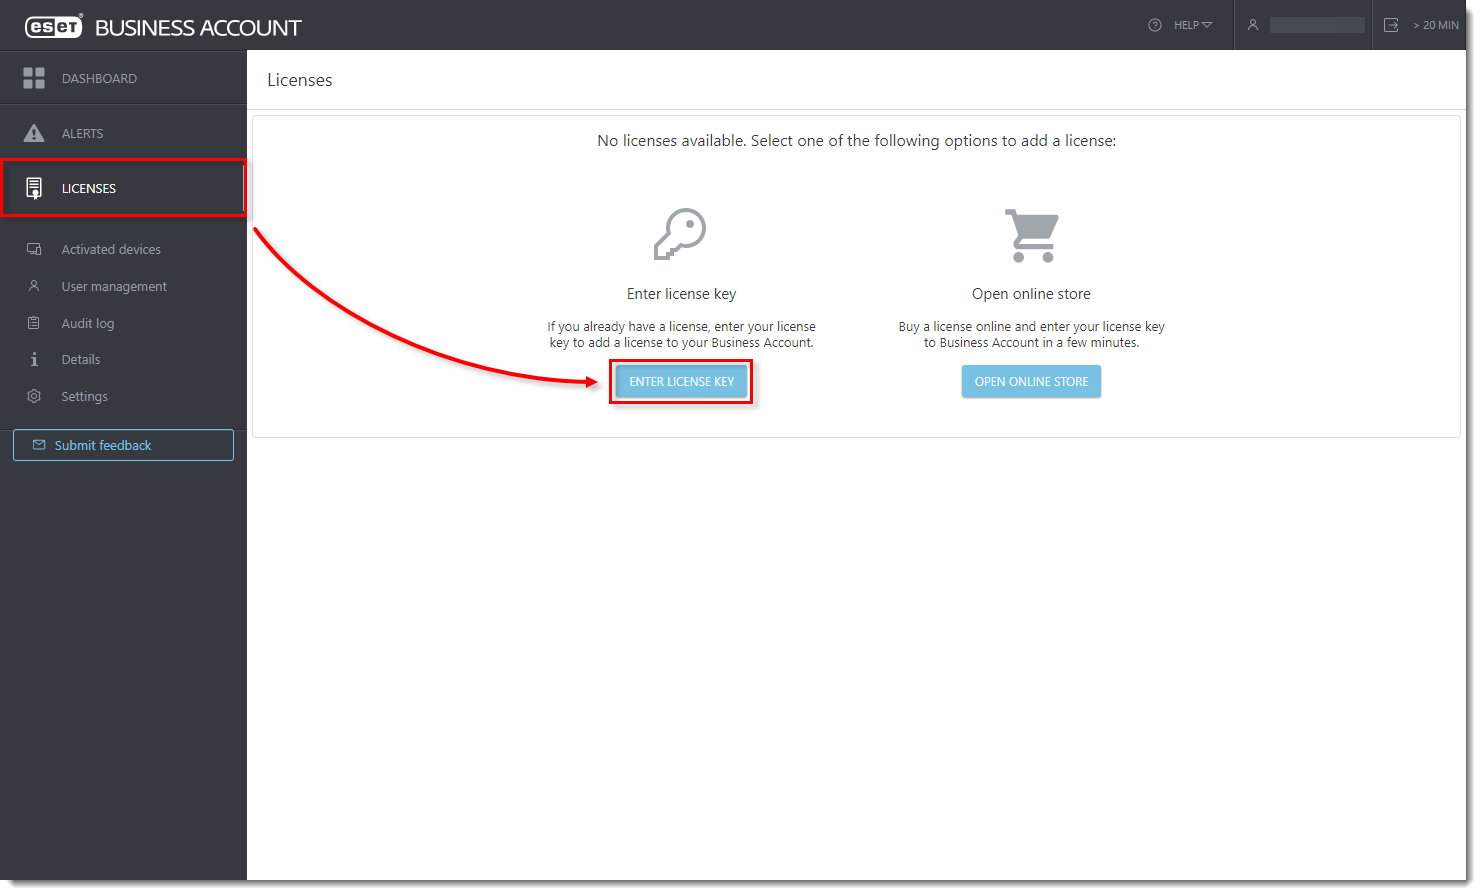
Click the image to view larger in new window
- Type or copy/paste your license key and click Add License.
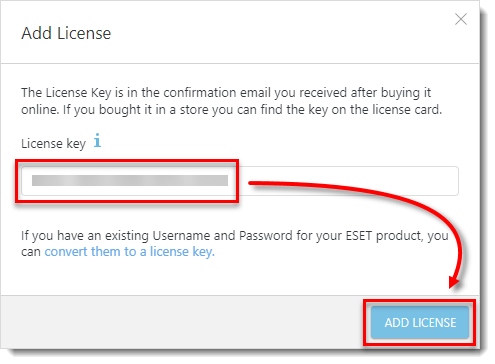
Click the image to view larger in new window
- Select the check box next to I agree to the ESET Terms of Use and click Verify.
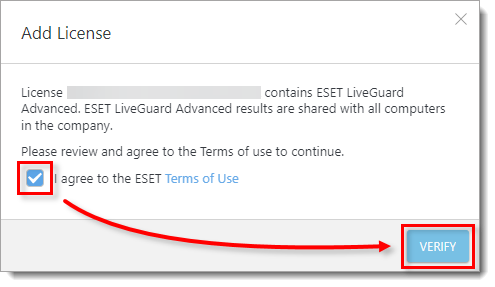
Click the image to view larger in new window
II. Synchronize ESET PROTECT with your ESET Business Account
-
Open ESET PROTECT in your web browser and log in.
-
Click More → License Management → Actions → Synchronize Licenses. Wait for the synchronization to finish. Your ESET LiveGuard Advanced license will appear in your licenses with the number of free seats.
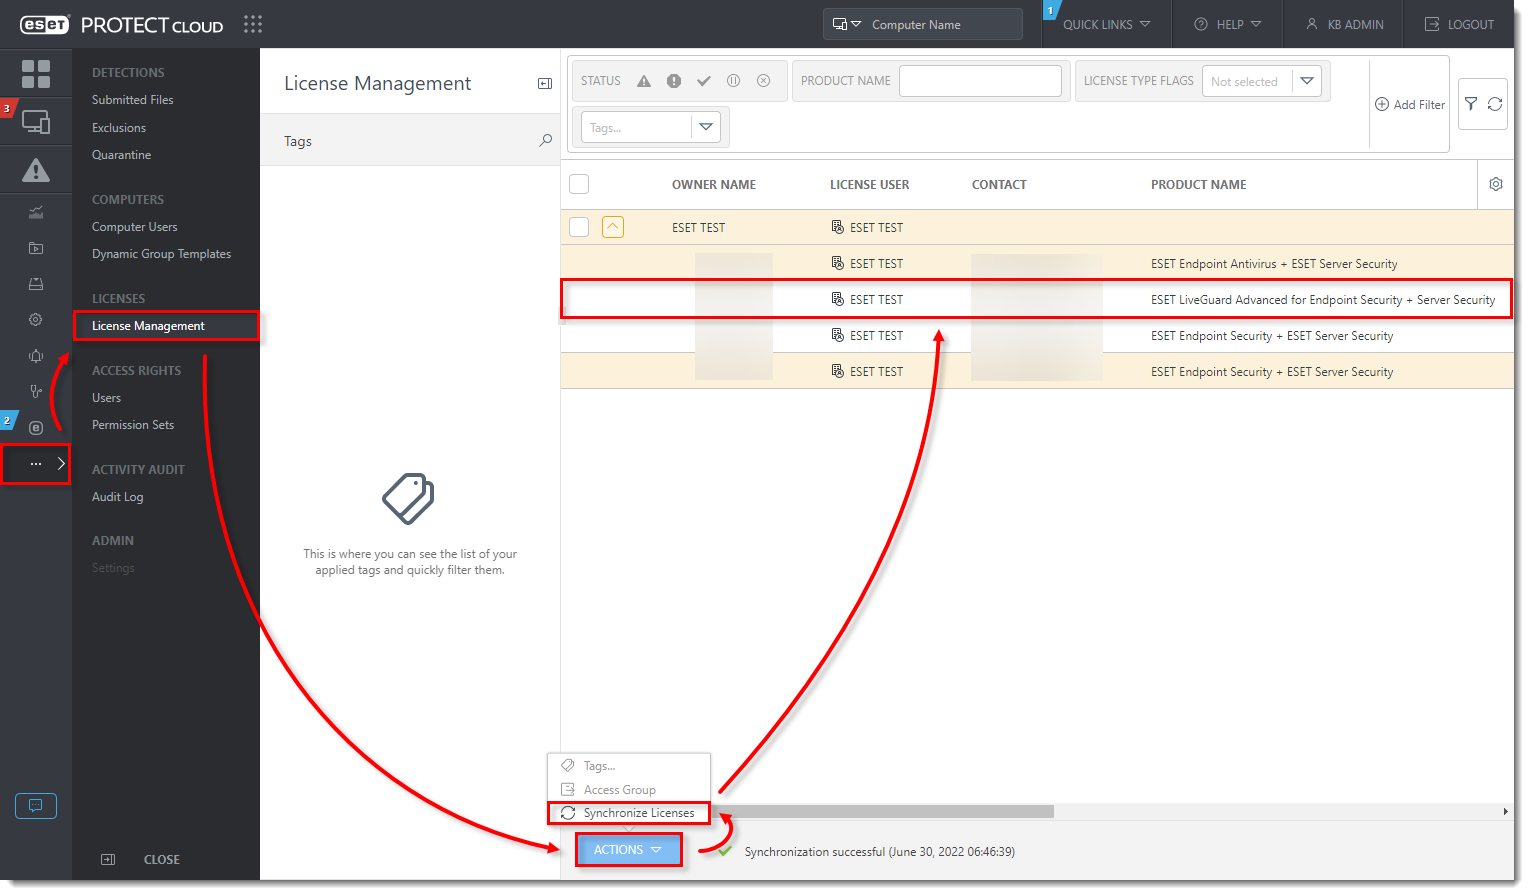
Click the image to view larger in new window
III. Activate ESET LiveGuard Advanced license on your endpoint computers
-
Open ESET PROTECT in your web browser and log in.
- Click Tasks → New → Client Task.
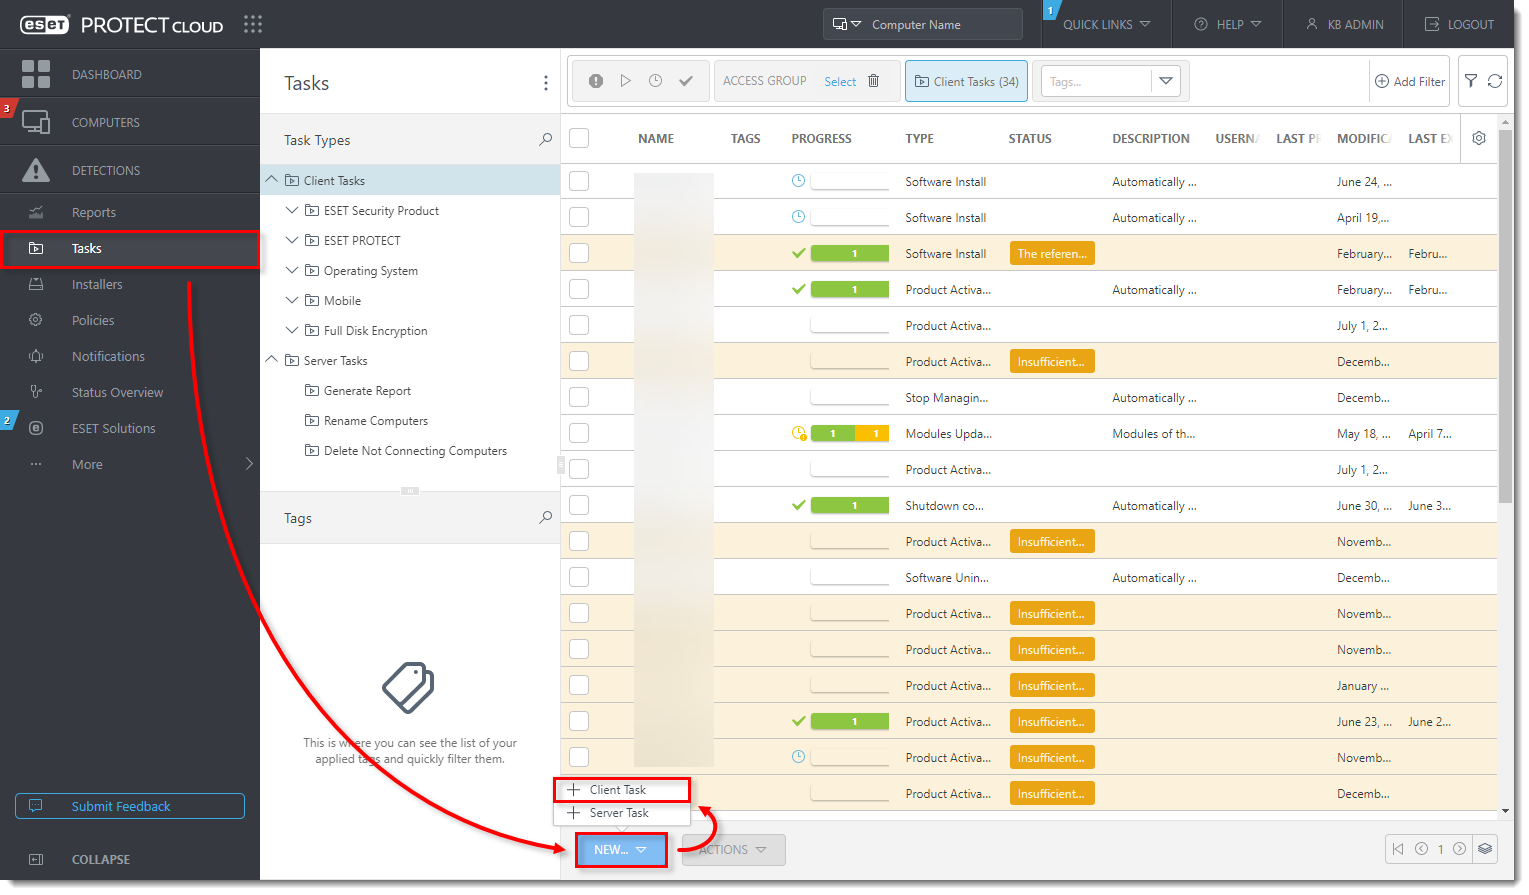
Click the image to view larger in new window
- Type a name for your task (in this example, Activate ESET LiveGuard Advanced). From the Task Category drop-down menu, select ESET Security Product and from the Task drop-down menu, select Product Activation. Click Continue.

Click the image to view larger in new window
- Click the license to change it.

Click the image to view larger in new window
- Select the check box next to ESET LiveGuard Advanced for Endpoint Security + Server Security and click OK.
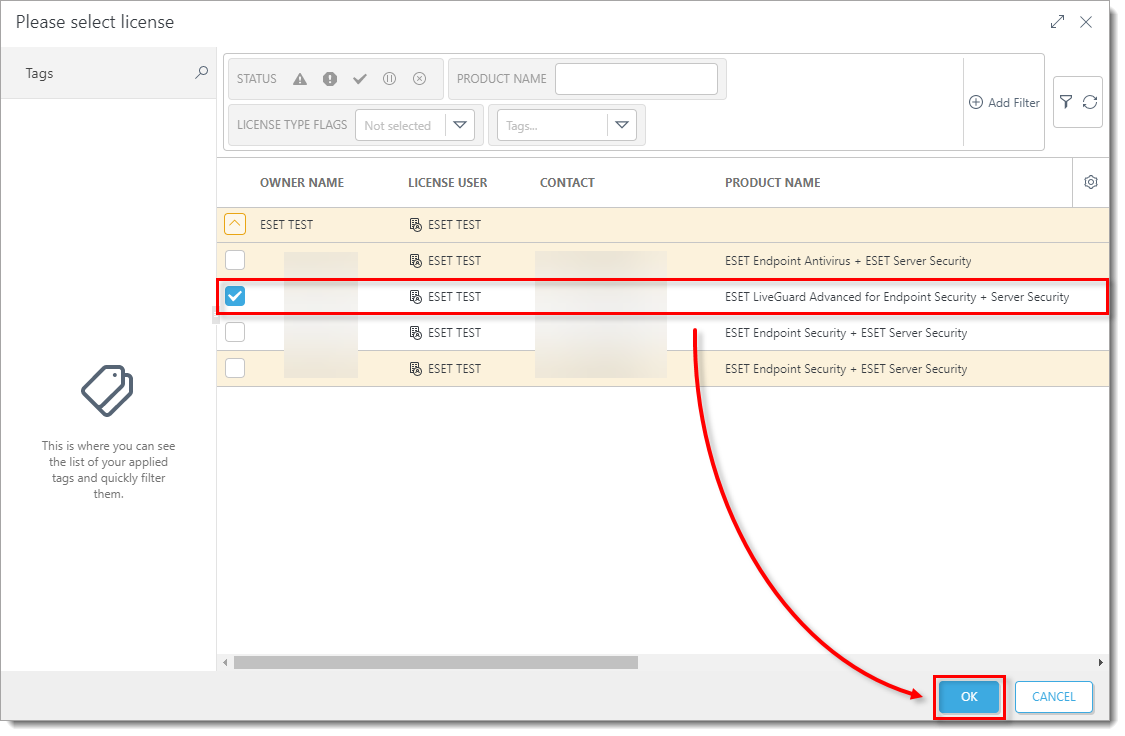
Click the image to view larger in new window
- Click Finish → Create Trigger.
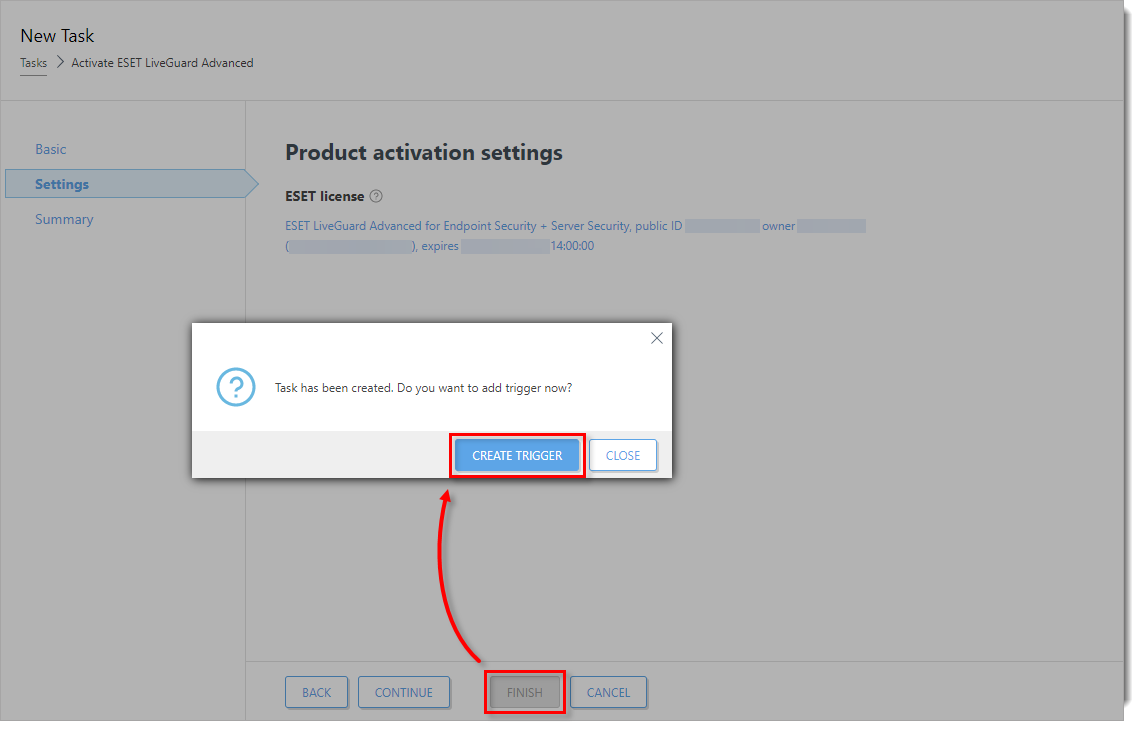
Click the image to view larger in new window
- Type a name for your trigger (in this example, Activate ESET LiveGuard Advanced) and click Continue.
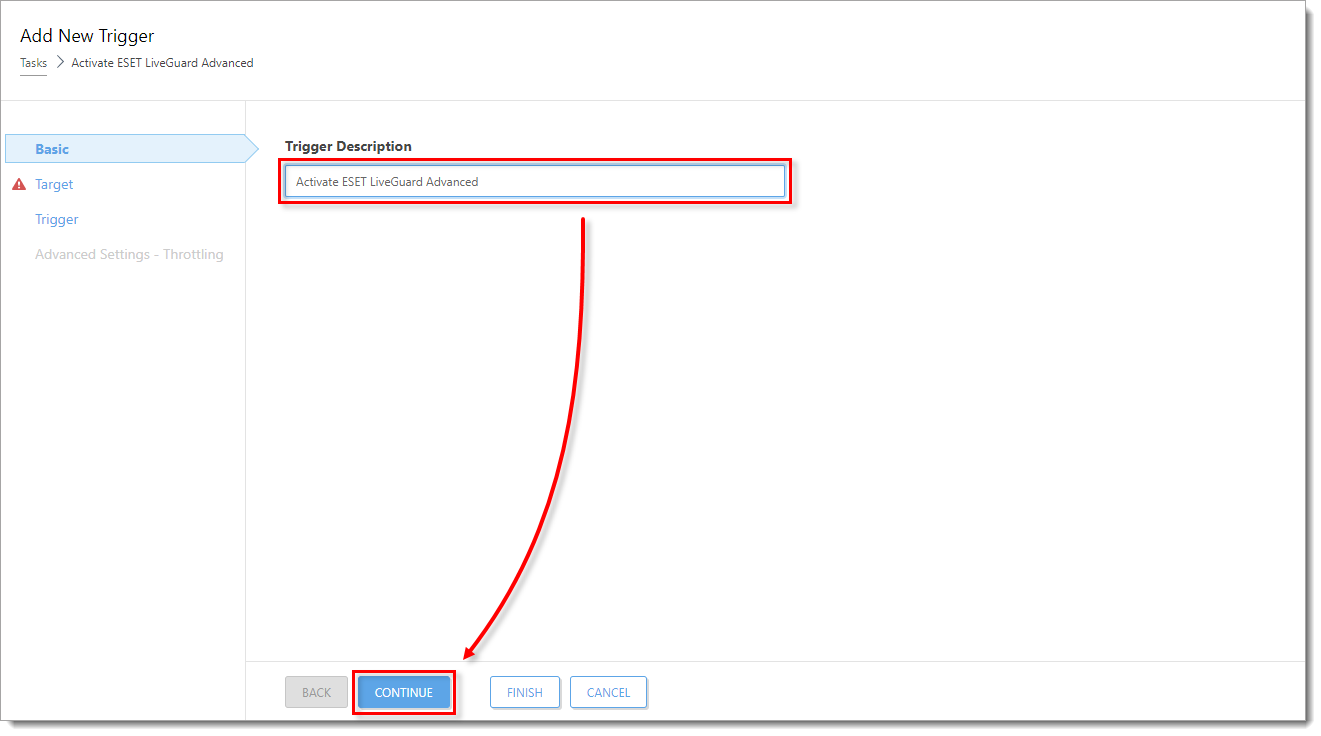
Click the image to view larger in new window
- Click Add Targets.

Click the image to view larger in new window
- Select the check box next to the computer or computer group you want to activate ESET LiveGuard Advanced and click OK.

Click the image to view larger in new window
- Click Trigger. From the Trigger type drop-down menu, select the appropriate option and click Finish. The task will be scheduled and ESET LiveGuard Advanced will activate on the selected computers.
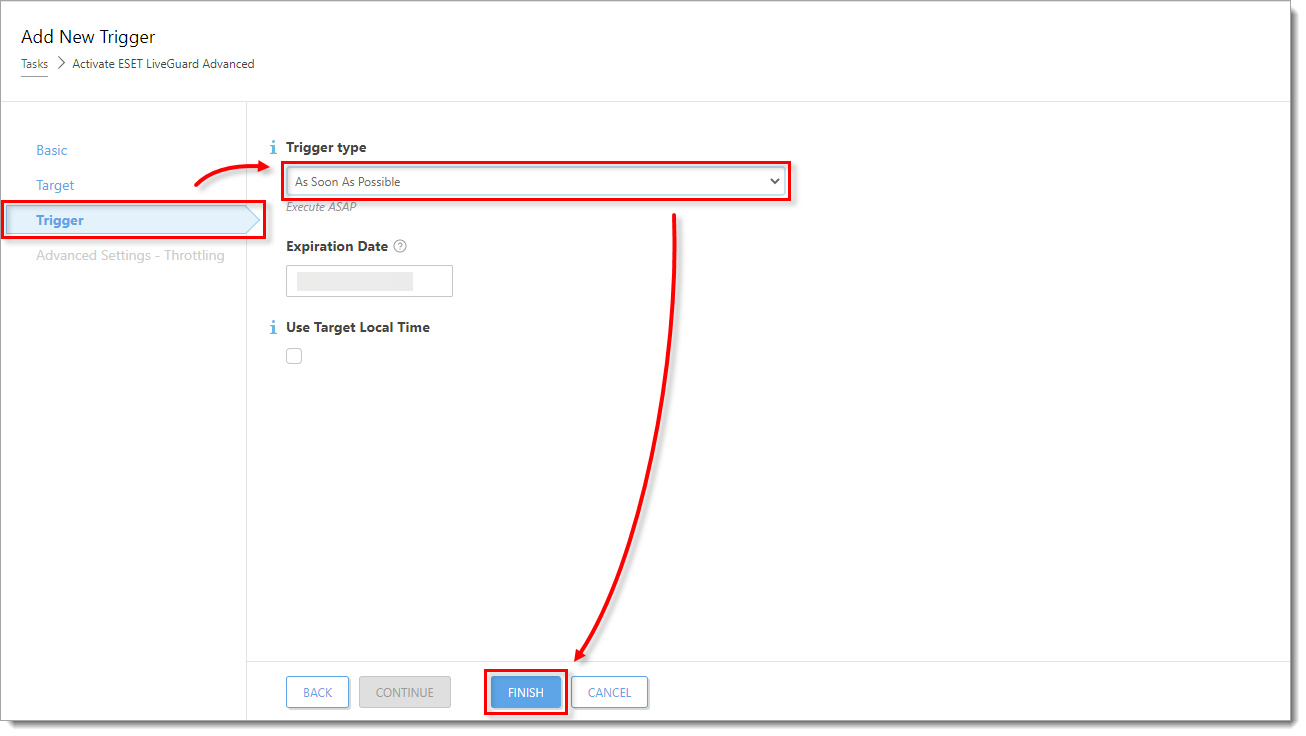
Click the image to view larger in new window
IV. Enable ESET LiveGuard Advanced license on your endpoint computers
- Click Policies, select the check box next to ESET LiveGuard Advanced - Submit scripts and executables - Recommended for the ESET endpoint product you are using (in this example, ESET Endpoint for Windows) and click Assign → Assign computers or Assign groups.
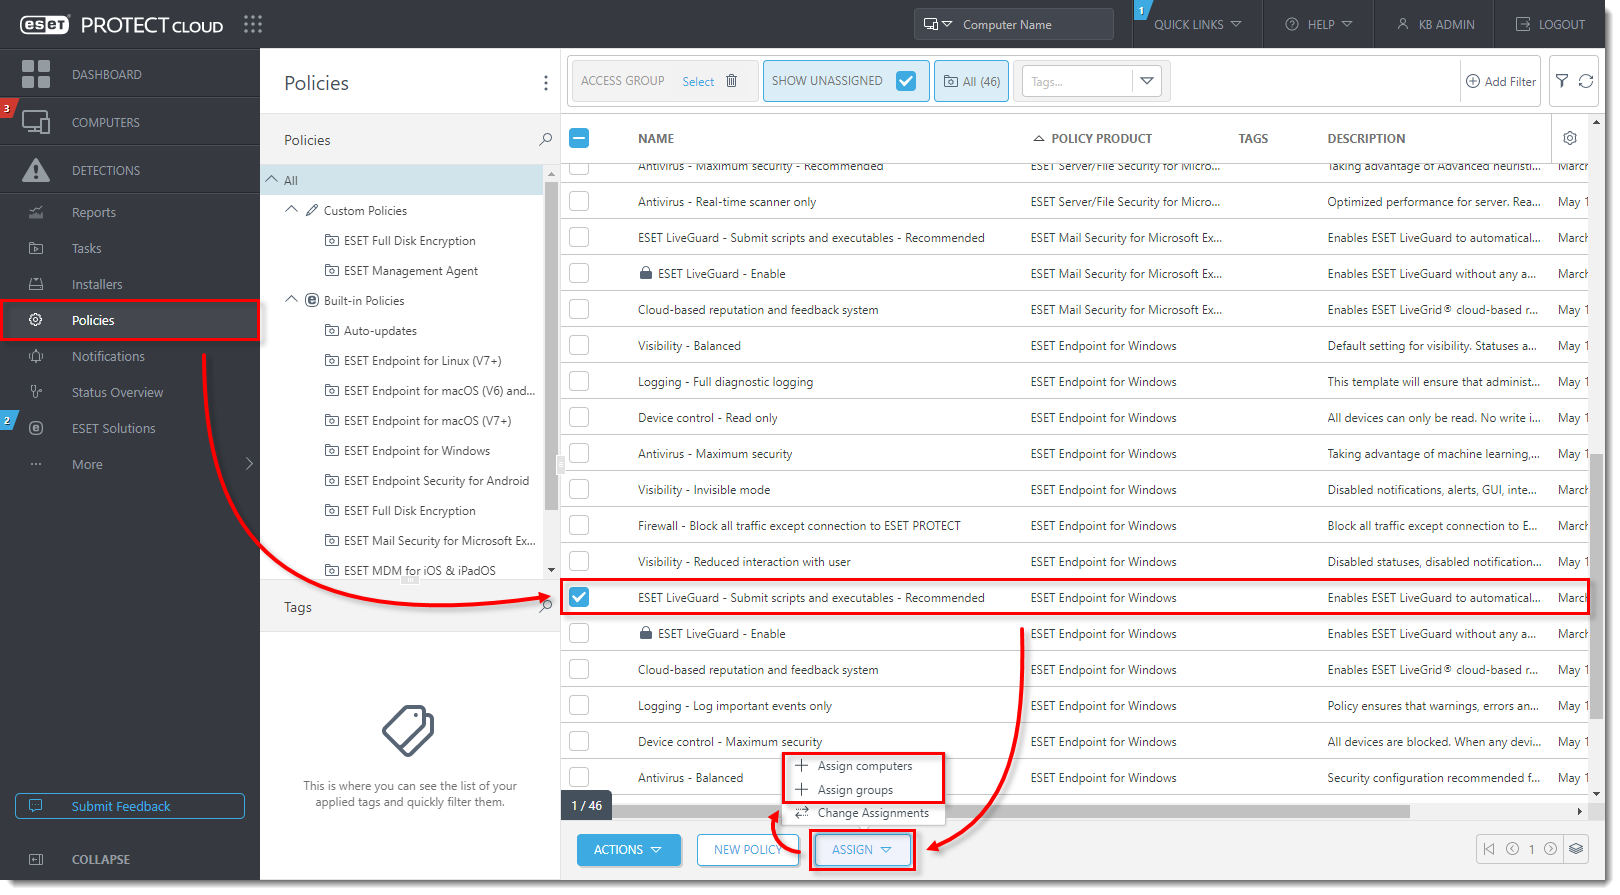
Click the image to view larger in new window
- Select the check box next to the computer or computer group you want to activate ESET LiveGuard Advanced and click OK.
Click the image to view larger in new window
-
ESET LiveGuard Advanced will be activated on the selected endpoint computers. Repeat the steps in this section for every ESET endpoint product separately.