[KB7705] Configure ESET PROTECT or ESET PROTECT On-Prem to automatically deploy ESET endpoint products to unprotected computers

Issue

Required user permissions

This article assumes that you have the appropriate access rights and permissions to perform the tasks below.

If you use the default Administrator user or are unable to perform the tasks below (the option is unavailable), create a second administrator user with all access rights.

Solution

Examples of Dynamic Group templates and their use

For additional examples of using Dynamic Group templates, see Dynamic Group template – examples Online Help and Related articles at the end of the article.

Create New Dynamic Group

  1. Open ESET PROTECT or ESET PROTECT On-Prem in your web browser and log in.

  2. Click Computers.

  3. Select the static group that will be the parent of the new group, click the gear icon and then select New Dynamic Group from the context menu.
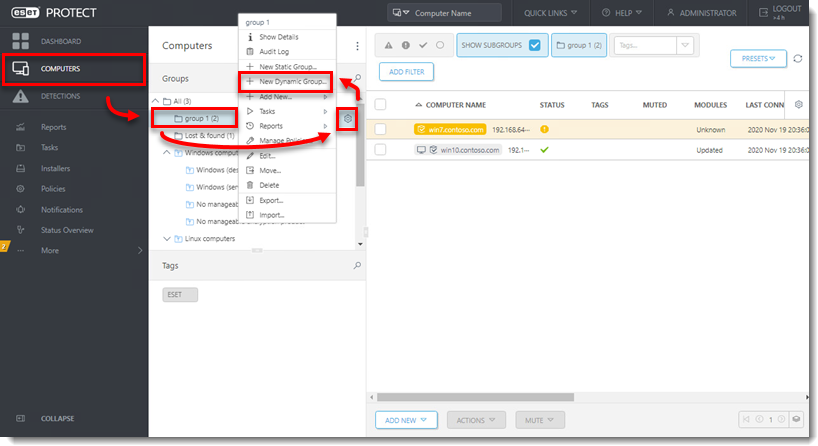
Figure 1-1
  1. Type a name for the group in the Name field. If necessary, configure the Description and Parent Group settings to your preferences.

Figure 1-2
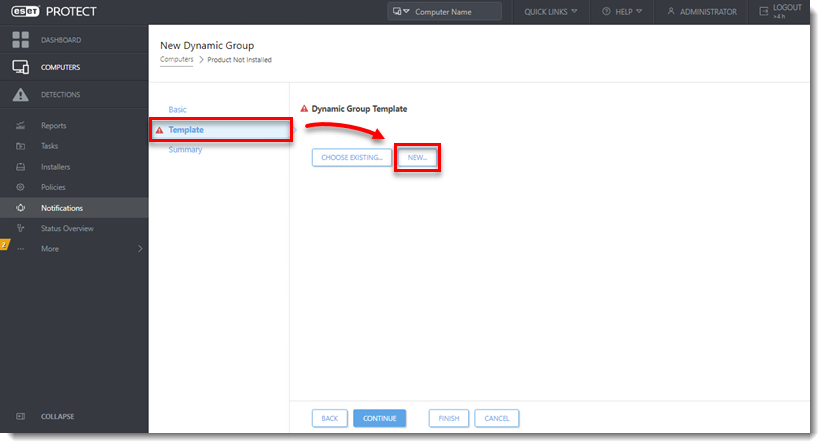
  1. Click Template New.

Figure 1-3
  1. Type a name in the Name field.

Figure 1-4
  1. Click Expression, select NOR (All conditions have to be false) from the Operation drop-down menu and then click Add Rule.
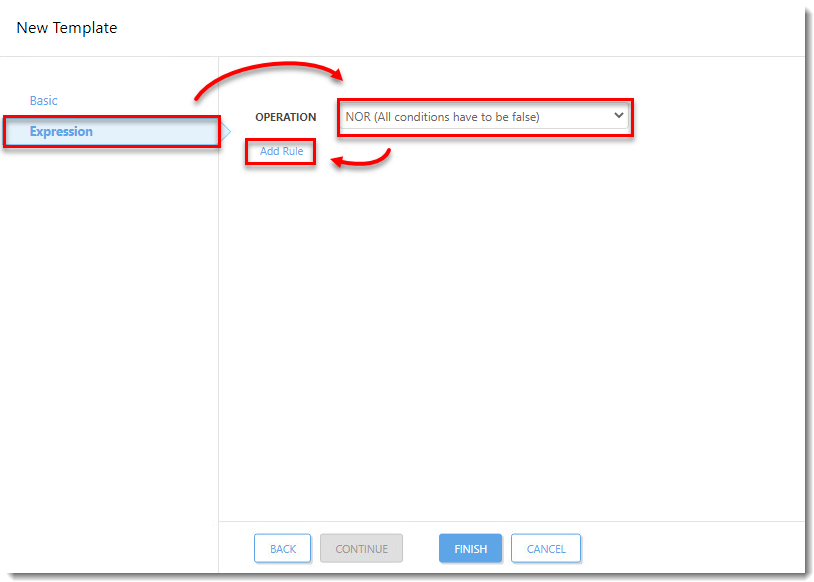
    Figure 1-5
  2. Expand Installed software, select Application name and then click OK.
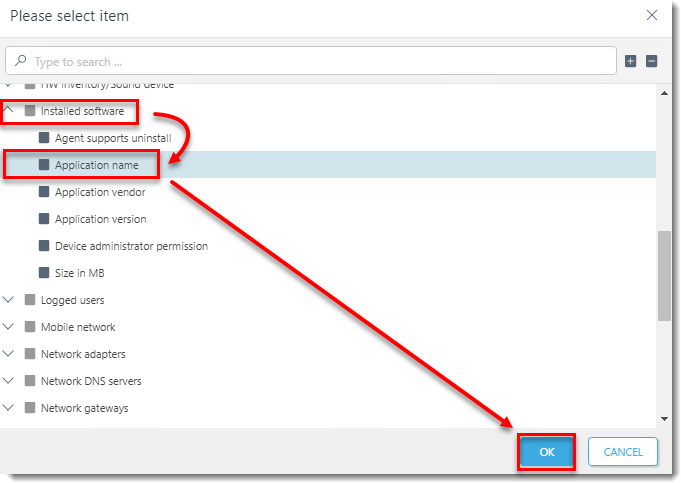
Figure 1-6
  1. Select has prefix from the drop-down menu, enter ESET Endpoint Security or ESET Server Security depending on which product will be automatically deployed to client workstations in this dynamic group, and then click Finish.
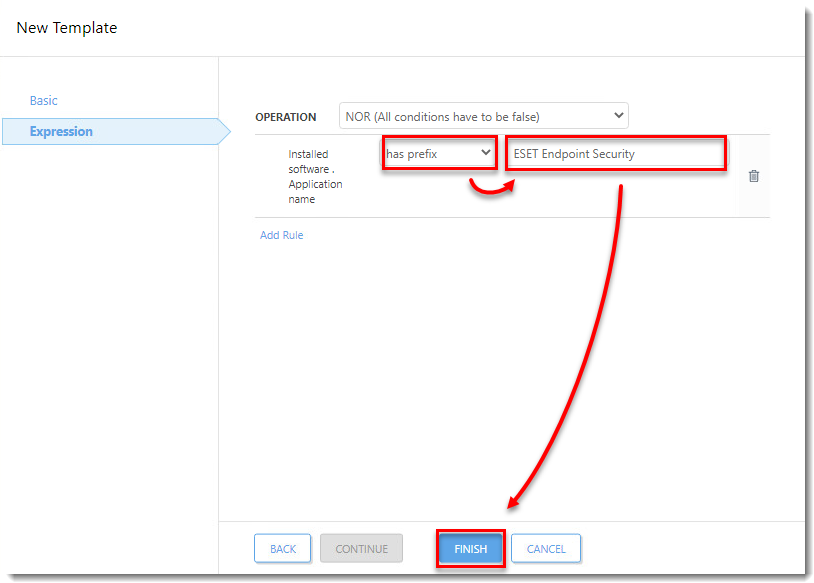
Figure 1-7
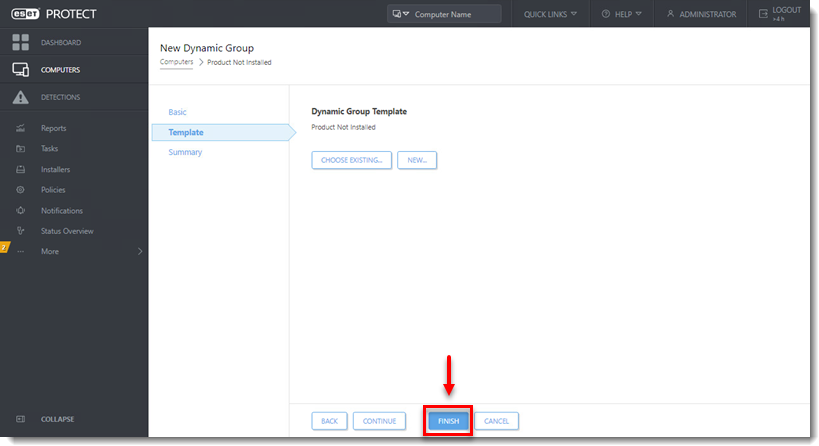
  1. Click Finish and proceed to part II.
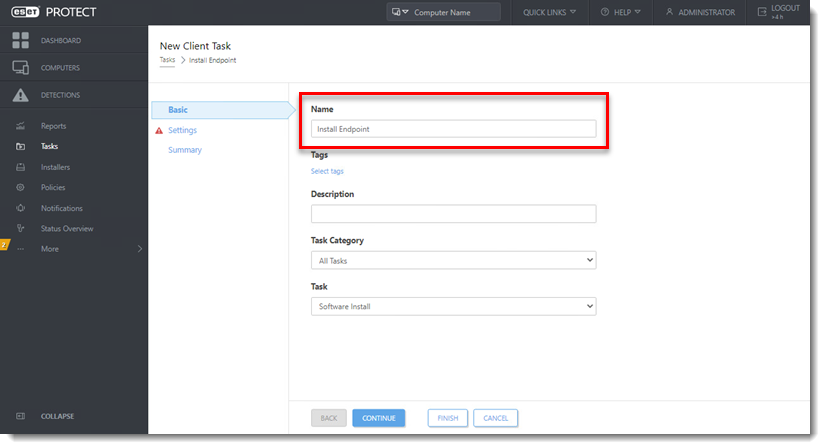
Figure 1-8
 

Create a new Client Task to deploy ESET endpoint products to unprotected clients

  1. Click Tasks.

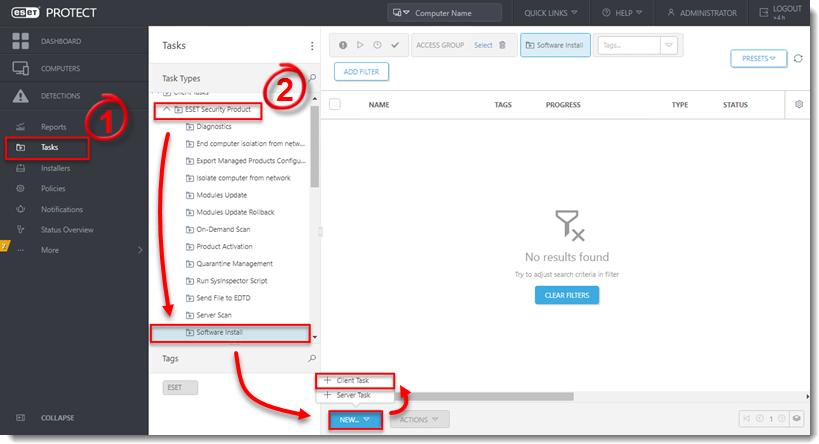
  2. Expand ESET Security Product, select Software Install, click New, and then click Client Task.

Figure 2-1
  1. Type a name for the task in the Name field (configure the other settings in the Basic section as necessary).

Figure 2-2
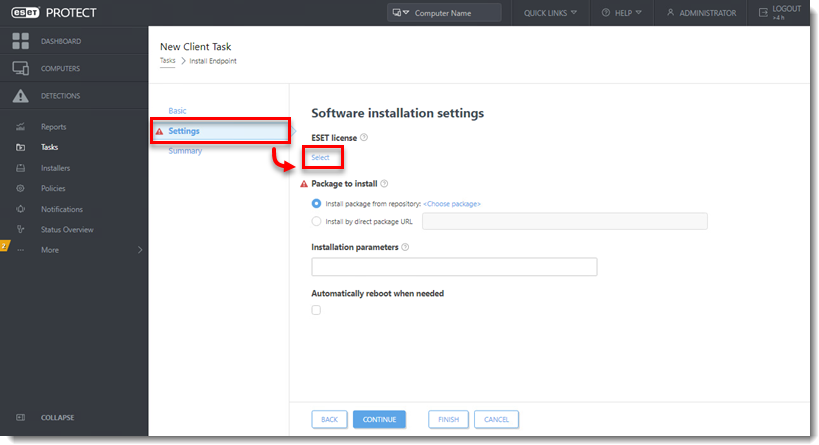
  1. Click Settings and click Select to choose your ESET license. You will add Targets after the task is created.

Figure 2-3
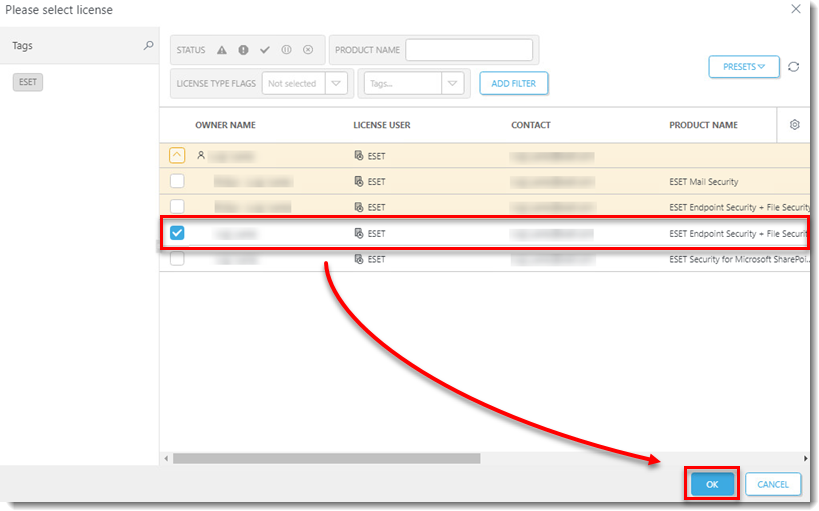
  1. Select a valid license and click OK.

Figure 2-4
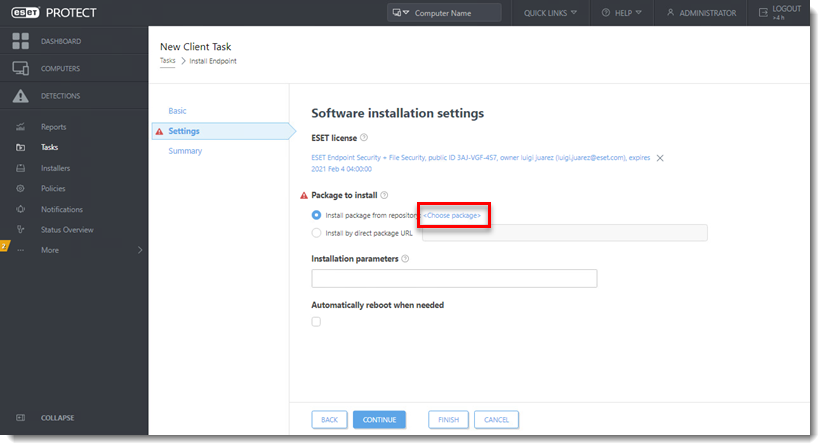
  1. Click Choose package.

Figure 2-5
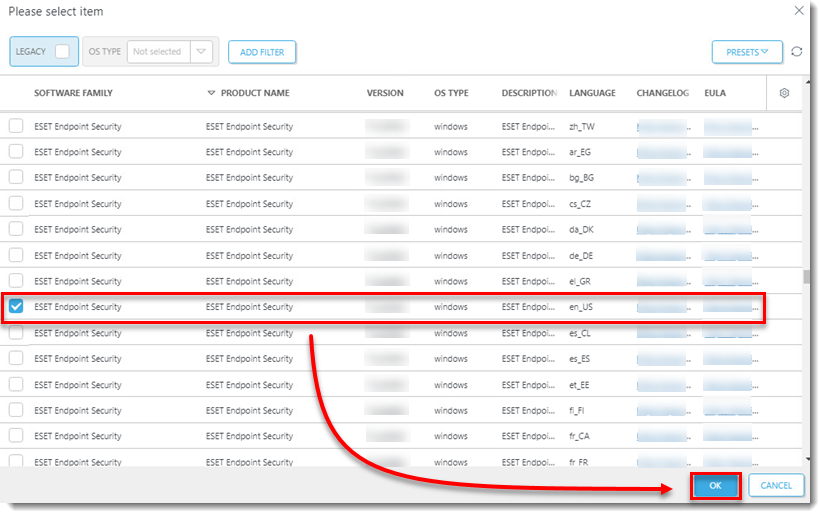
  1. Select the product you want to deploy and click OK.

    Figure 2-6
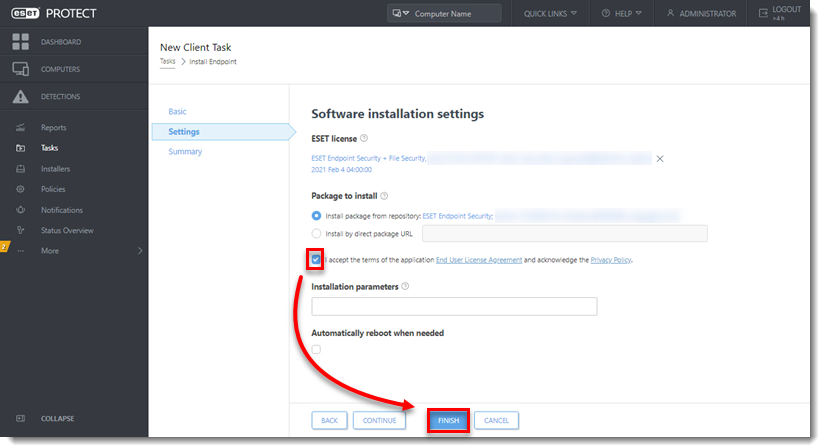
  2. Select the check box next to I accept the terms of the application End User License Agreement and acknowledge the Privacy Policy and then click Finish.

Figure 2-7
  1. Click Create Trigger when you are asked whether you want to add a trigger for the client task.

Figure 2-8
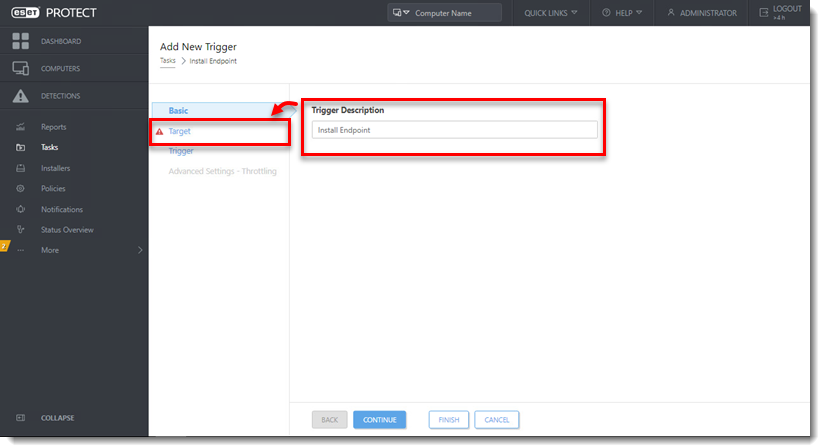
  1. Type in a Trigger Description and click Target.

    Figure 2-9
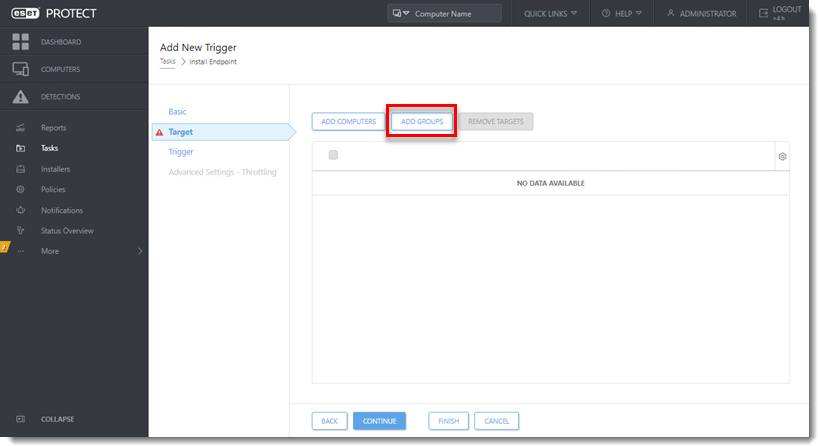
  2. Click Add groups.

    Figure 2-10
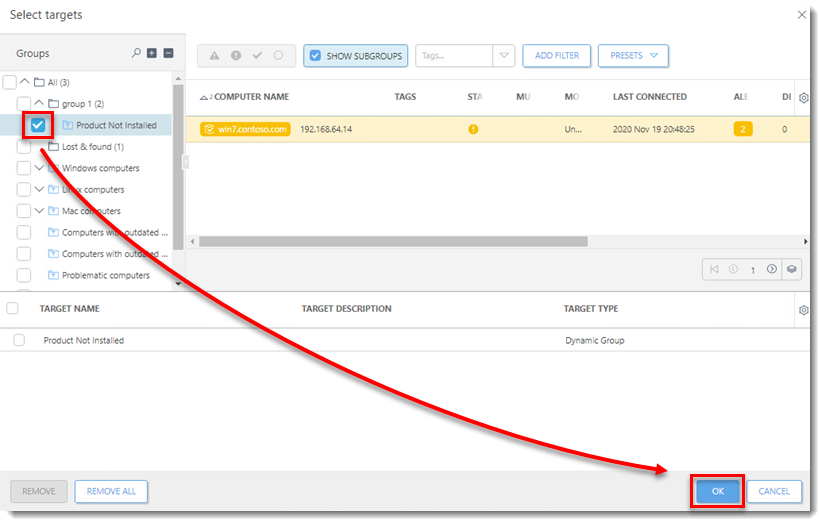
  3. Select the check box next to the dynamic group you created in part I and click OK.

Figure 2-11
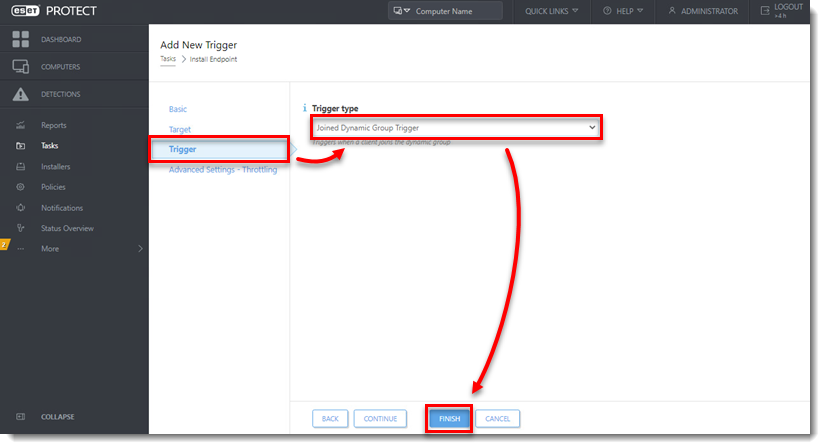
  1. Click Trigger and select Joined Dynamic Group Trigger from the Trigger type drop-down menu.

  2. Click Finish.

    Figure 2-12

Assistance supplémentaire

Plus d'informations