Issue
- Use dynamic groups automatically to determine the update settings for client workstations depending on the network they are connected to
Solution
![]() Endpoint users: Perform these steps on individual client workstations
Endpoint users: Perform these steps on individual client workstations
In the example below:
- Download updates using a proxy server when connected to subnet A (referred to as "Company Network").
- Download updates using the ESET update server when connected to subnet B (referred to as "Off Network").
For additional examples of using Dynamic Group templates, see Dynamic Group template - examples in ESET PROTECT On-Prem Online Help and Related articles below.
I. Configure the Company Network Dynamic group
- Open ESET PROTECT or ESET PROTECT On-Prem in your web browser and log in.
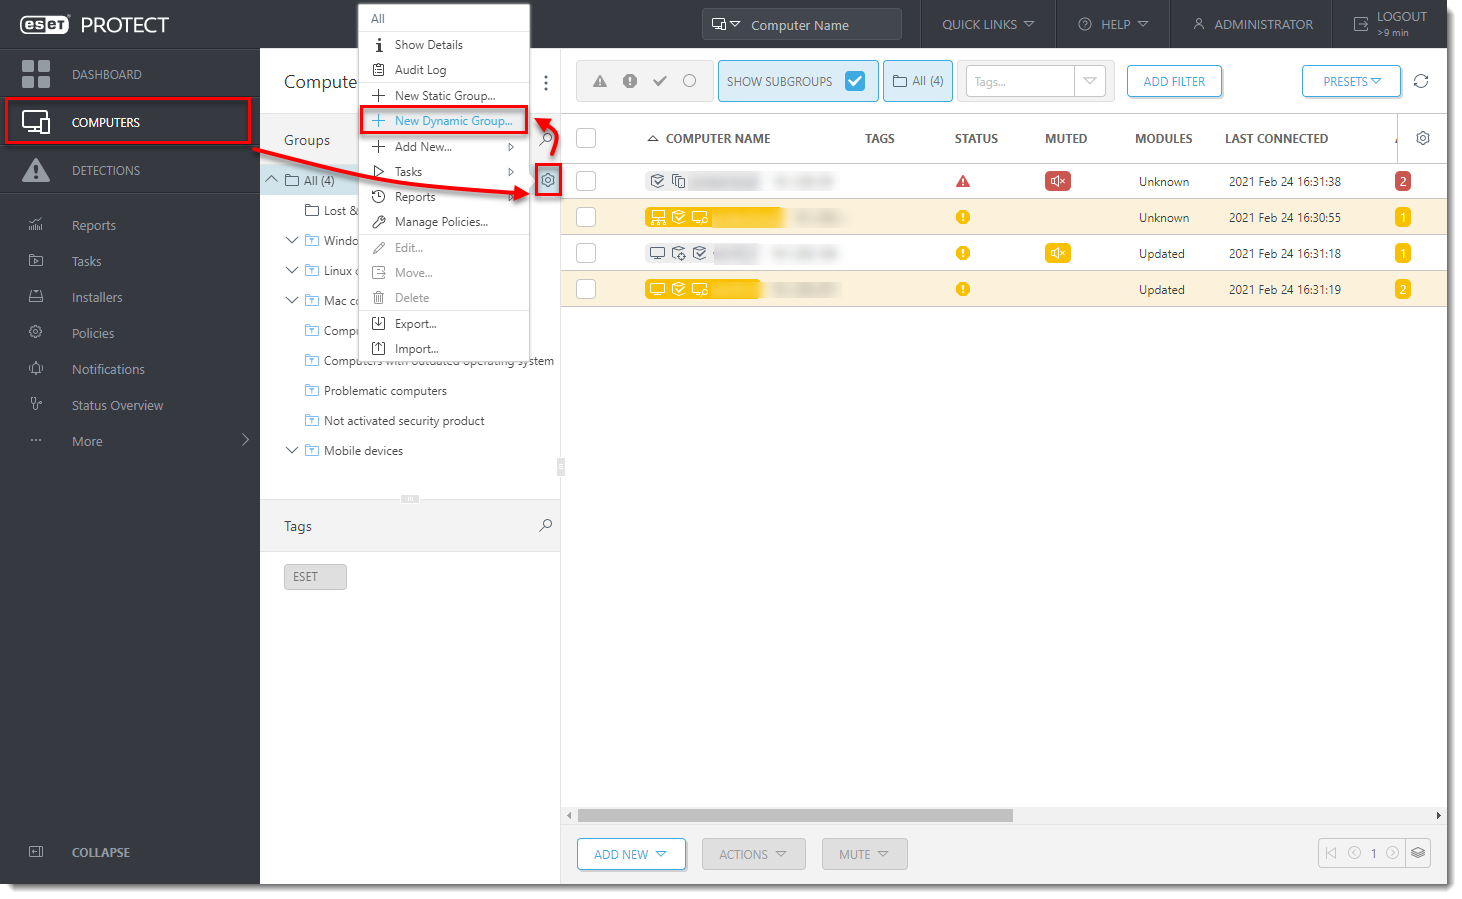
- Click Computers, click the gear icon next to a group and then select New Dynamic Group from the context menu.

Figure 1-1 - Enter a Name for the new group. If necessary, click Change Parent Group to change the parent group.
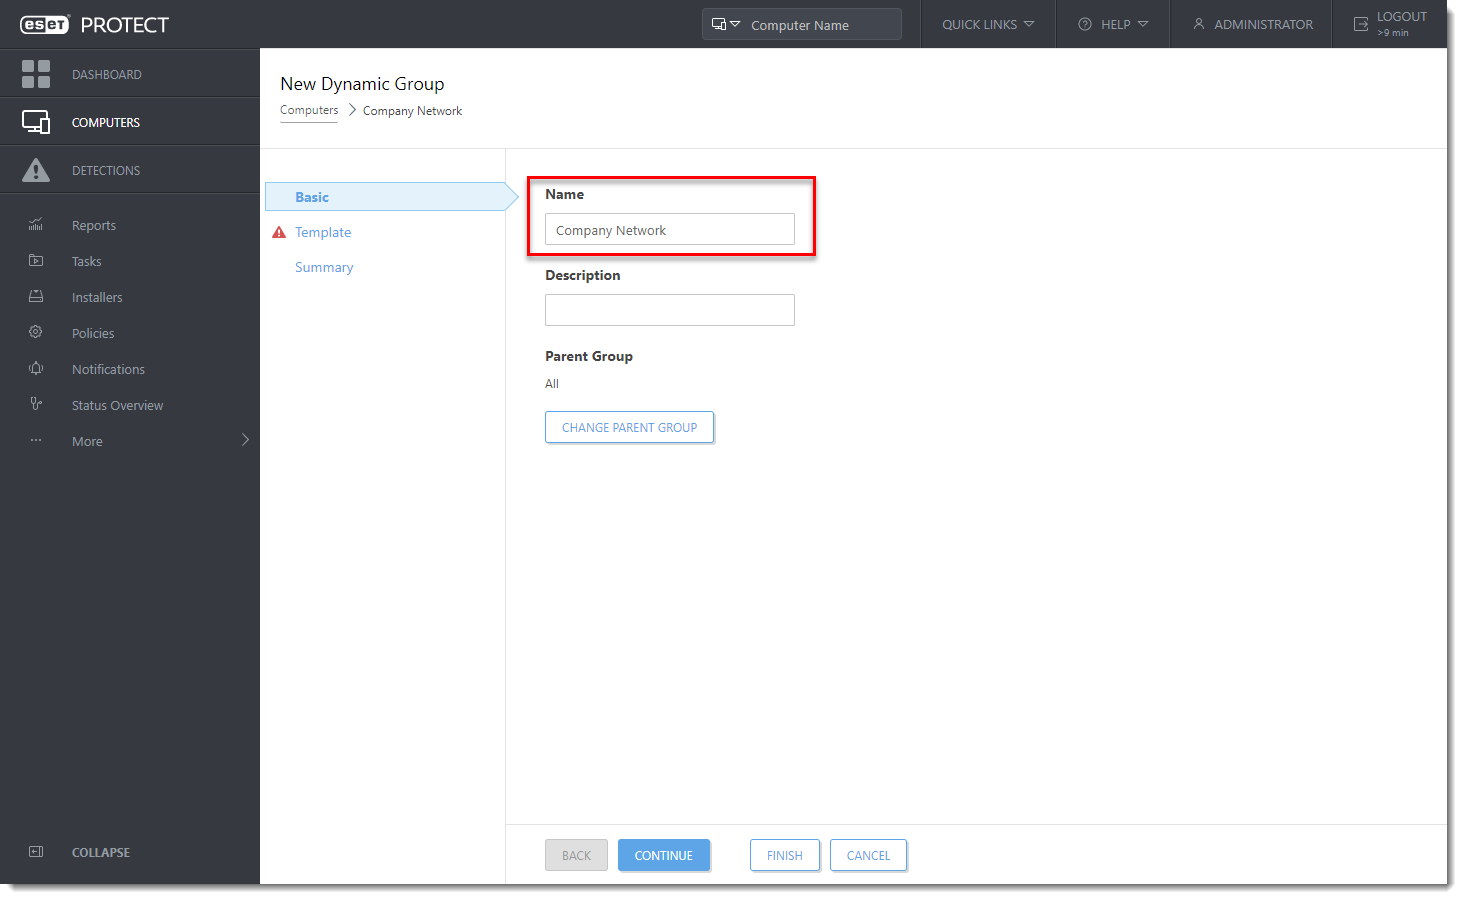
Figure 1-2 - Click Template and click New.
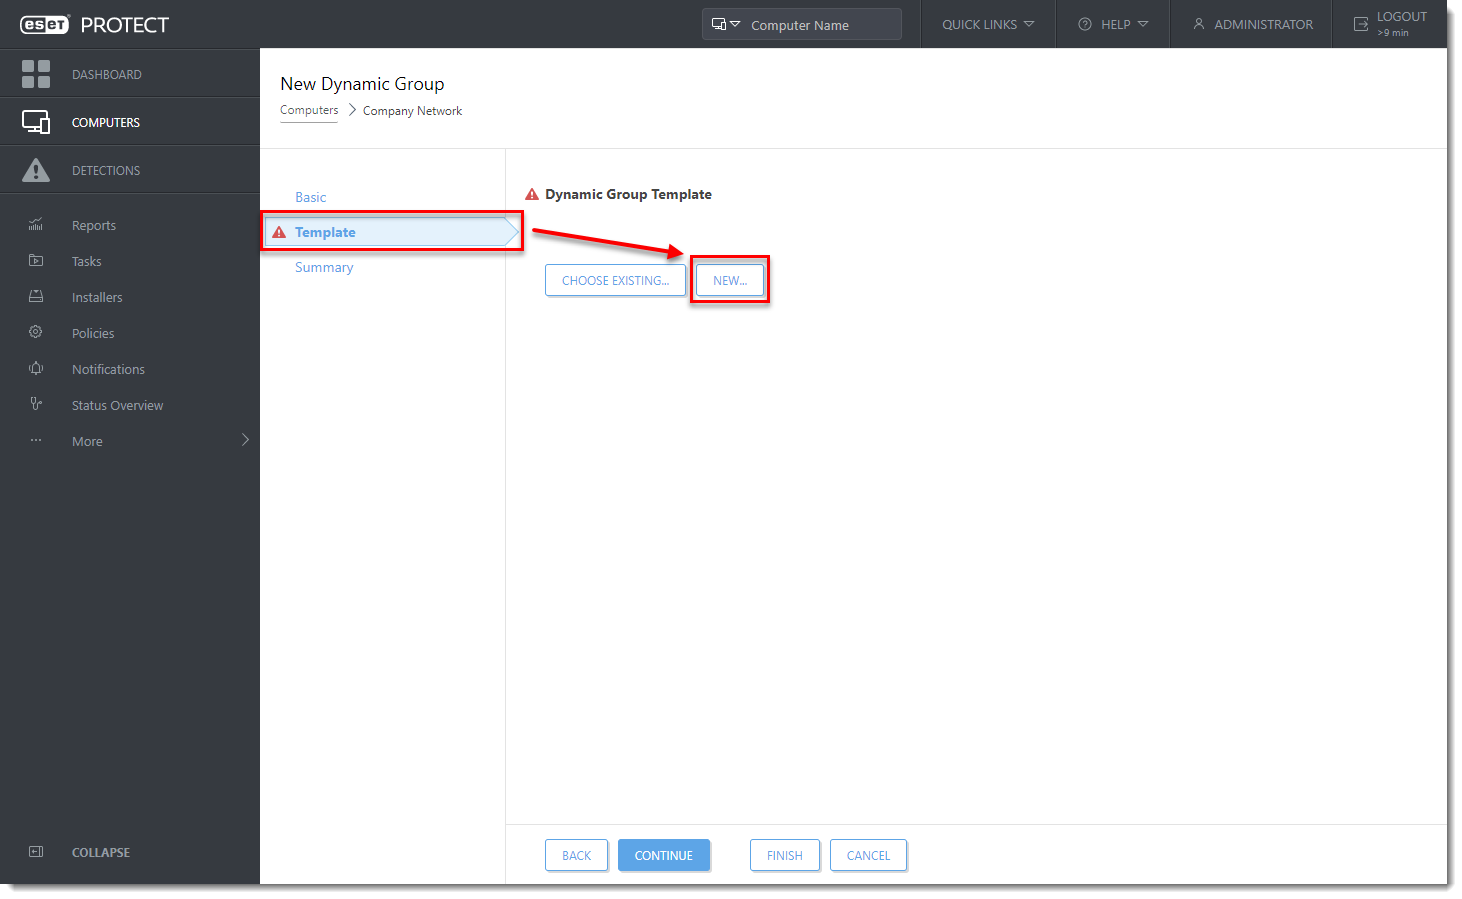
Figure 1-3 - Type a name into the Name field.

Figure 1-4 - Click Expression, select AND (All conditions have to be true) from the Operation drop-down menu, and then click Add Rule.
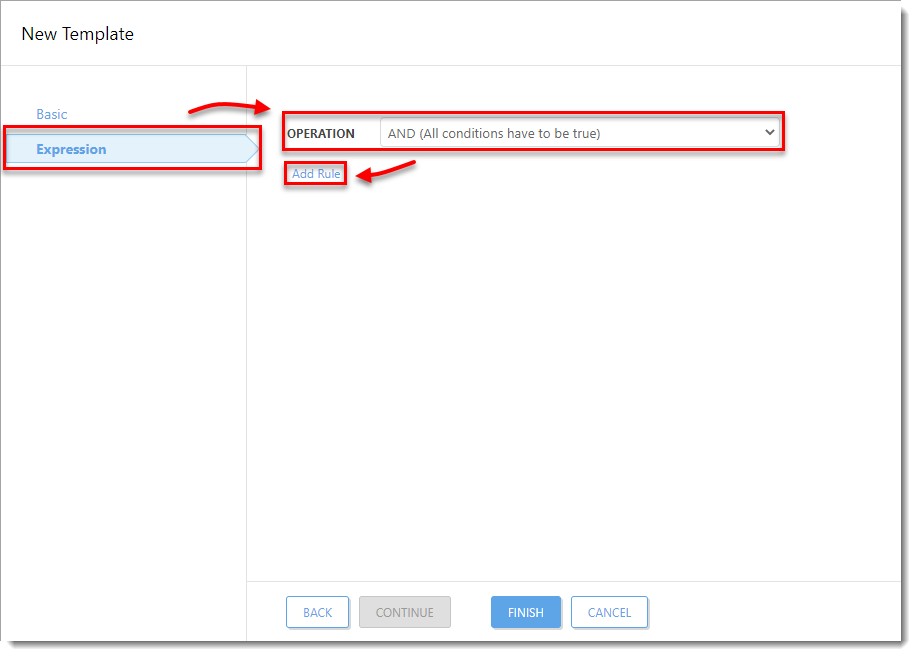
Figure 1-5 - Expand Network IP addresses, select IP subnetwork, and then click OK.

Figure 1-6 - Select = (equal) from the drop-down menu, enter the IP address of the subnet into the blank field and then click Finish. The subnet format is: x.x.x.x (for example: 10.1.112.0).
More on this can be found in our Online Help topic.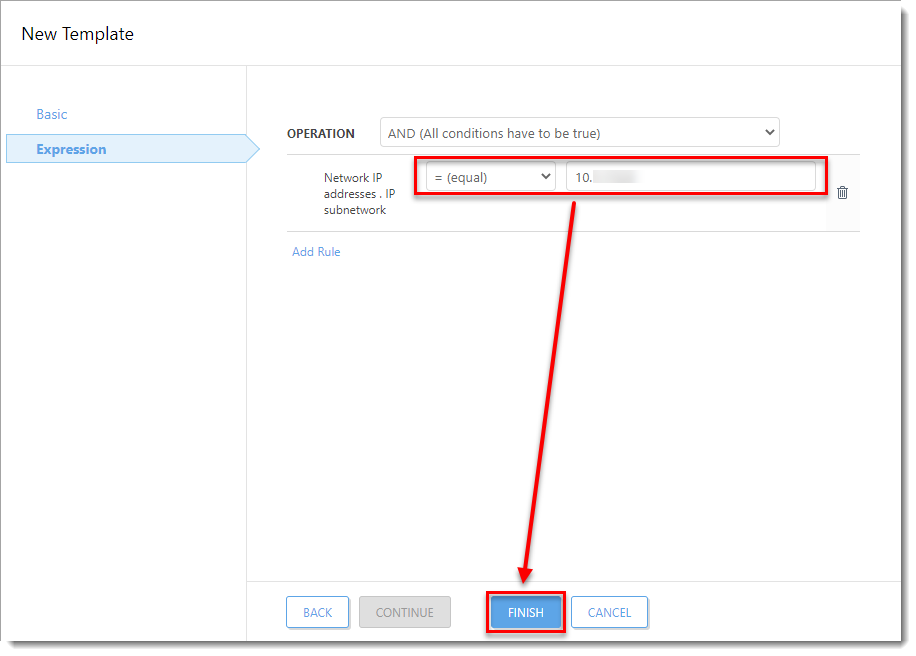
Figure 1-7 - Click Finish.
II. Configure an Off Network Dynamic Group
- Open ESET PROTECT or ESET PROTECT On-Prem in your web browser and log in.
- Click Computers, click the gear icon next to a group and then select New Dynamic Group from the context menu.
- Enter a name for the new group. If necessary, click Change Parent Group to change the parent group.

Figure 2-2 - Click Template and click New.
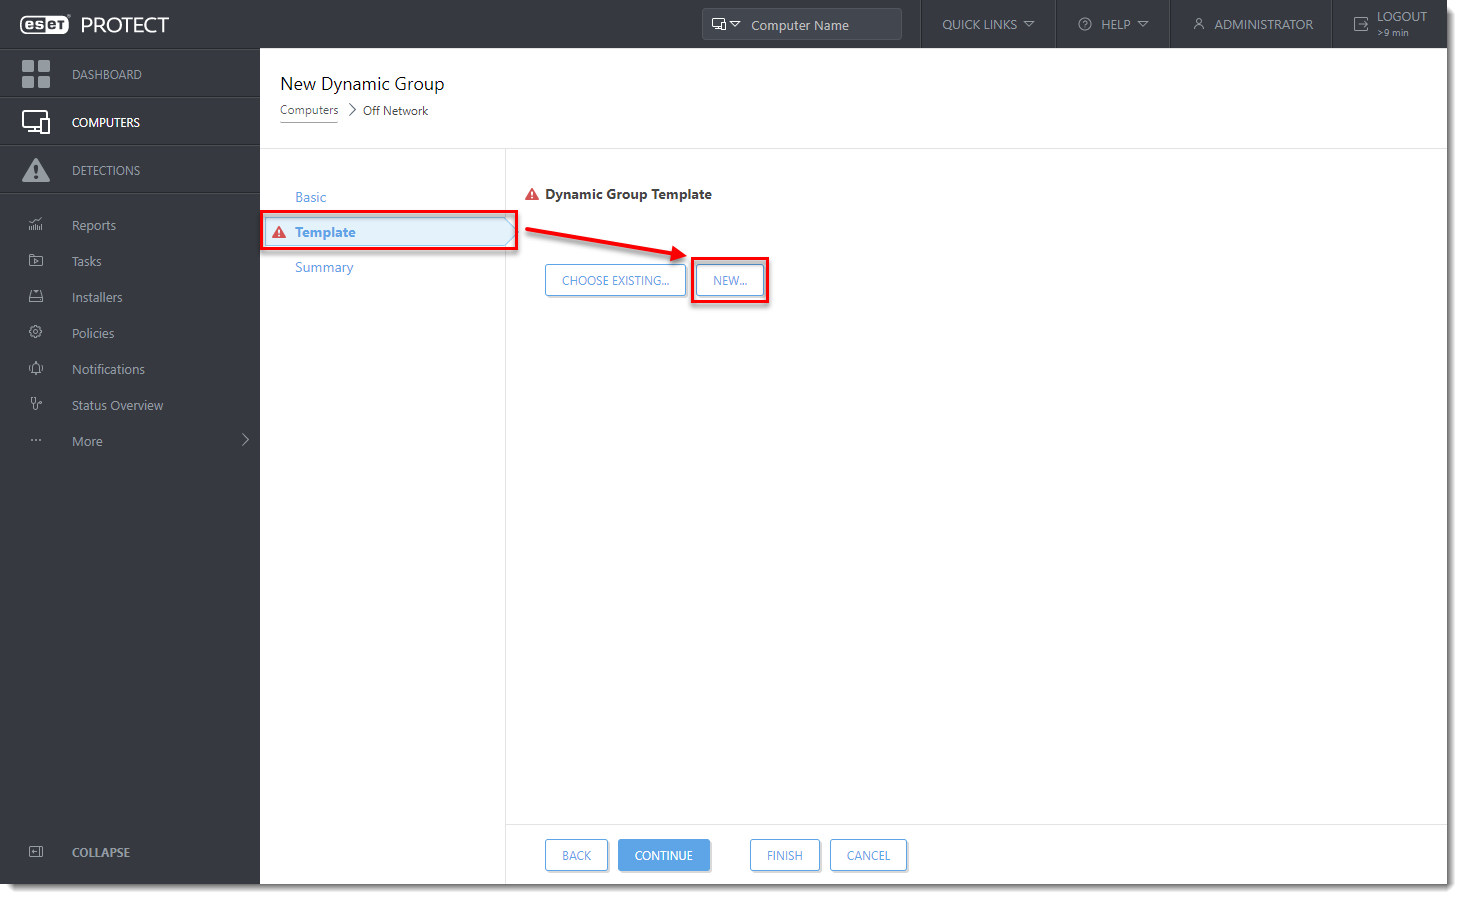
Figure 2-3 - Type a name into the Name field.

Figure 2-4 - Expand Expression, select NOR (All conditions have to be false) from the Operation drop-down menu and then click Add Rule.

Figure 2-5 - Expand Network IP addresses, select IP subnetwork, and then click OK.
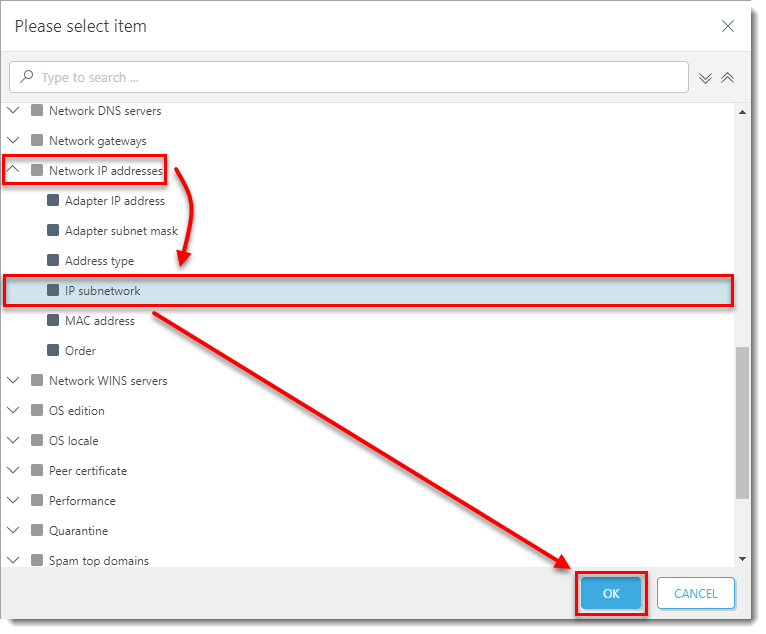
Figure 2-6 - Select is one of from the drop-down menu, enter the IP address of the secondary subnet into the blank field and then click Finish. The subnet format is: x.x.x.x (for example: 10.1.113.0).
More on this can be found in our Online Help topic.
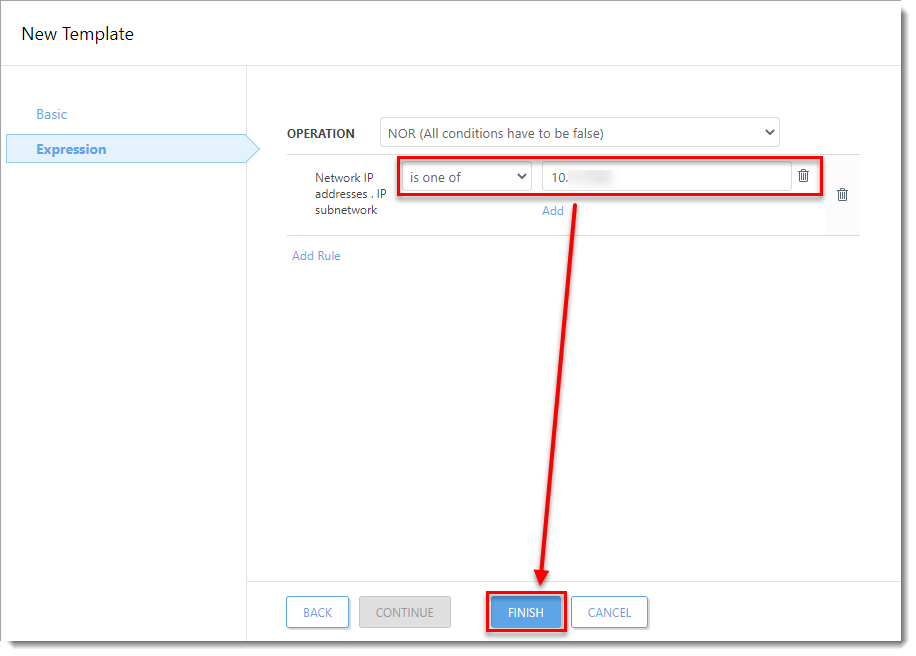
Figure 2-7 - Click Finish.
III. Create Company Network and Off Network policies and assign them to groups
A. Company Network Policy
- Open ESET PROTECT or ESET PROTECT On-Prem in your web browser and log in.
- Click Policies → New Policy.
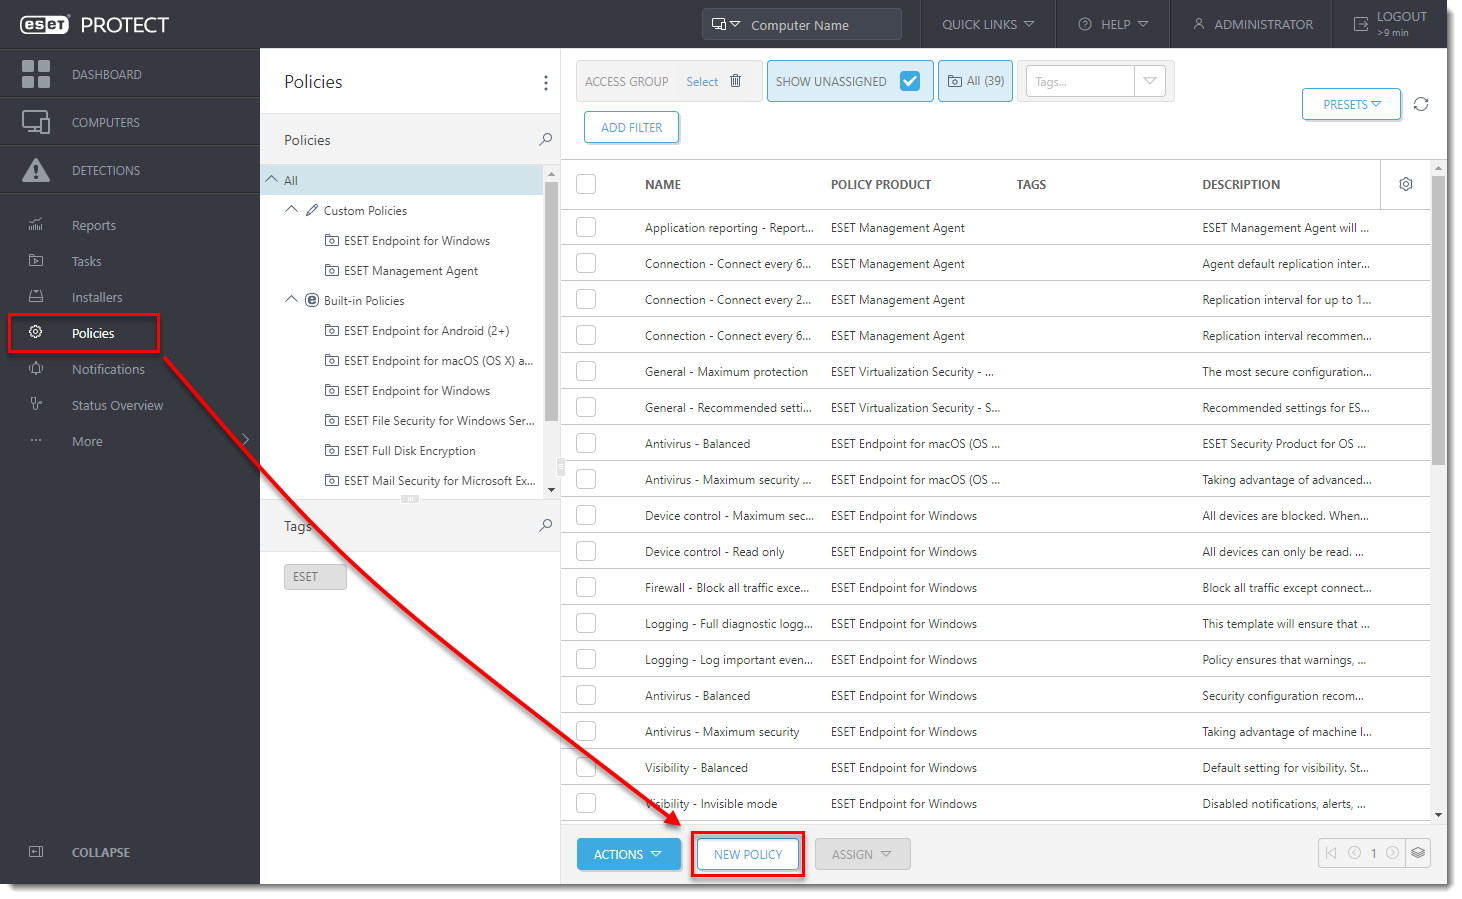
Figure 3-1 - Type a name for the policy into the Name field.
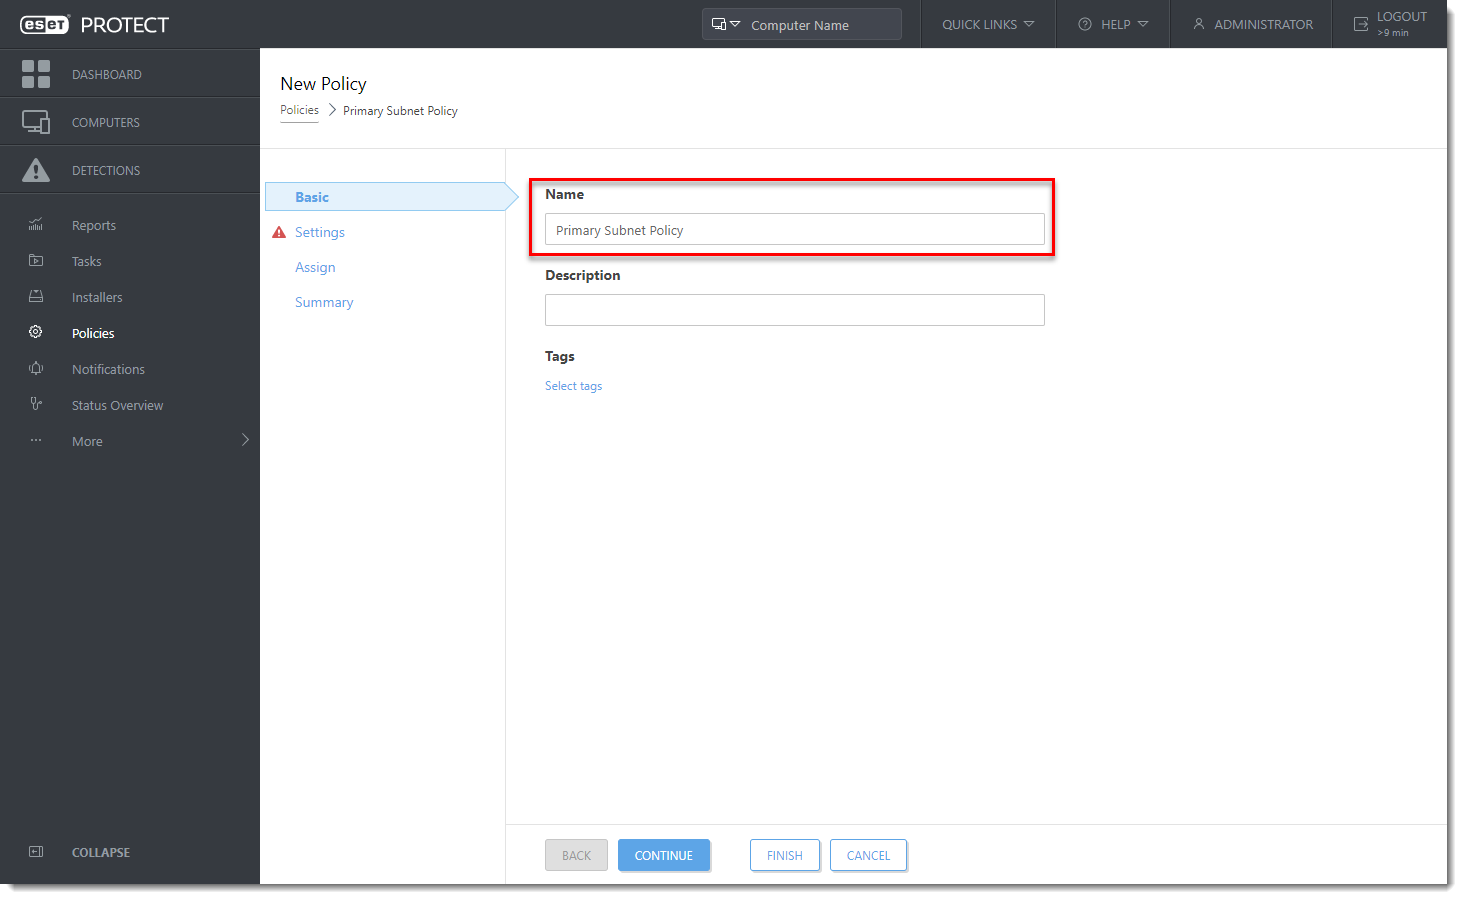
Figure 3-2 - Click Settings and select the appropriate product from the drop-down menu (in this example, the policy will be applied to client computers running Microsoft Windows operating systems, so ESET Endpoint for Windows is selected).

Figure 3-3 - Expand Tools and click Proxy server.
- Select Use proxy server, enter the IP address of the proxy server that client computers will download updates from.
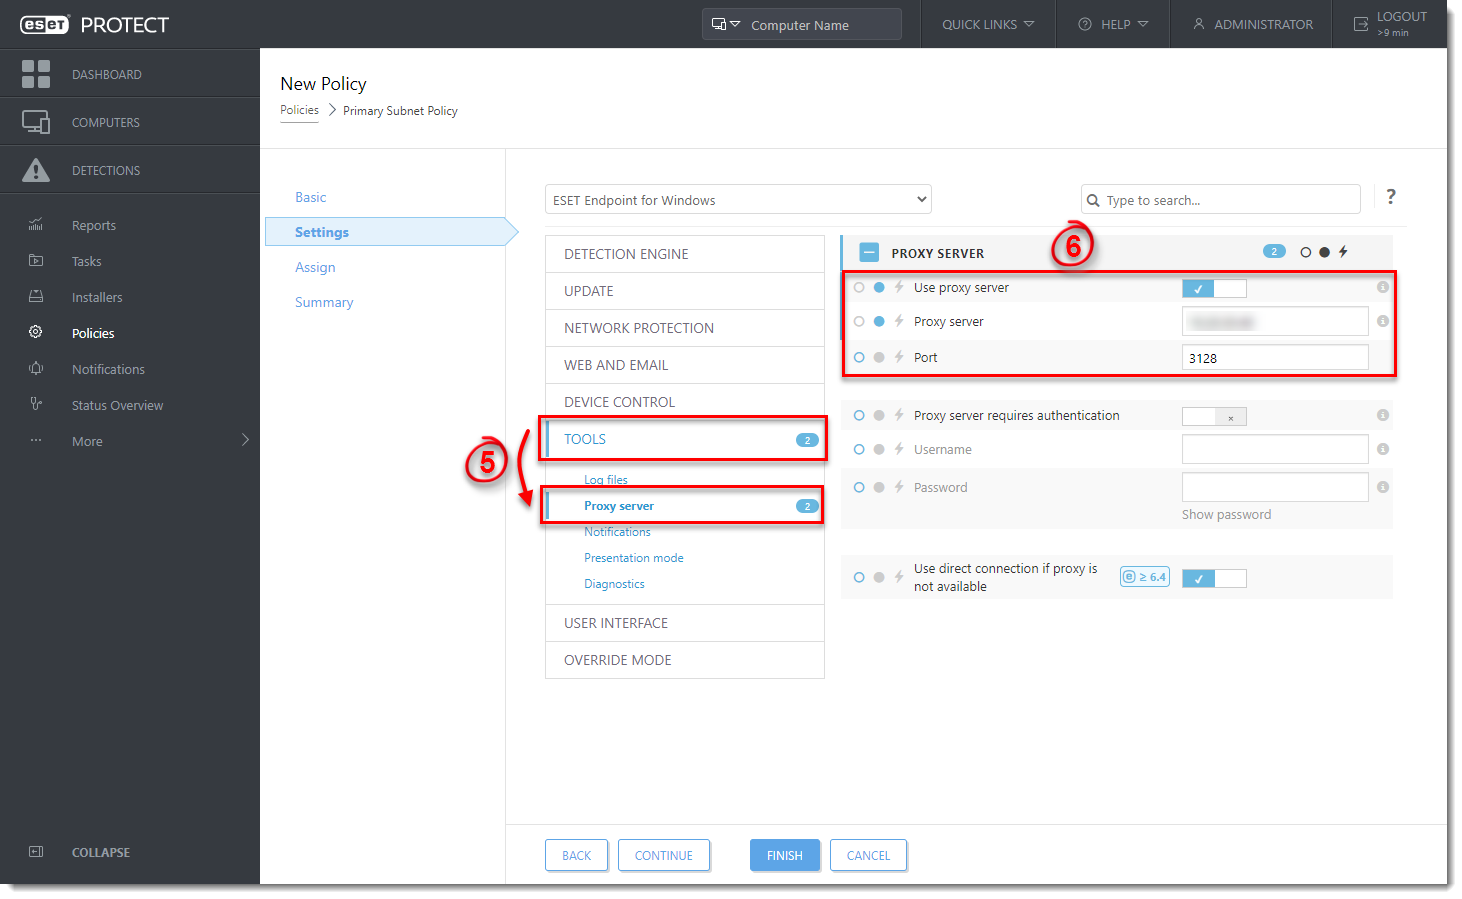
Figure 3-4 - Click Assign and click Assign.
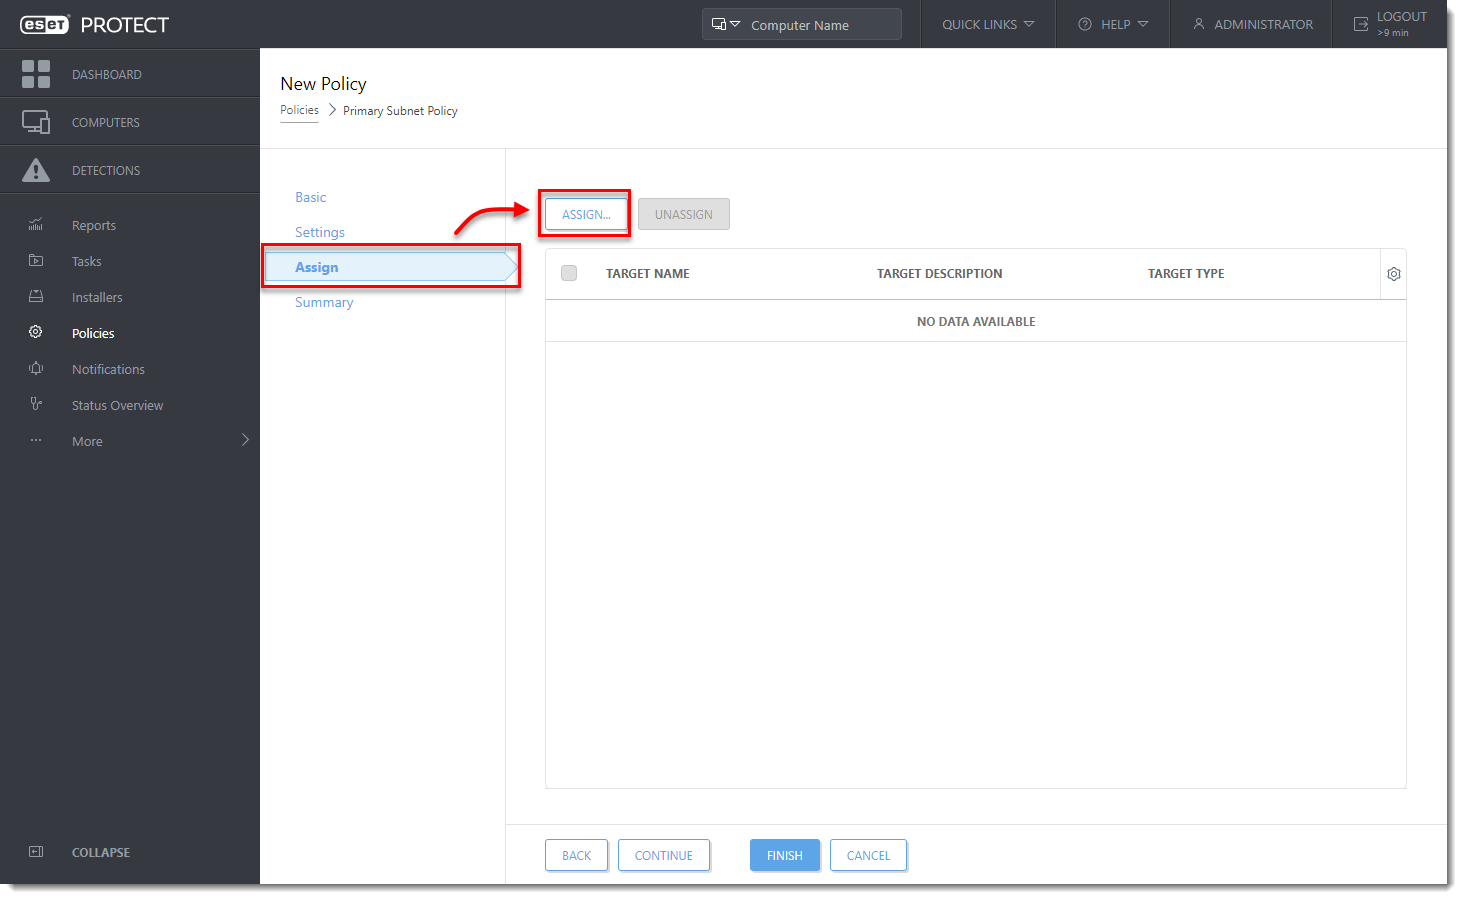
Figure 3-5 - Select the check box next to the Company Network dynamic group you created in part I and then click OK.
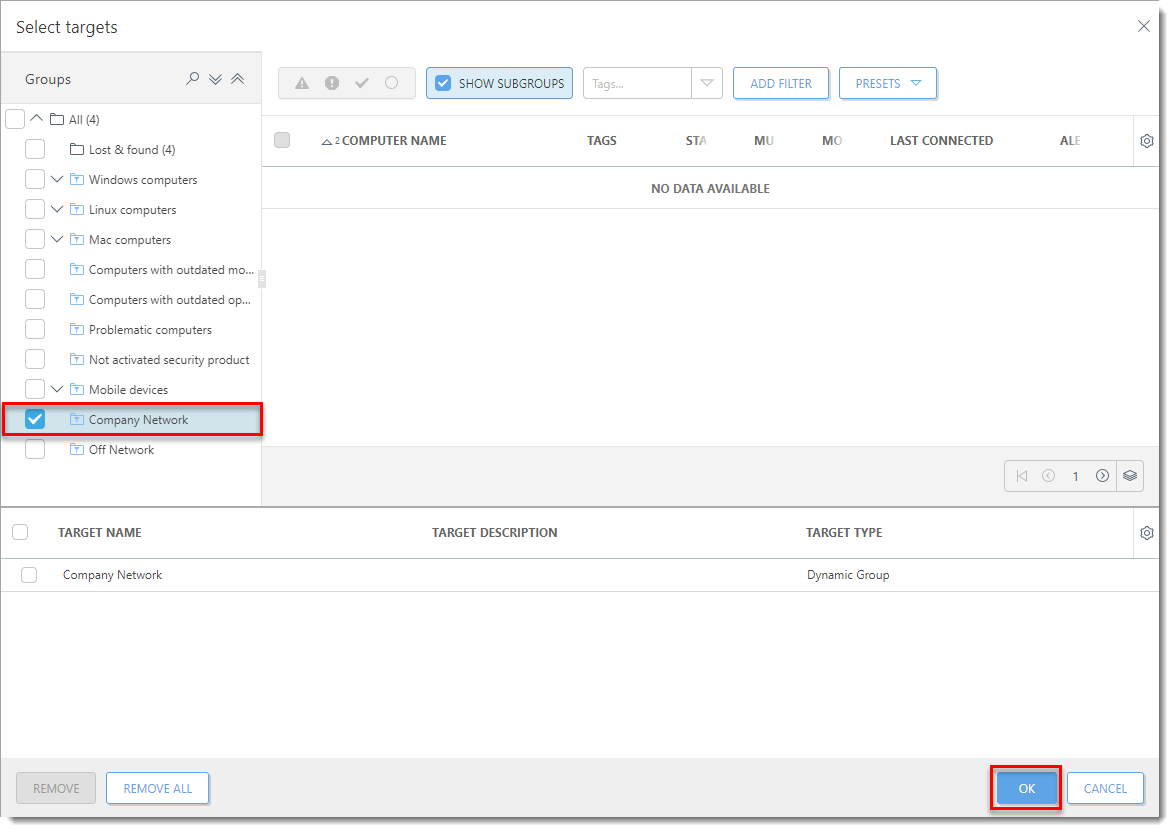
Figure 3-6 - Click Finish and proceed to part B.
B. Off Network Policy
- Open ESET PROTECT or ESET PROTECT On-Prem in your web browser and log in.
- Click Policies → New Policy.

Figure 3-7 - Type a name for the policy into the Name field.
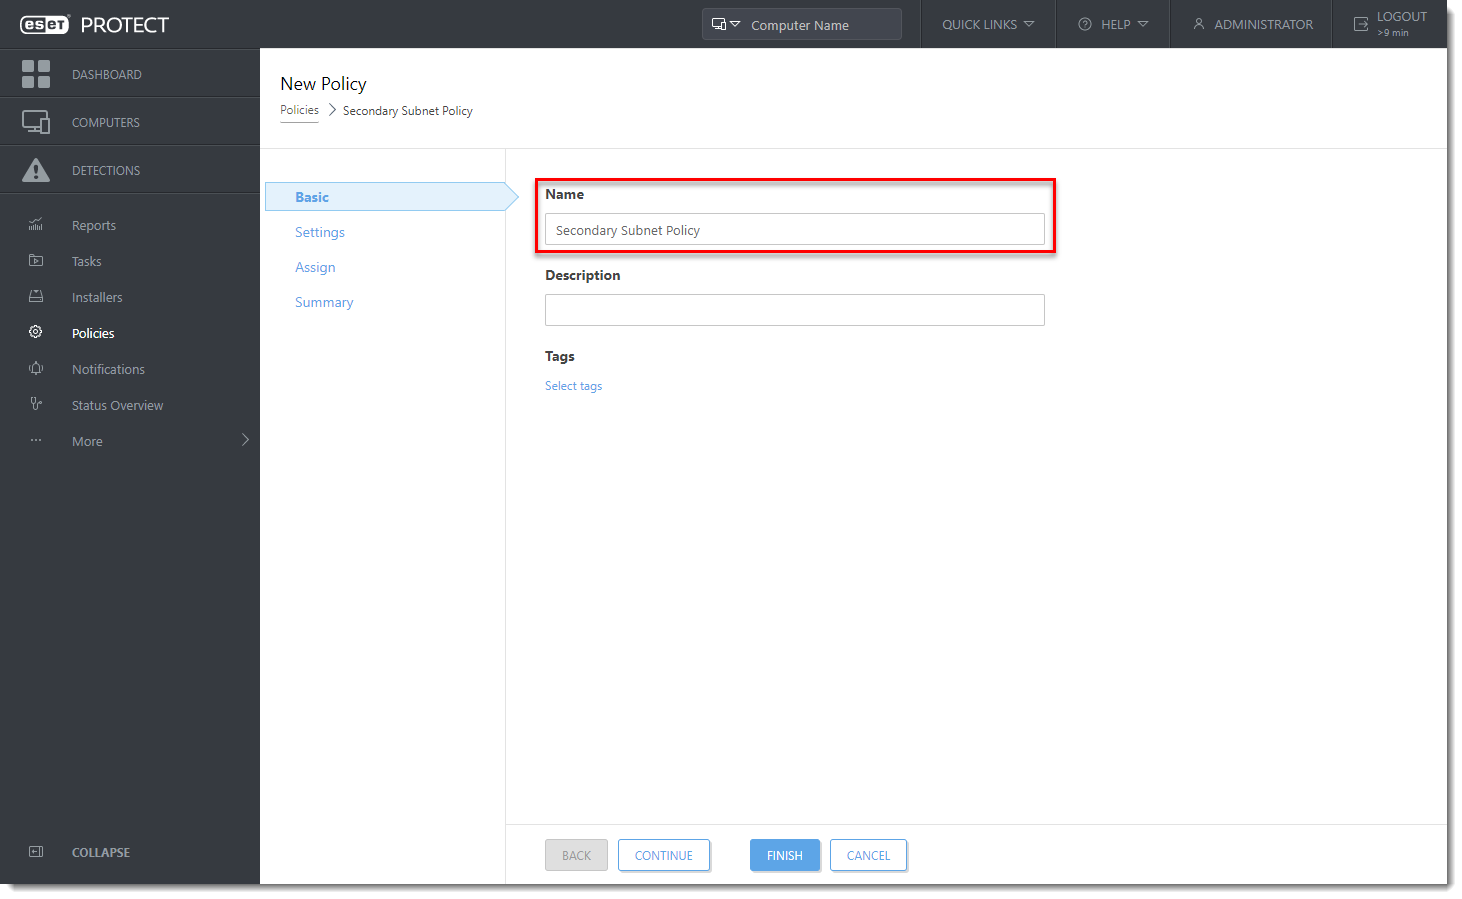
Figure 3-8 - Click Settings and select the appropriate product grouping from the drop-down menu (in this example, the policy will be applied to client computers running Microsoft Windows operating systems, so ESET Endpoint for Windows is selected).
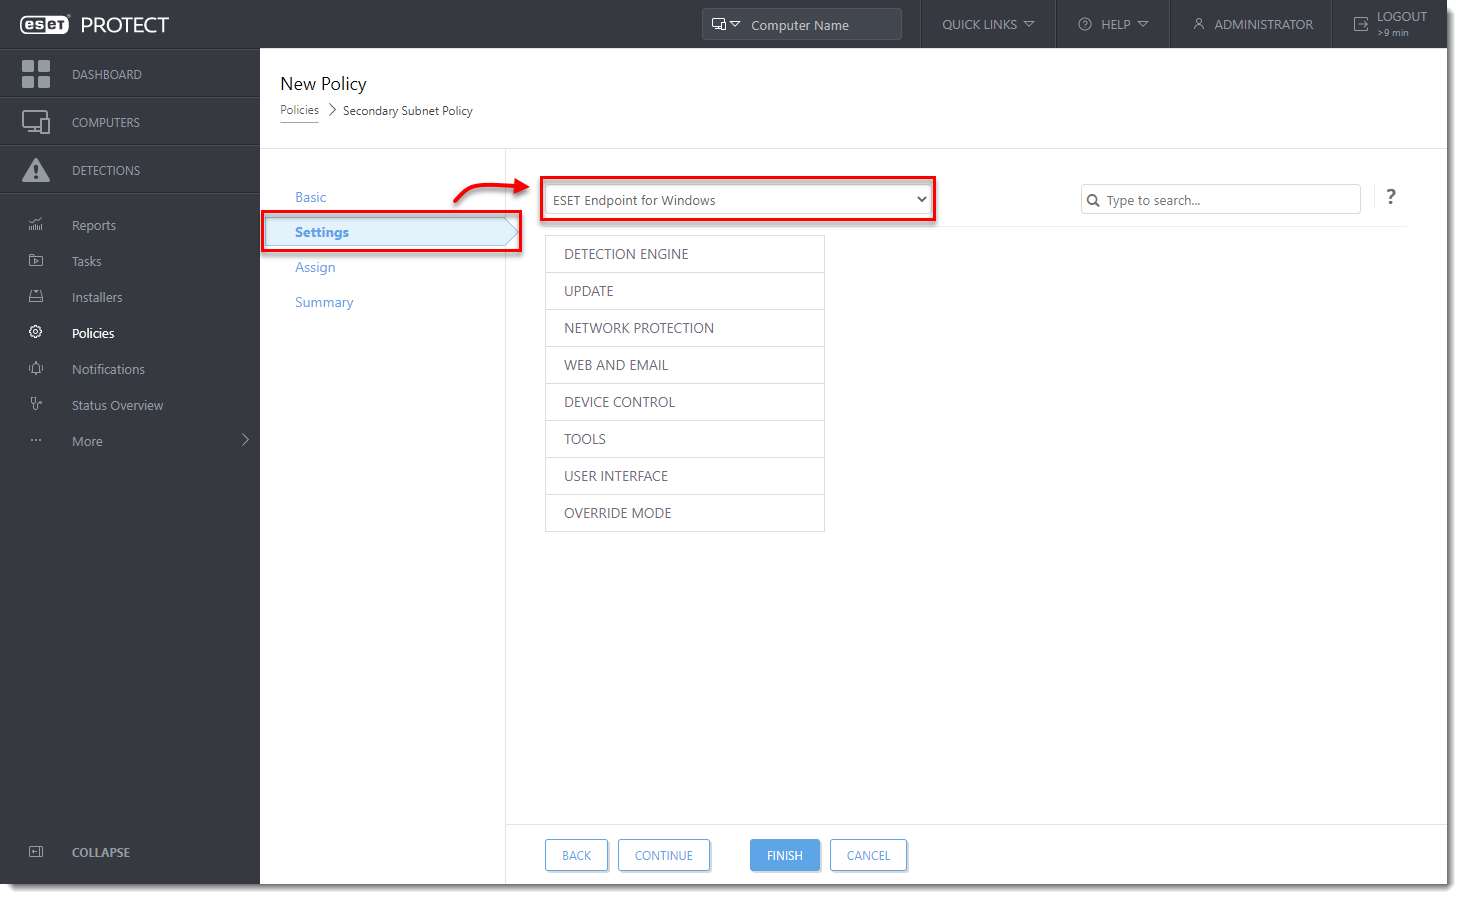
Figure 3-9 - Expand Tools and click Proxy server.
- Make sure that Use proxy server is not enabled, and that the setting is applied by the Policy - the blue dot is selected (in this example, we are leaving all other settings in their default state).
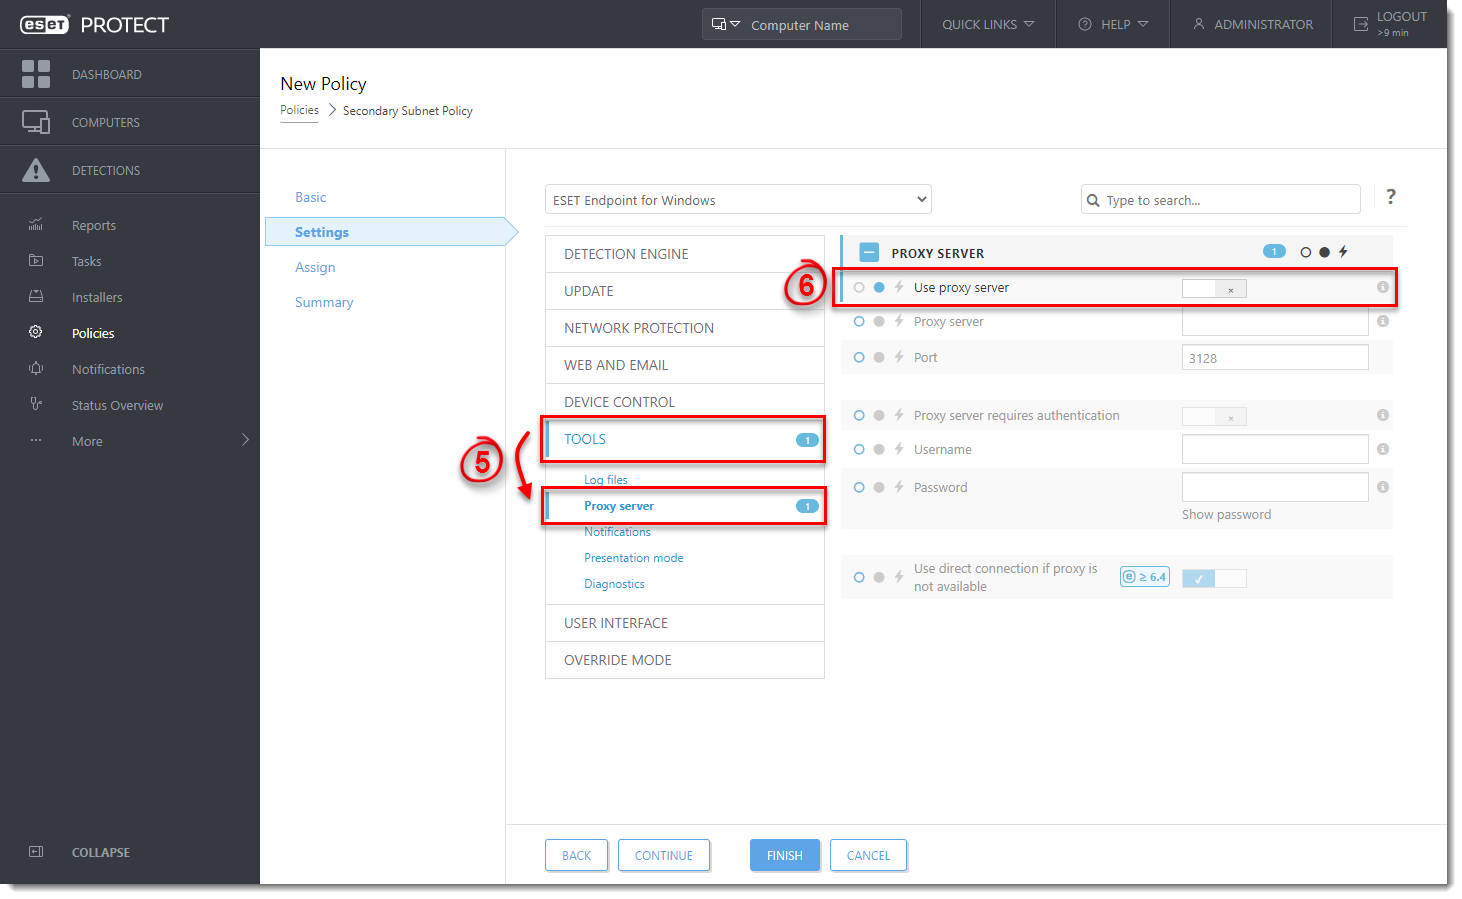
Figure 3-10 - Click Assign and click Assign.

Figure 3-11 - Select the check box next to the Off Network dynamic group you created in part II and then click OK.
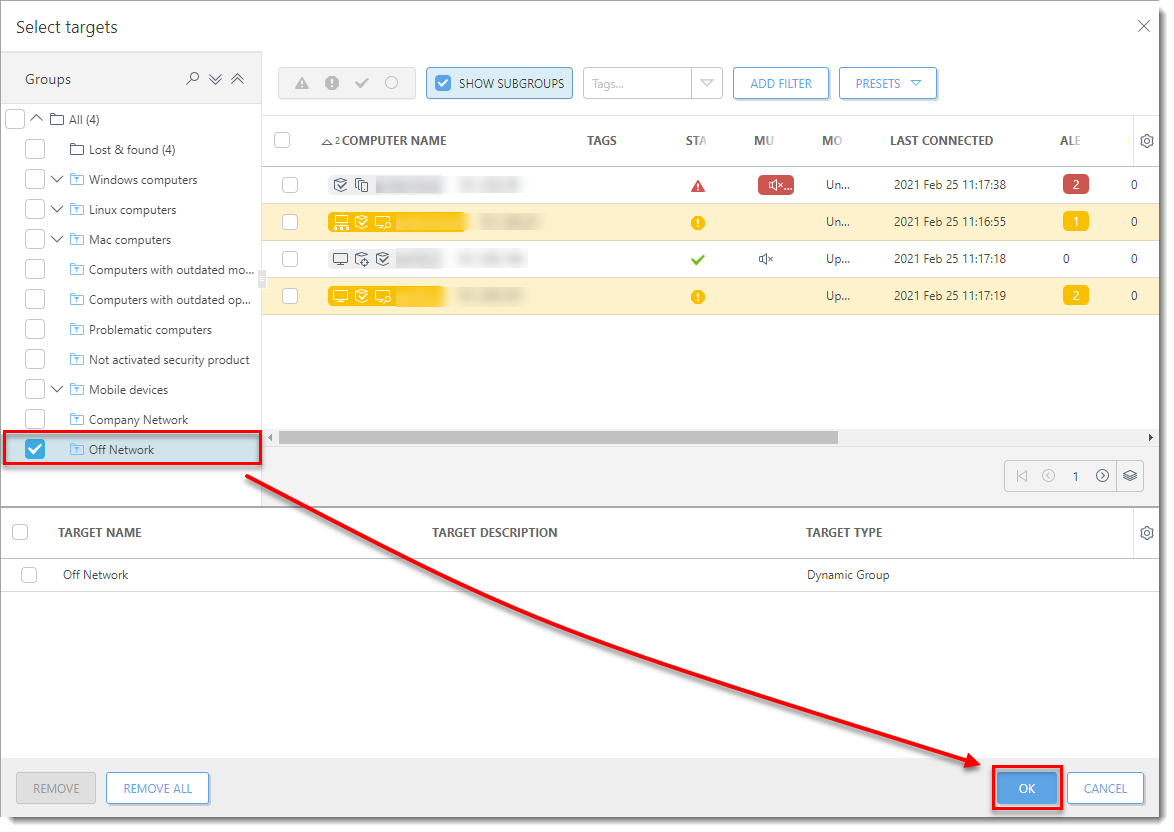
Figure 3-12 - Click Finish.