Issue
- Restore, restore and exclude, or delete objects in the quarantine from the ESET PROTECT or ESET PROTECT On-Prem Web Console
- Create a quarantine Management task
- Manage the quarantine on an individual client workstation
Solution
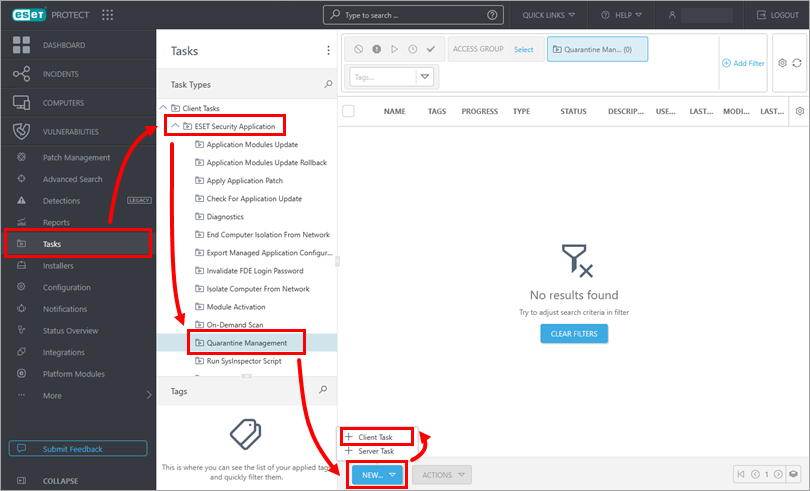
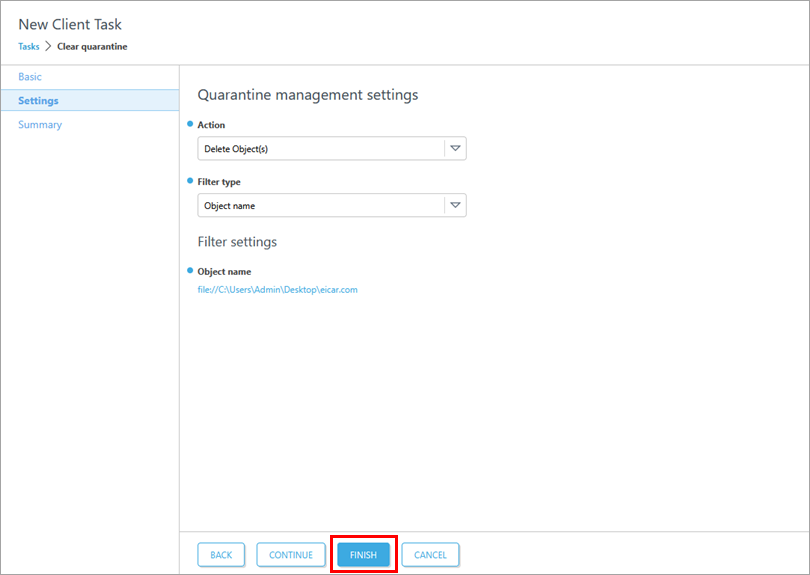
Create a quarantine Management task
-
Click Tasks → ESET Security Application → Quarantine Management → New → Client Task.
-
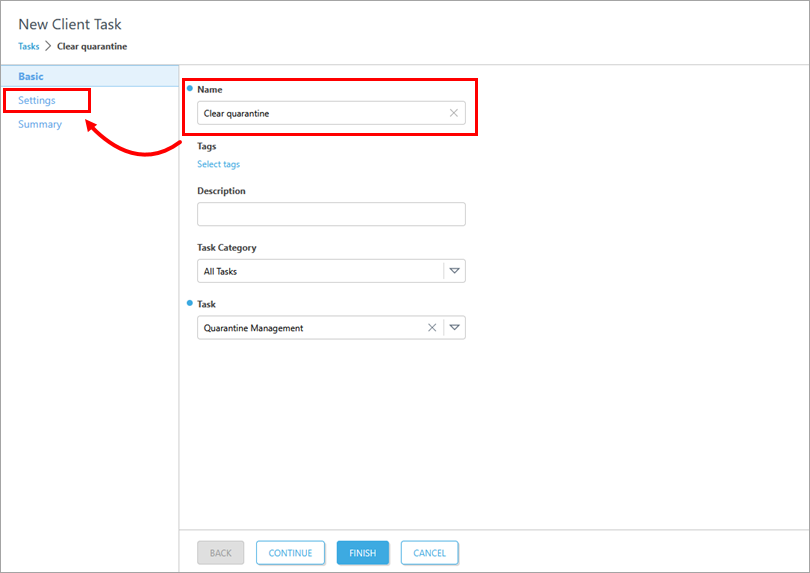
Type a name into the Name field and click Settings.
-
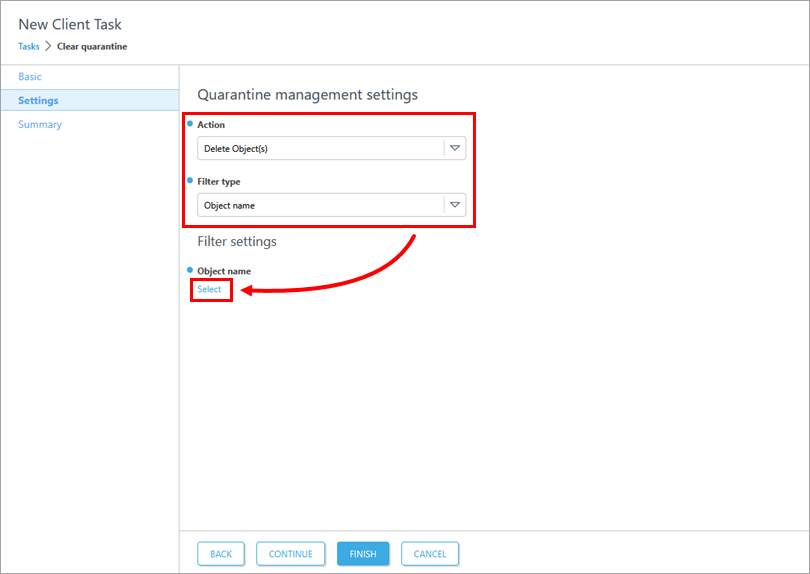
Select the Action and Filter type from the drop-down menus. In this example, Delete Object(s) and Object name are selected. Click Select.
-
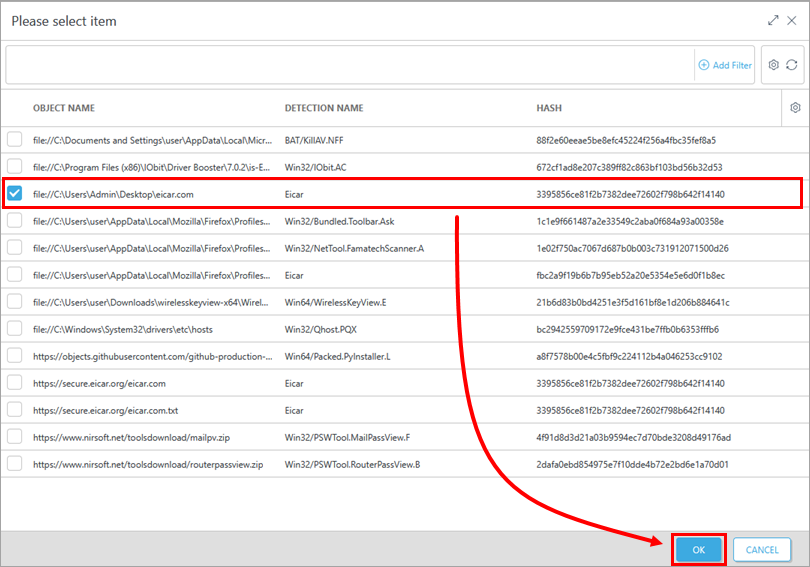
Select the Object name from the list of quarantined files and click OK.
-
Click Finish.
-
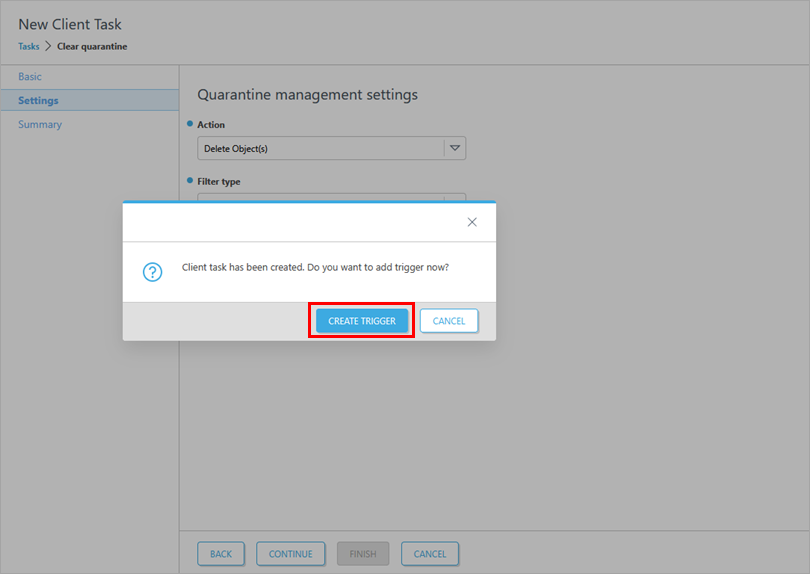
Click Create Trigger to create a trigger and add target computers or groups to execute a Client Task.
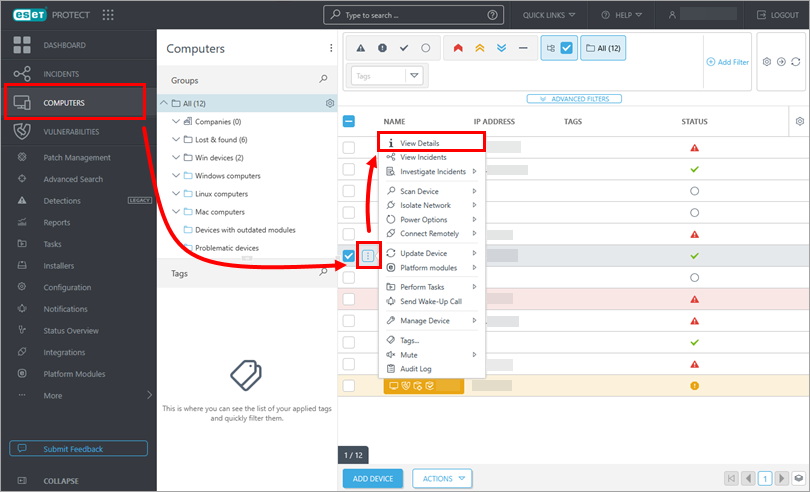
Manage quarantine on an individual client workstation
-
Click Computers, click the menu icon (three dots) next to a computer you want to manage, and click View Details.
-
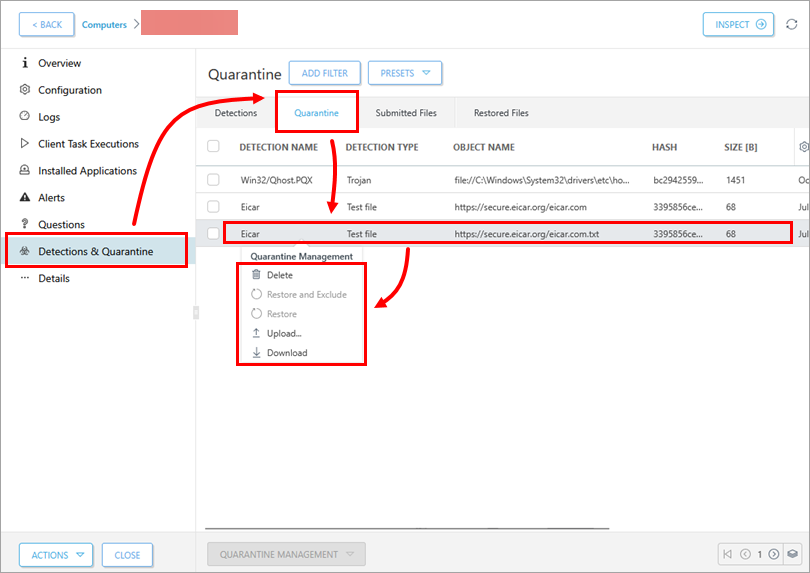
Click Detections & Quarantine → Quarantine. Click a record you want to manage and select an option from the Quarantine Management context menu.
-
Finish the process based on the selected option.