Issue
- We recommend you configure Citrix and other terminal servers using these parameters when running ESET Server Security for Microsoft Windows Server
Details
Click to expand
ESET server products can run in virtualized environments (such as Citrix) when using default settings. Make a few small changes to minimize the impact ESET products have on your virtual machine’s performance.
The ESET Server Security main program window normally starts every time a remote user logs in to the server and creates a terminal session. This is usually undesirable on terminal servers.
Solution
- Disable the ESET Server Security graphic user interface (GUI) to prevent it from starting up every time a user logs in
- Scan file execution events and local drives only (Citrix servers only)
- Add needed exclusions (Citrix servers only)
I. Disable the graphical user interface (GUI)
A. Enable silent mode on the server
Assign the Visibility - Silent mode policy on ESET Server Security in ESET PROTECT On-Prem to enable silent mode on a server.
-
Open ESET PROTECT On-Prem in your web browser and log in.
-
Click Policies, expand Built-in Policies, select ESET File Security for Windows Server and select the check box next to Visibility - Silent mode. Click Assign → Assign computers.

Figure 1-1 -
Select the appropriate computer and click OK.
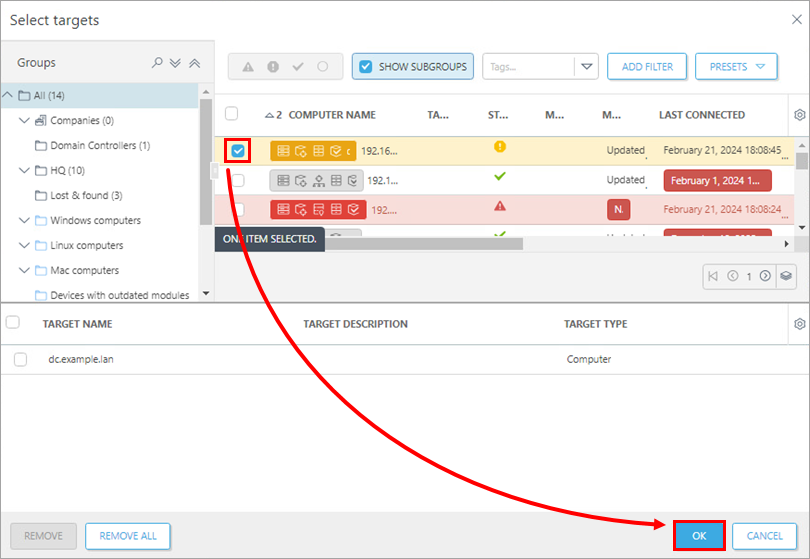
Figure 1-2
B. Manually update individual client workstations using ESET Shell
To see what policies are assigned to a specific group, select that group and click the Policies tab to view a list of policies assigned to the group. See more information about the Policies.
-
Click the Start
 icon, type ESET Shell and click ESET Shell.
If prompted, type in the username and password for the administrative account. If you are opening ESET Shell for the first time, press X to skip the help section.
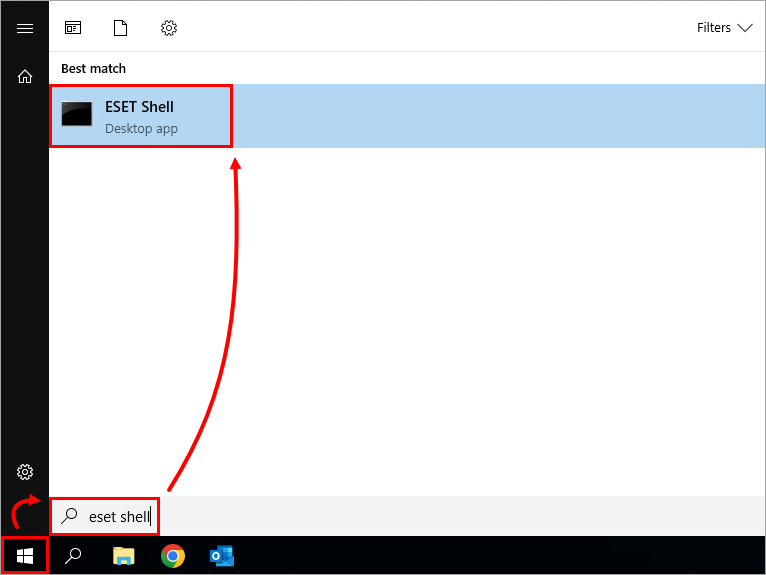
Figure 2-3 -
Type the following command:
set ui ui gui-start-mode none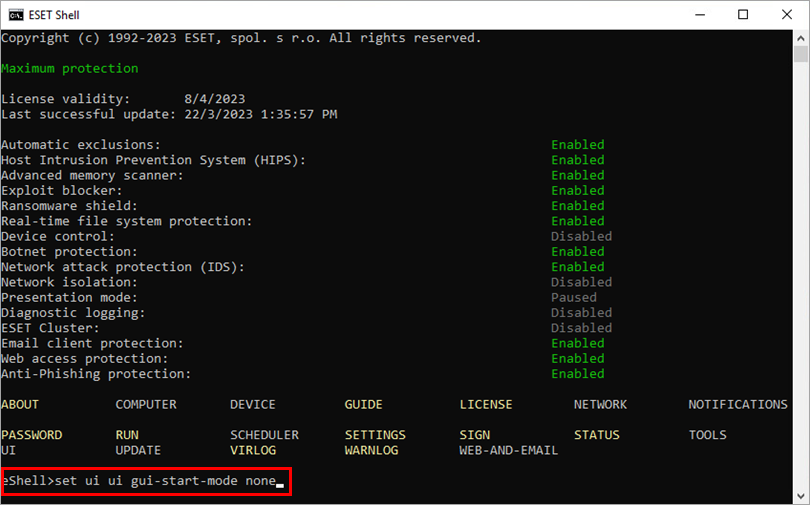
Figure 2-4 -
Press Enter and wait for the command to complete. Close the ESET Shell window.
II. Scan file execution events and local drives only (Citrix servers only)
-
Open the main program window of ESET Server Security for Microsoft Windows Server.
-
Press F5 to open Advanced setup.
-
Click Detection Engine → Real-time file system protection. Click the toggles next to the following four features to disable them. When you are finished, click OK.
- Network drives
- File open
- File creation
- Removable media access

Figure 2-1
Continue to Section III to add exclusions for a Citrix server.
III. Add needed exclusions (Citrix servers only)
-
To open ESET Server Security, click the Start
icon, navigate to ESET and click ESET Server Security. -
Press the F5 key to open Advanced setup.
-
Click Detection Engine, expand Exclusions, and click Edit next to Performance exclusions.
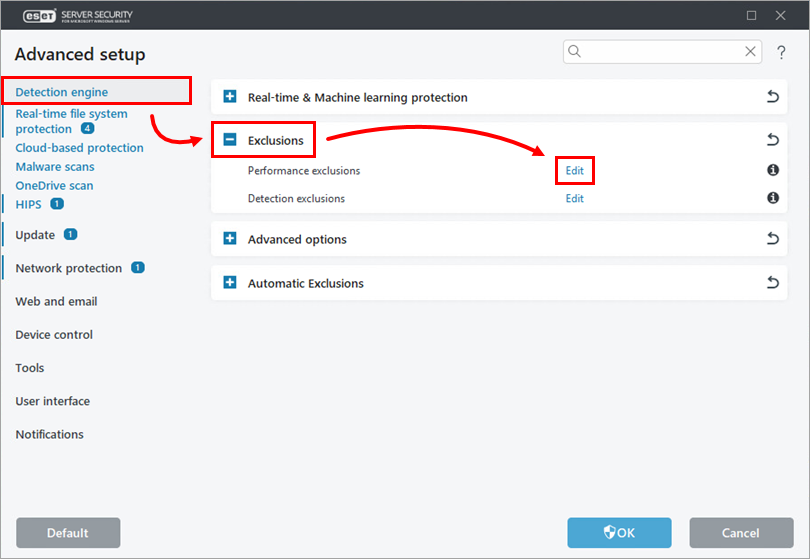
Figure 3-1 -
Click Add, type C:\Program Files\Citrix\ into the Path field and click OK → OK → OK.
To add additional file paths to exclude, type \ at the end of the path. ESET will treat \ as a wildcard, and all children of the original path will be excluded.
View the Citrix Consolidated list of Antivirus exclusions.

Figure 3-2