Solution
Introduction
This article describes how to configure the Netasq IPSec VPN Client™ to authenticate users against an ESA Server. Before proceeding, verify that you've installed the RADIUS Server component of ESET Secure Authentication and can access the RADIUS service that allows external systems to authenticate users.
Before the Netasq IPSec VPN Client™ can use the ESA Server to authenticate users via RADIUS, it must be set up as a RADIUS client on the ESA Server. Next, your server running the ESA RADIUS service must be setup as a RADIUS Server on the Netasq IPSec VPN Client™. Once these configurations have been specified, you can start logging into your Netasq IPSec VPN™ using ESA OTPs.
Step I - RADIUS client configuration
The RADIUS protocol requires that access requests to RADIUS servers include the IP address for the RADIUS client (for example, the Netasq IPSec VPN Client™).
To allow the Netasq IPSec VPN Client™ to communicate with your ESA Server, you must configure it as a RADIUS client on your ESA RADIUS Server:
- Log in to ESA Web Console.
- Navigate to Components > RADIUS and locate the hostname of the server running the ESA RADIUS service.
- Click the hostname, then click Create New Radius Client.
- In the Basic Settings section:
- Give the RADIUS client a memorable name for easy reference.
- Configure the IP Address and Shared Secret for the Client so that they correspond to the configuration of your VPN appliance. The IP address is the internal IP address of your appliance. If your appliance communicates via IPv6, use that IP address along with the related scope ID (interface ID).
- The shared secret is the RADIUS shared secret for the external authenticator that you will configure on your appliance.
- In the Authentication section apply the settings shown in Figure 1-1 below.
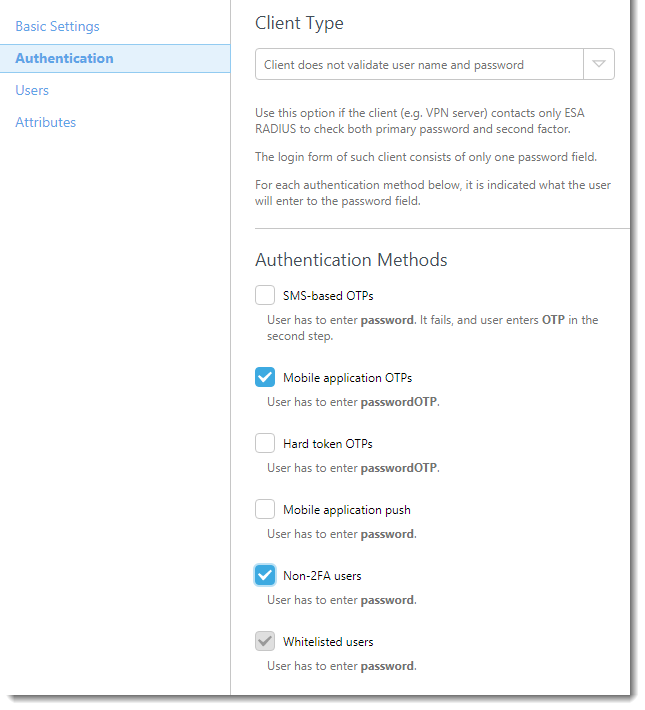
Figure 1-1
ESA has now been configured to communicate with the Netasq IPSec VPN Client™. You must now configure the Netasq IPSec VPN Client™ to communicate with the ESA Server. First, create a new authentication scheme, then configure the settings for your RADIUS server.
- Open the Netasq Web GUI and navigate to Users→ Authorization Portal → available methods. Add the Radius method and set the server address to the IP address of the server where ESET Secure Authentication is installed.
- Navigate to Users → VPN access privileges → Default authentication method and select Radius. You can set this parameter for individual users under Users → VPN access privileges → Rules for users.
Step II - VPN Tunnel Configuration
Use your Active Directory password and Token ID, without any spaces, to complete the following steps:
Create a new Certificate Authority (CA)
- Navigate to Objects → Certificates and click Add → Add root CA.
- Follow the instructions from the Wizard to create a CA.
- Navigate to Objects→ Certificates → Add→ Add a server certificate and select your newly created CA as the default server certificate for Netasq.
- Navigate to VPN→ IPSec VPN→ Peers, select Add→ New anonymous (mobile) peer.
- Select Certificate → Xauth (iPhone) and then select your new CA.
Define Tunnel settings
- Navigate to VPN → IPSec VPN → Encryption Policy → Tunnels → Add → New Policy
- Select Mobile peer in the Mobile peer used field and select the objects to which the user has access in the Local resources field. When you are finished, click Activate.
- Navigate to User → VPN → IPSec VPN → Peers and click Add→ New anonymous (mobile) peer.
- Select Certificate → Xauth (iPhone) and then select your new CA.
- Navigate to VPN → IPSec VPN → Encryption Policy → Add → New policy.
- Select Mobile peer in the Mobile peer used field and select the objects to which the user has access in the Local resources field. When you are finished, click Activate.
- Navigate to VPN → VPN Access Privileges → VPN Access and add a rule to allow access for the user.
Activate notifications
- Navigate to Notifications → Email alerts → Configuration.
- Select Enable e-mail notification and enter the appropriate parameters for your email application.
- Click Add new recipient group under Recipients and then add users that you want to receive email notifications.
User Enrollment
- Navigate to Users → Authentication → Captive Portal.
- Enable the Captive Portal and select the check box next to external interfaces.
- Under Certificate options enter the private key for the certificate that you created earlier.
- Under External Interfaces, select Allow Web enrollment for users. Create new certificates for users under Advanced properties and specify the user group to assign the certificate to.
Certificate Assignment
- Navigate to the Captive Portal (https://netasq_IP_address/auth).
- Log into the user account for which you want to get a certificate.
- Navigate to the Certificate section and get the certificate for your user.
- Navigate to Users → Enrolment and approve any outstanding requests.
- In the Captive Portal, navigate to the Certificate section and click Download Certificate.
- Once the certificate is finished downloading, click Export to save it to a file.
Step III - Testing the Connection
Configure your VPN client as per the screenshots below in order to test your connection:
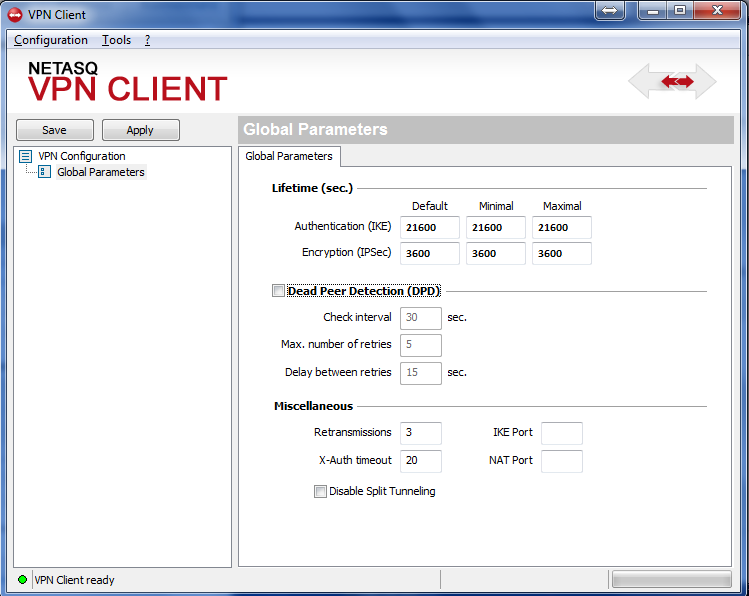
Figure 3-1
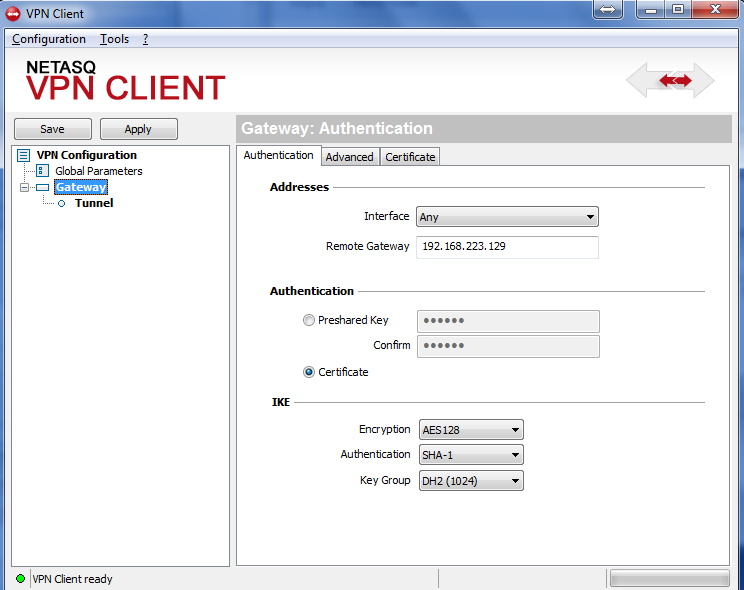
Figure 3-2
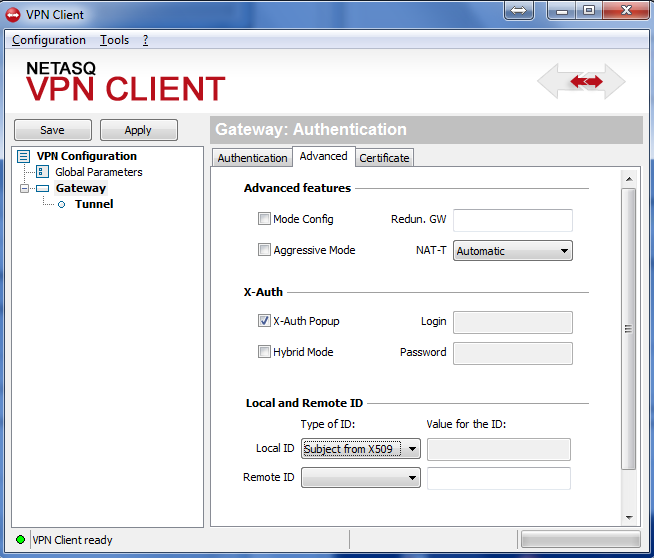
Figure 3-3
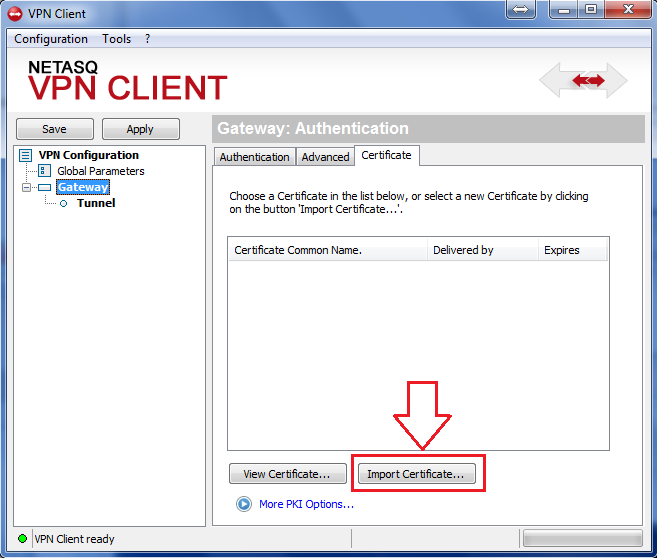
Figure 3-4
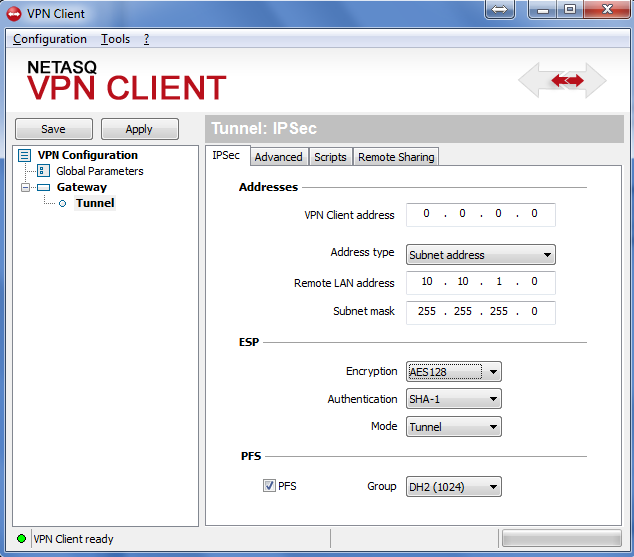
Figure 3-5
Troubleshooting
If you are unable to authenticate via the ESA RADIUS server, ensure you have performed the following steps:
- Run a smoke test against your RADIUS server, as per the Verifying ESA RADIUS Functionality document.
- If no faults were fixed and you are still unable to connect, revert to an existing sign-in configuration (that does not use 2FA) and verify that you are able to connect
- If you are still able to connect using the old settings, restore the new settings and verify that there is no firewall blocking UDP 1812 between you VPN device and your RADIUS server
- If you are still unable to connect, contact ESET technical support.