Solution
-
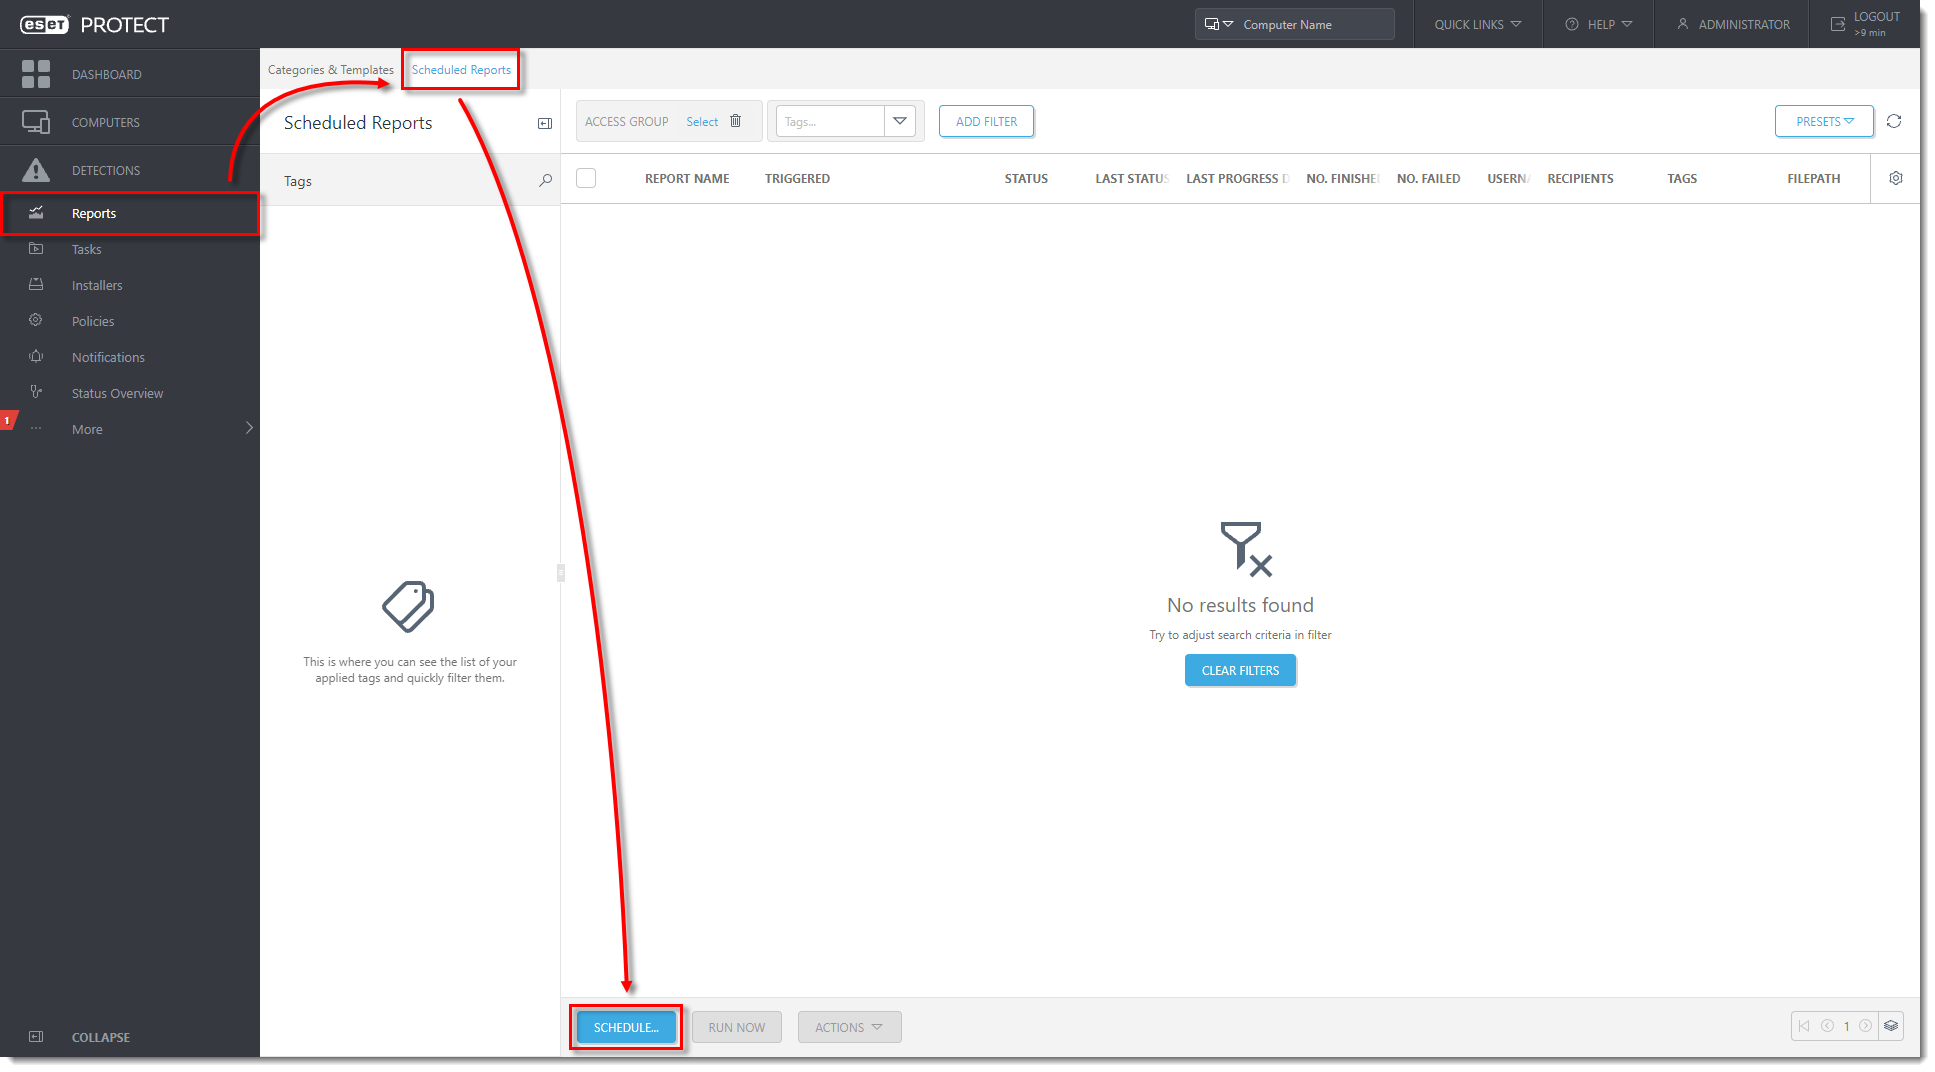
or Open ESET PROTECT in your web browser and log in.
- Click Reports → Scheduled Reports → Schedule.
Click the image to view larger in new window
-
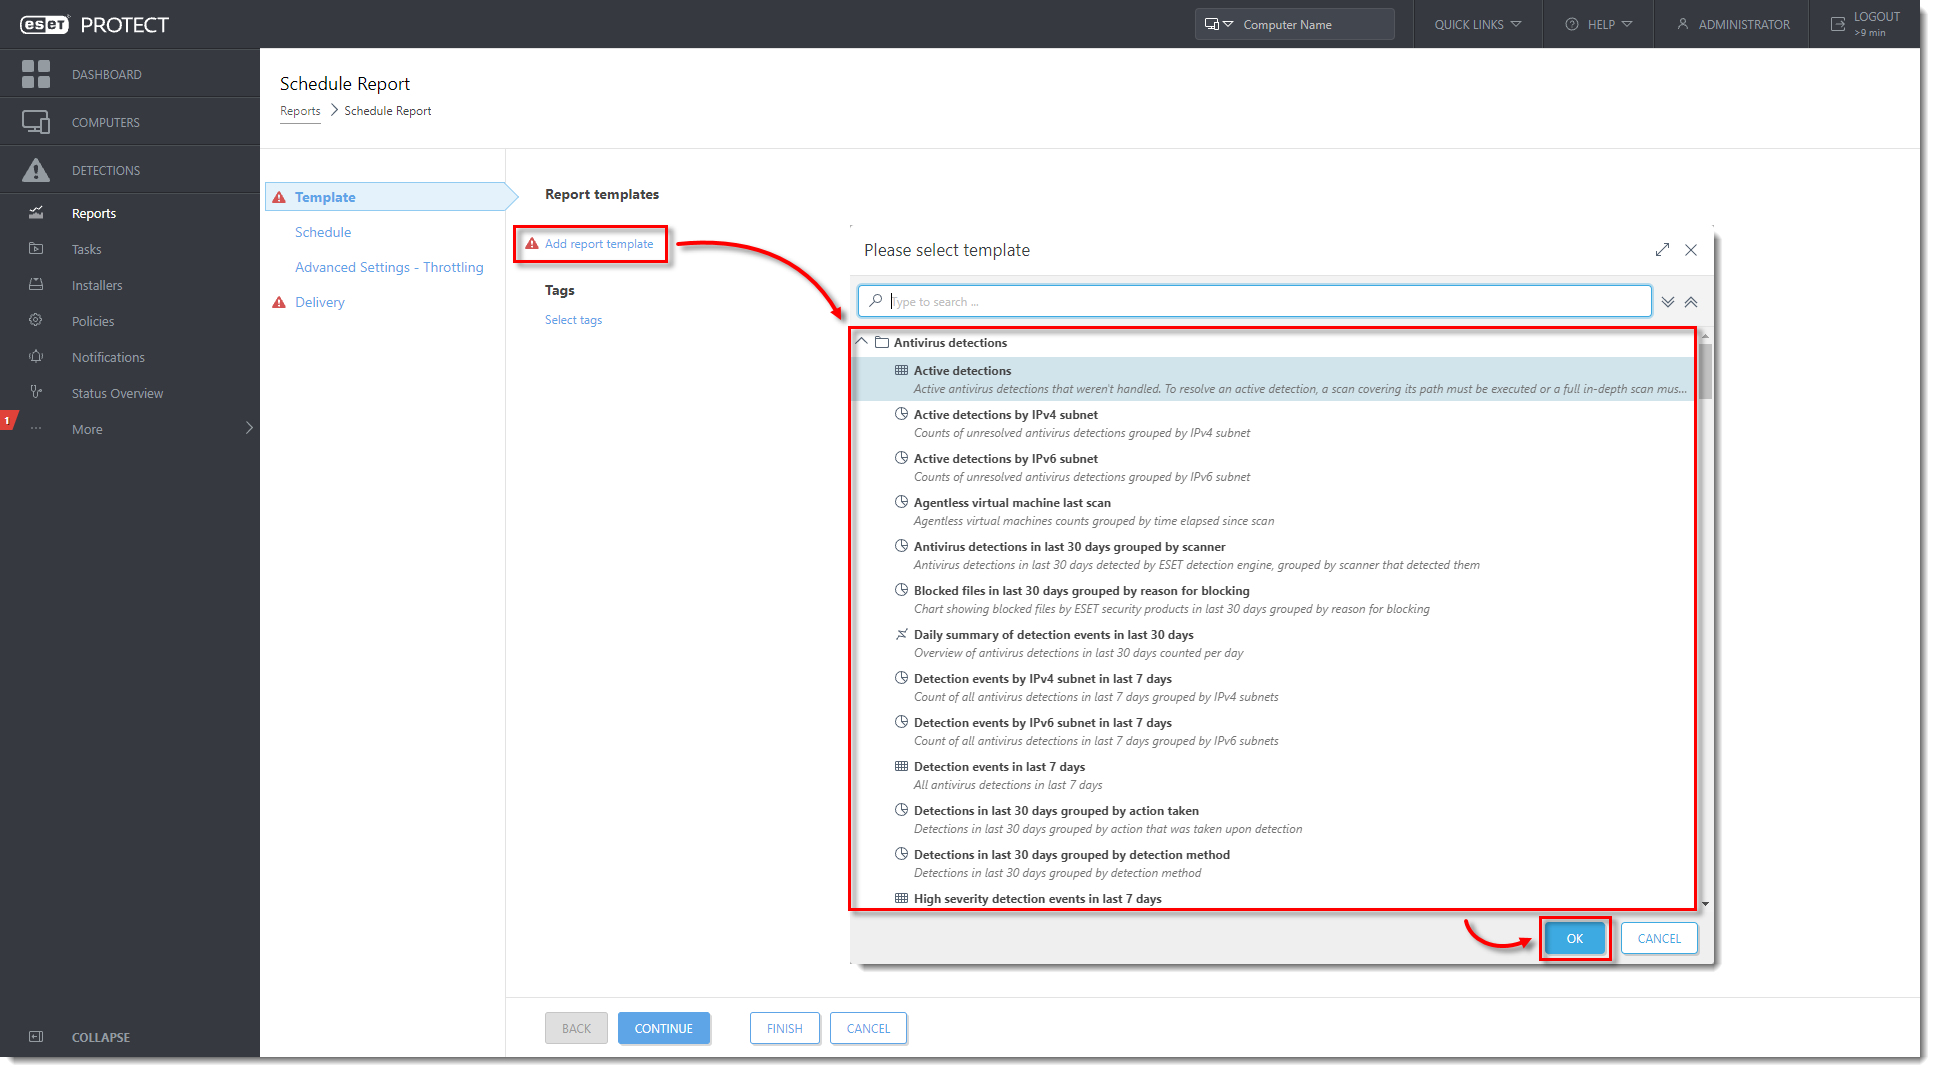
Click Add report template to add a report template that you want to be scheduled. Select the desired template from the list (in this example, Active detections template has been selected) and click OK.
Click the image to view larger in new window
-
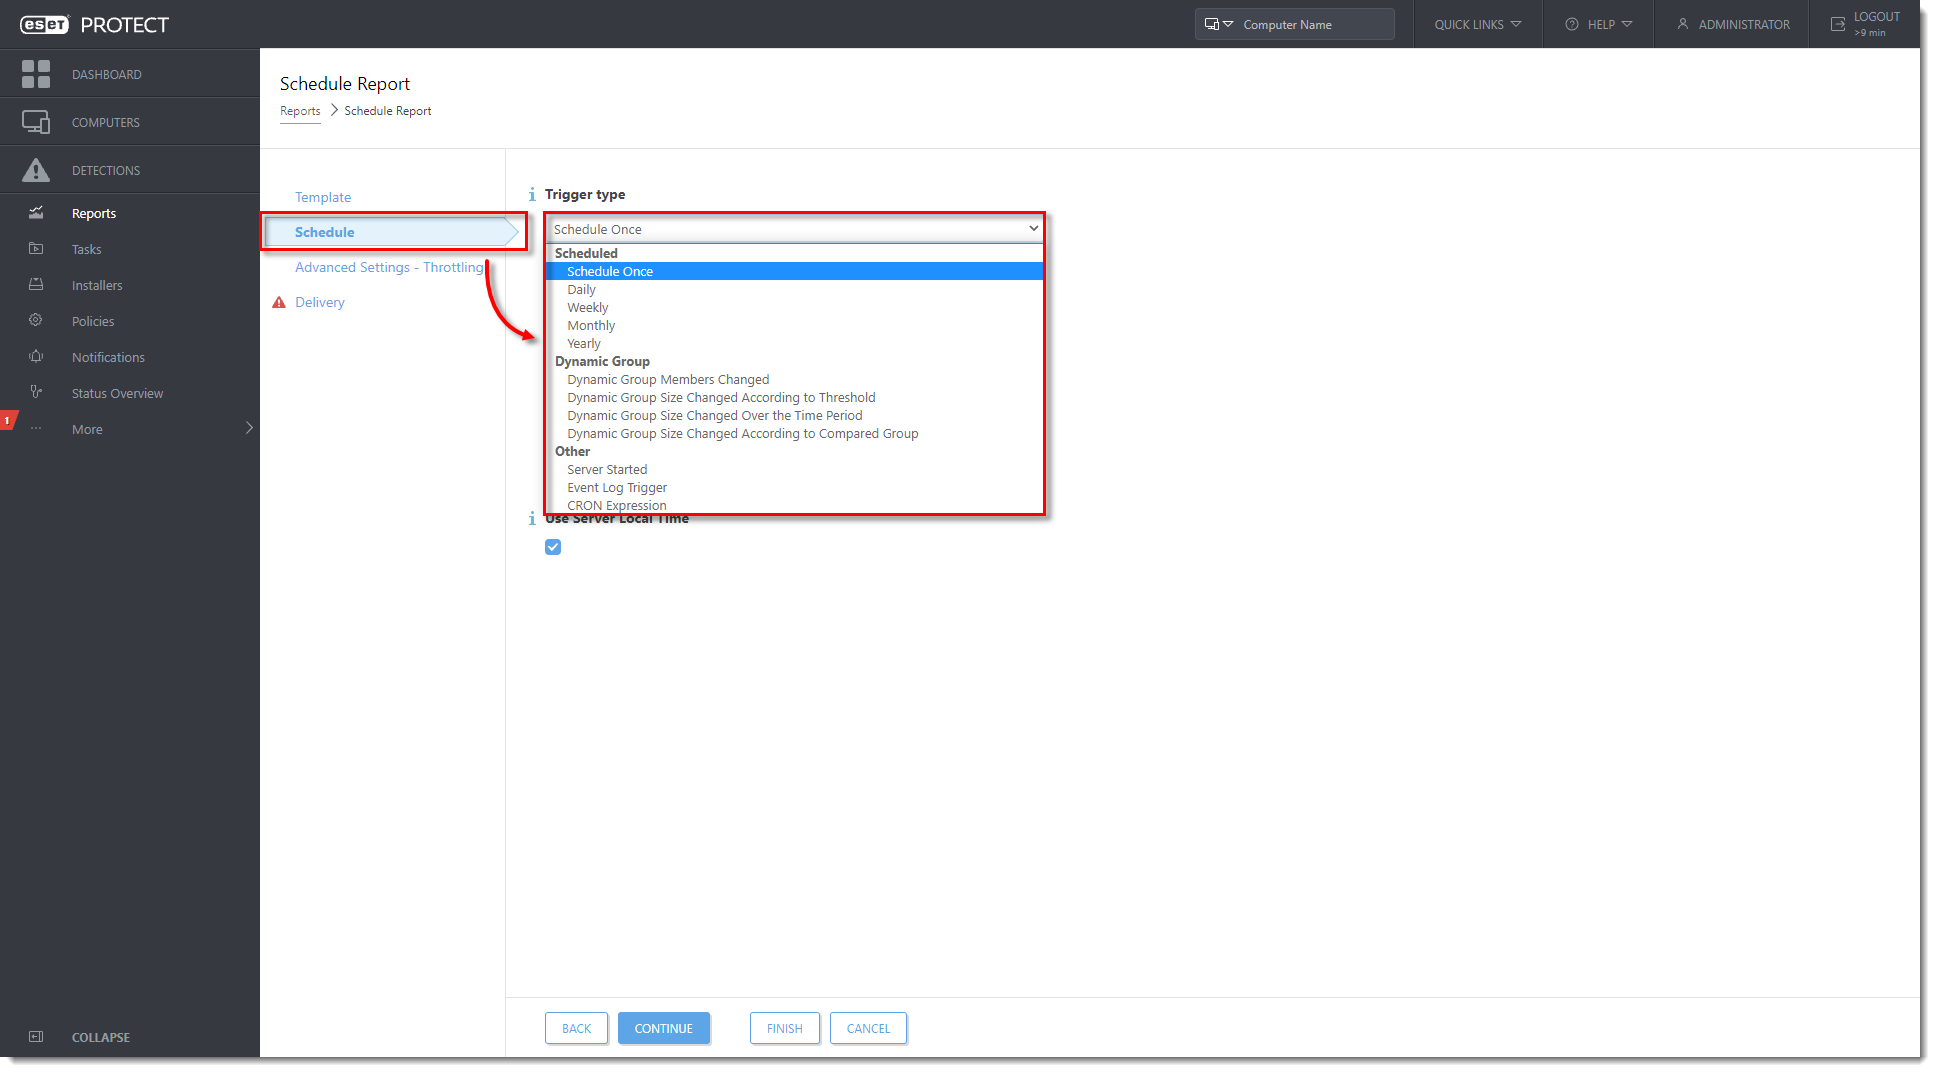
Click Schedule and select the trigger type from the Trigger type drop-down menu.
Click the image to view larger in new window
-
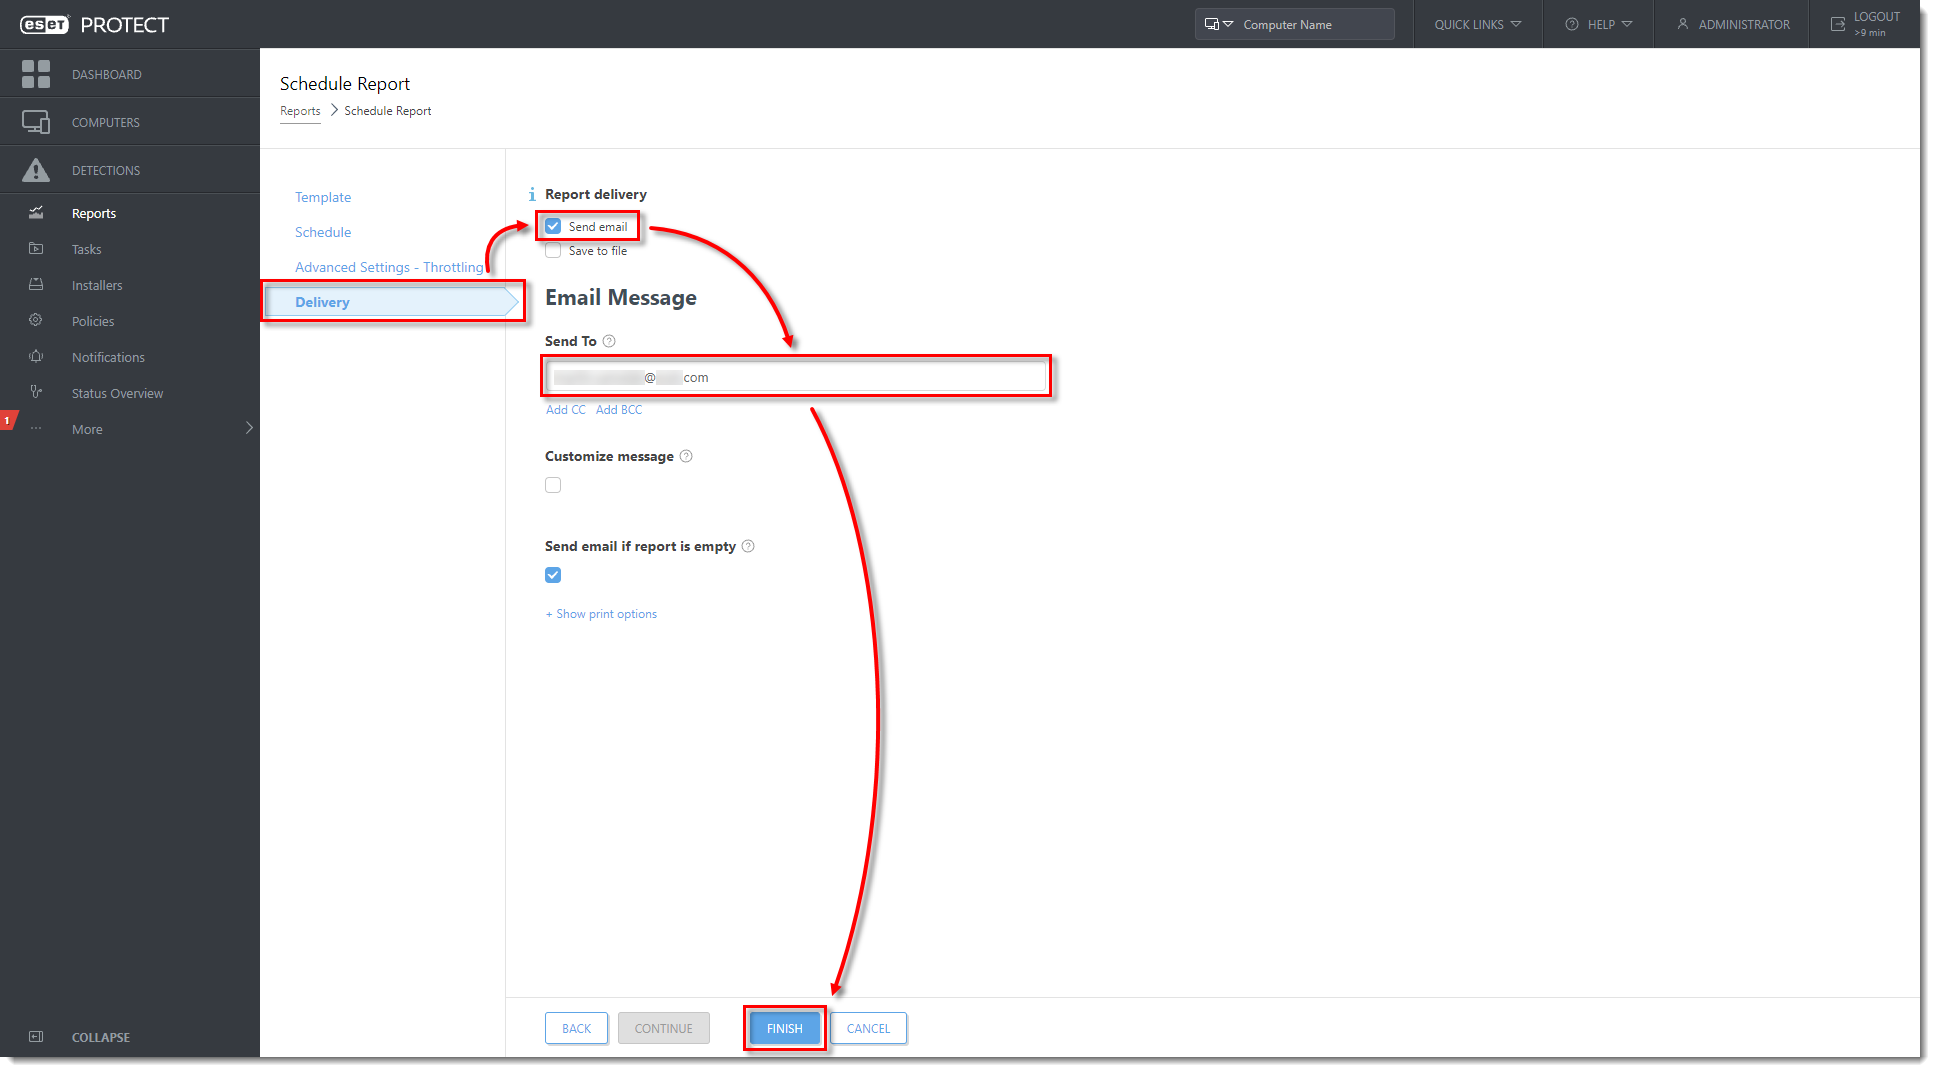
Click Delivery, select the Send email check box under the Report delivery and type the email that you want the reports to be sent to into the Send to field. Click Finish to save your scheduled report.
Click the image to view larger in new window