Issue
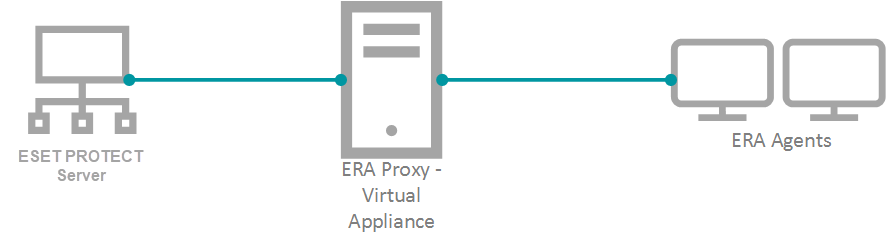
- You have an ESET Remote Administrator (ERA) 6.5 environment running with an ERA Proxy on a Virtual Appliance, and you want to upgrade to ESET PROTECT On-Prem, which does not support ERA Proxy
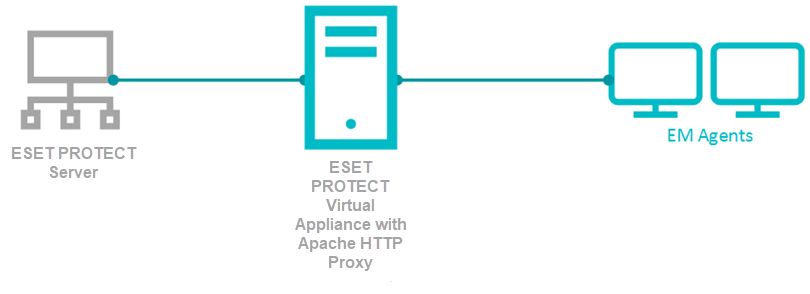
- You want to enable an Apache HTTP Proxy on a Virtual Appliance to substitute the role of an ERA Proxy in ESET PROTECT On-Prem
- Migrate from ERA Proxy (Windows) to Apache HTTP Proxy in ESET PROTECT On-Prem
Details
ESET PROTECT On-Prem is the renamed ESET Security Management Center (ESMC), the new name is used since version 8.0. It uses the agent/server communication protocol introduced with ESMC 7.0. The communication protocol uses TLS and HTTP2 protocols to go through proxy servers, self-recovery features, and a persistent connection that improves overall communication performance.
ESET provides a pre-configured Apache installer. The user can also use other proxy solutions (besides Apache HTTP Proxy) that fulfill the following conditions:
- Can forward communications
- HTTP CONNECT
- Can work without authentication (the ESET Management Agent does not support authentication with proxy)
The configuration of other proxy solutions is not provided or supported by ESET. Other solutions may not support caching of ESET LiveGuard Advanced communications.
The ESET PROTECT On-Prem Virtual Appliance contains a correctly pre-configured Apache HTTP Proxy. We recommend you use the new appliance instead of upgrading the old one.
Solution
- Prepare your ERA 6.x environment
- Deploy the new Virtual Appliance and connect it to your ESET PROTECT On-Prem Server
- Assign a transition policy to a test client
- Upgrade ERA Agents on client computers
- Remove the ERA Proxy address from the list of servers
Connection limitations
- The ERA 6.x Proxy component is discontinued in ESET PROTECT On-Prem.
- ERA 6.x Agents can connect to the ESET PROTECT On-Prem Server.
- The ESET Management Agents cannot connect to the ESET PROTECT On-Prem Server via ERA Proxy or the ERA 6.x Server.
- Do not upgrade ERA 6.x Agents before a proper proxy solution is set up.
- It is not possible to run the Agent deployment task on clients with an ESET PROTECT On-Prem Server. The Agent deployment task can only reach the ESET PROTECT On-Prem Server using Apache HTTP Proxy.
I. Prepare your ERA 6.x environment
- Back up your ERA Server (for example, backup database, CA and certificates).
- Run the Component upgrade task on your ERA Server (as target) to upgrade the ERA Server 6.5 to ESET PROTECT On-Prem Server 8.0. This task updates the server, agent (on the server machine) and web console. When assigning a target for the task, only select the machine with the ERA Server.
- Wait approximately 24 hours to verify the upgraded environment runs smoothly.
II. Deploy the new Virtual Appliance and connect it to your ESET PROTECT On-Prem Server
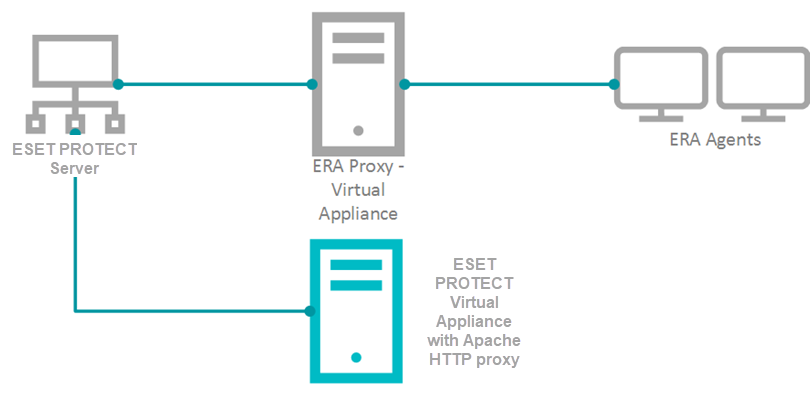
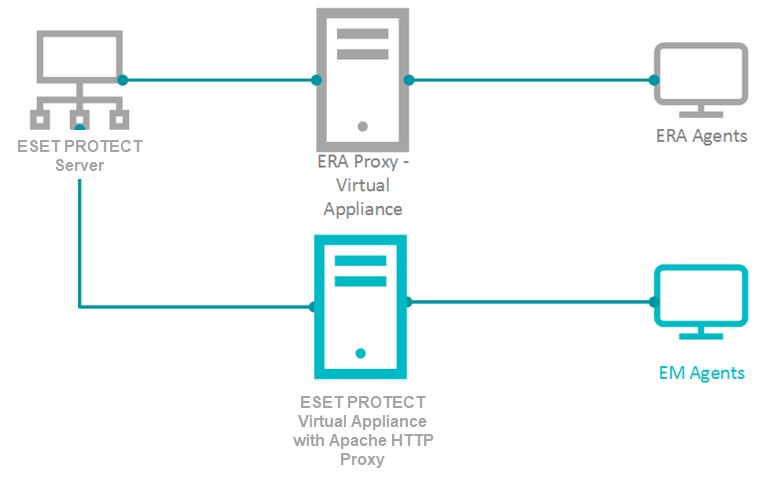
To keep your proxy safe and well configured, replace your old ERA Proxy - Virtual Appliance with the new version. ESET PROTECT On-Prem does not provide a stand-alone proxy configuration as ERA 6.x did. We recommend you deploy a new ESET PROTECT On-Prem Server - Virtual Appliance. The new server is not used as an administrative server but as a proxy. The correctly configured Apache HTTP Proxy is included in the ESET PROTECT On-Prem Virtual Appliance download.
- Download the ESET PROTECT On-Prem Virtual Appliance.
- Deploy the ESET PROTECT On-Prem Virtual Appliance on your hypervisor.
- Configure the new Appliance as an ESET PROTECT On-Prem Server.
-
- You will be prompted for the new password later in the process.
- Enable HTTP Forward Proxy during the configuration.
- Reinstall the ESET Management Agent on the appliance and connect it to the main ESET PROTECT On-Prem Server. Open the virtual machine with your ESET PROTECT On-Prem Virtual Appliance → Enter Management mode → enter your password → Login → Exit to terminal.
- The Agent installer is located at:
/root/eset_installers/Agent-Linux-x86_64.sh
We recommend you use the server-assisted installation. For example:
Replace the hostname and password values with actual values from the main ESET PROTECT On-Prem Server. For more information, refer to the Agent installation - Linux topic in the ESET PROTECT On-Prem Online Help Guide./root/eset_installers/Agent-Linux-x86_64.sh \
--skip-license \
--hostname=10.1.179.36 \
--port=2222 \
--webconsole-user=Administrator \
--webconsole-password=aB45$45c \
--webconsole-port=2223
- If required, you can stop certain services on the new appliance to save resources.
In the Terminal, run the applicable commands:
System V init Systemd service eraserver stopsystemctl stop eraserverservice mysql stopsystemctl stop mysqlservice tomcat stopsystemctl stop tomcatTo prevent ESET PROTECT On-Prem and MySQL services from starting after reboot, disable them:
Systemd systemctl disable eraserversystemctl disable mysqlsystemctl disable tomcat - Modify the Apache HTTP Proxy configuration file /etc/httpd/conf.d/proxy.conf. Use the nano editor in the Terminal or access the file using Webmin. For nano, use the following command:
nano /etc/httpd/conf.d/proxy.conf
- If you have changed the default port (2222) for the agent, find the line
AllowCONNECT 443 2222and change2222to the number of your port.
- Add the hostname or IP address of your ESET PROTECT On-Prem Server to the configuration file. The hostname you add must be exactly the same as the hostname agents use to connect to the ESET PROTECT On-Prem Server. You can also add a ProxyMatch expression.
- Close the file and save the changes.
- Restart the Apache HTTP Proxy service.
systemctl restart httpd
- If you have changed the default port (2222) for the agent, find the line
-
Open ESET PROTECT On-Prem in your web browser and log in.If the new agent is connecting, use it for future maintenance of the proxy machine.
III. Assign a transition policy to a test client
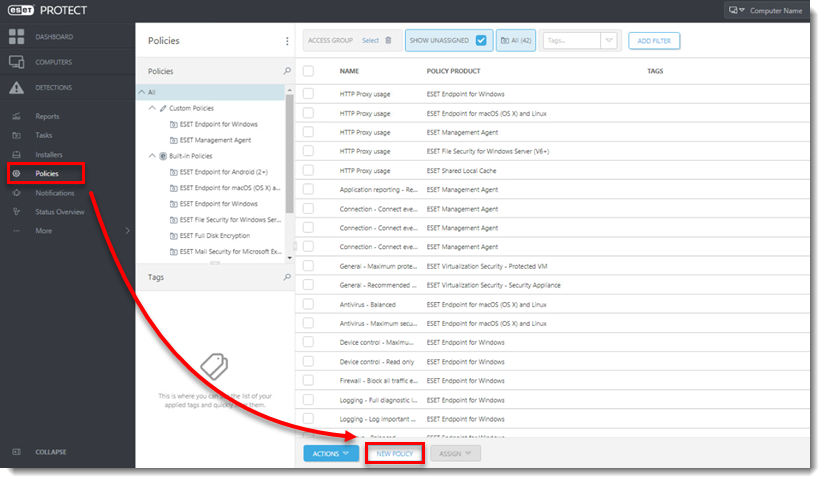
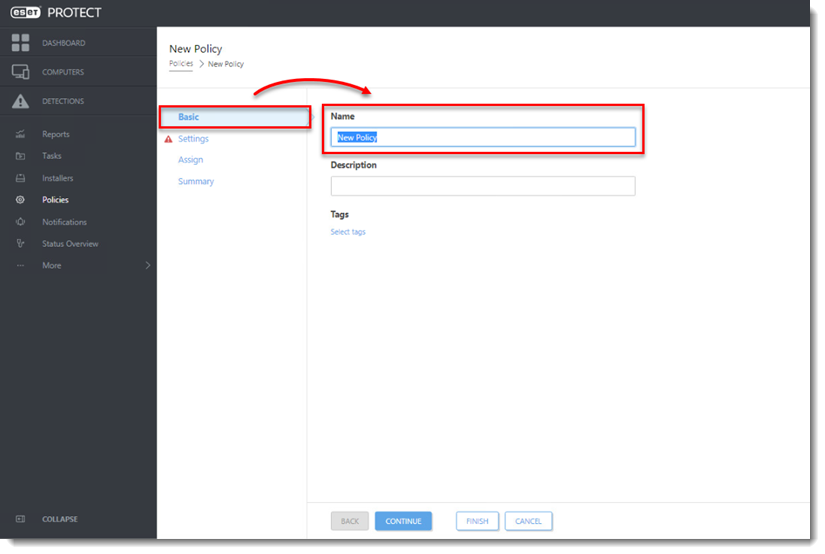
- In the ESET PROTECT On-Prem Web Console click Policies → New Policy.
- Type a Name for the policy.
-
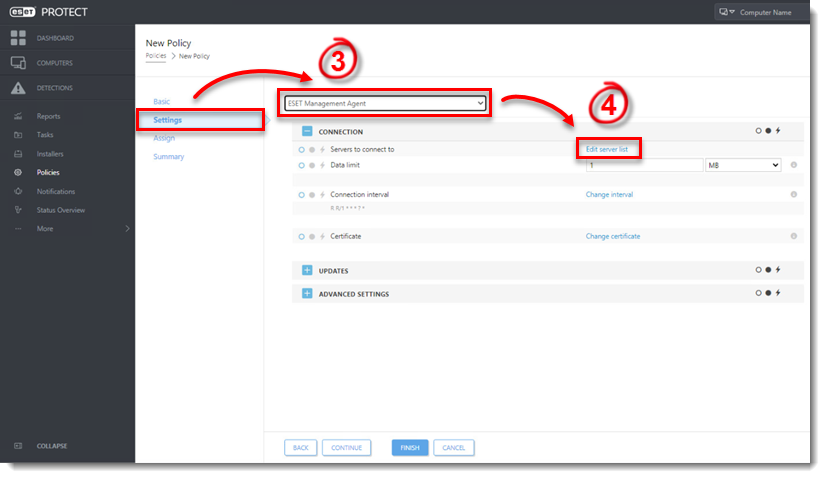
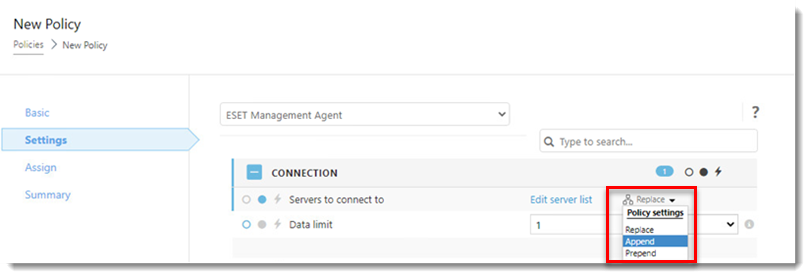
Click Settings, select ESET Management Agent.
-
Expand Connection, click Edit server list next to Server connects to.
-
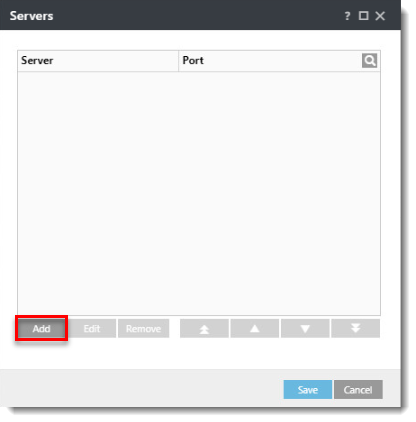
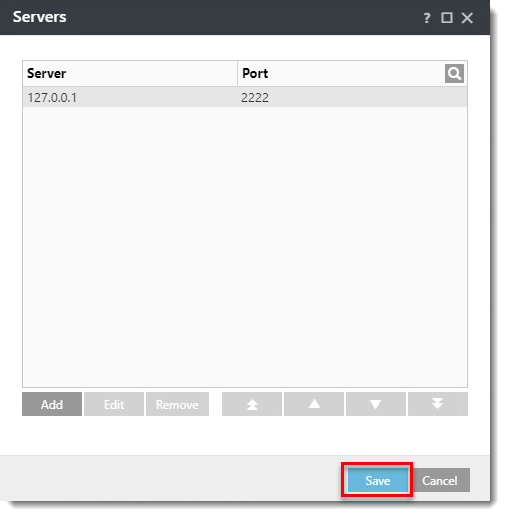
Click Add.
-
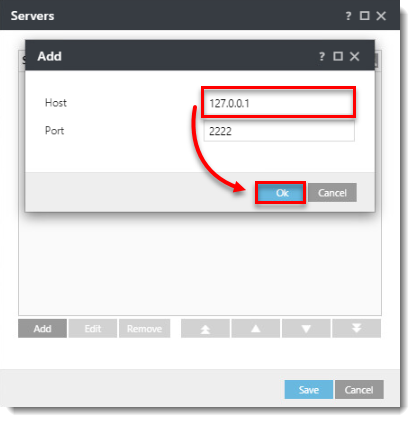
In the Host field, type the applicable address (the address must match what the agent uses in the configuration) of your ESET PROTECT On-Prem Server and click OK.
-
Click Save.
-
In the Policy settings drop-down menu, select Append.
-
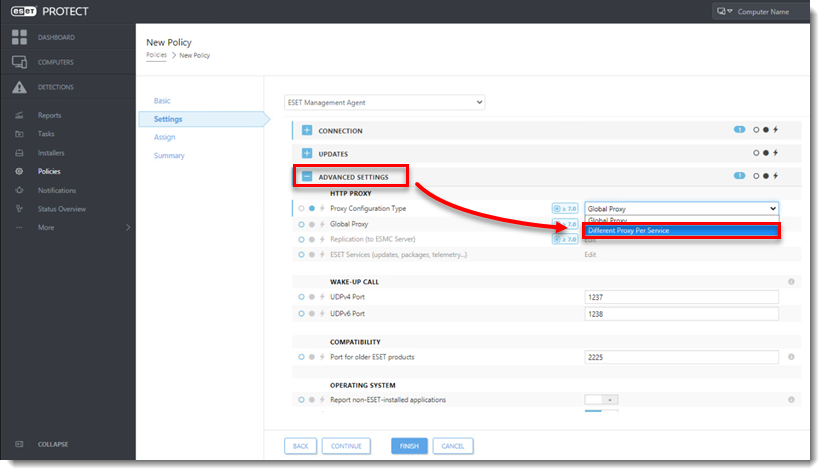
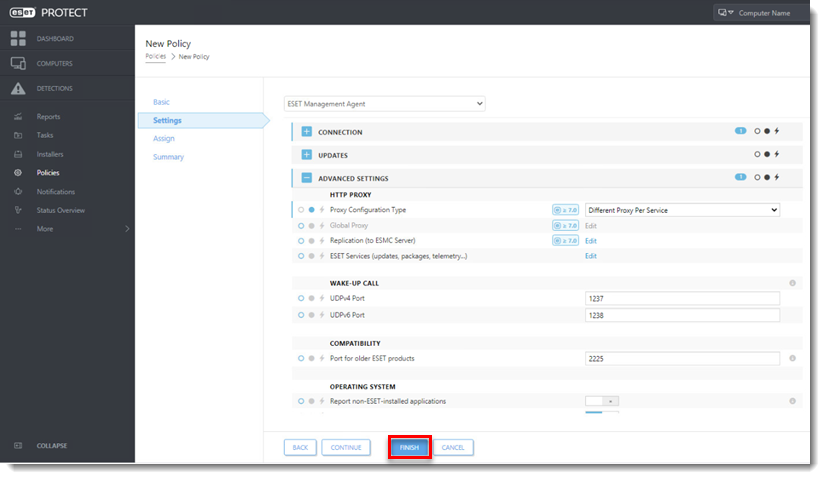
Expand Advanced Settings. In the HTTP Proxy section, select Different Proxy Per Service from the Proxy Configuration drop-down menu.
-
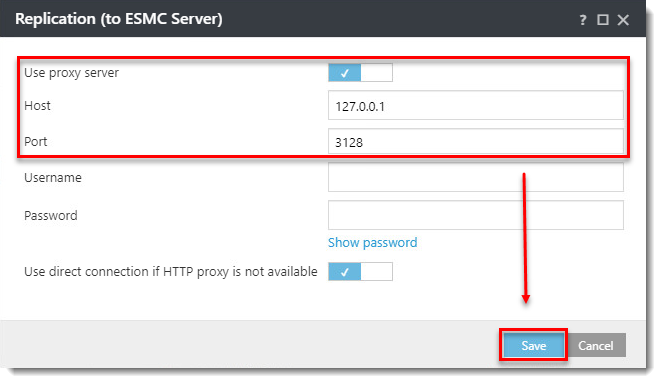
Next to Replication (to ESET PROTECT Server), click Edit.
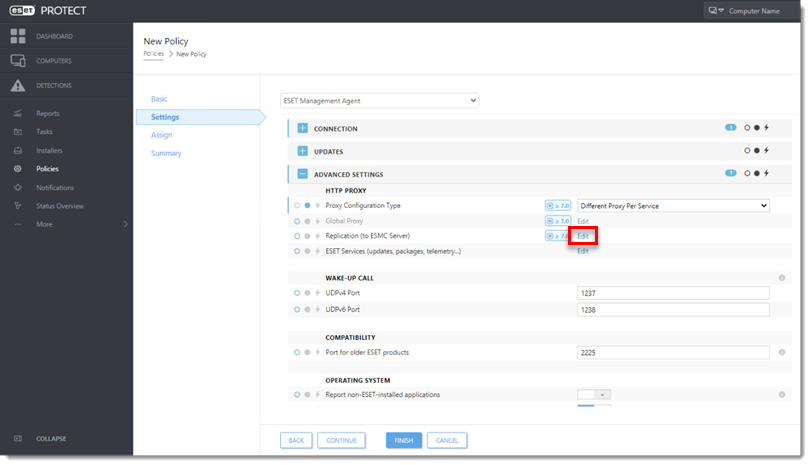
- Enable the Use proxy server. In the Host field, type the IP address of the proxy machine. In the Port field, leave the default value (3128), and click Save.
- Click Finish to save the policy. Do not assign it to a computer yet.
-
Choose one computer that is connected via ERA Proxy and assign the new policy to that test client.
-
After a few minutes, verify the computer is still connecting to the ESET PROTECT On-Prem Server.
IV. Upgrade ERA Agents on client computers
-
Verify the client is connected to the ESET PROTECT On-Prem Server. Continue upgrading the remaining clients.
- Apply the policy from part III to the other computers connected via the ERA Proxy.
-
After the policy is applied, verify all clients are connecting to the ESET PROTECT On-Prem Server.
-
Run an ESET PROTECT Components Upgrade Task.
-
If all clients are connecting to the ESET PROTECT On-Prem Server after the upgrade is finished, proceed to section V. below.
V. Remove the ERA Proxy address from the list of servers
-
Open ESET PROTECT On-Prem in your web browser and log in.
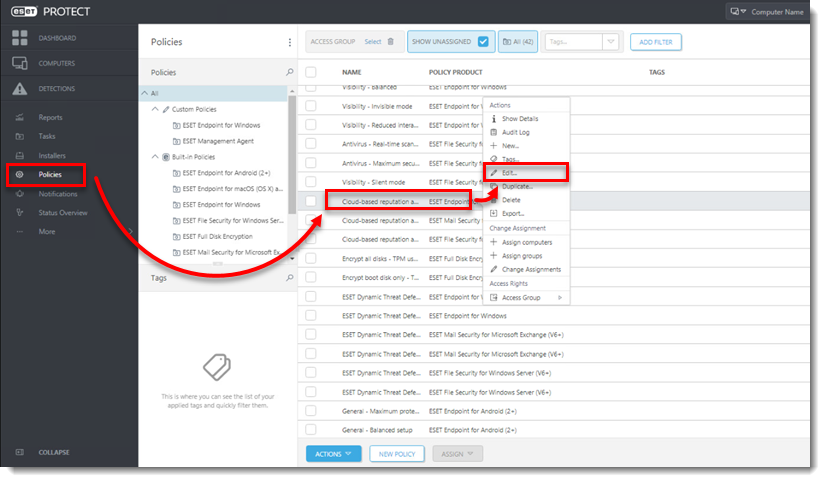
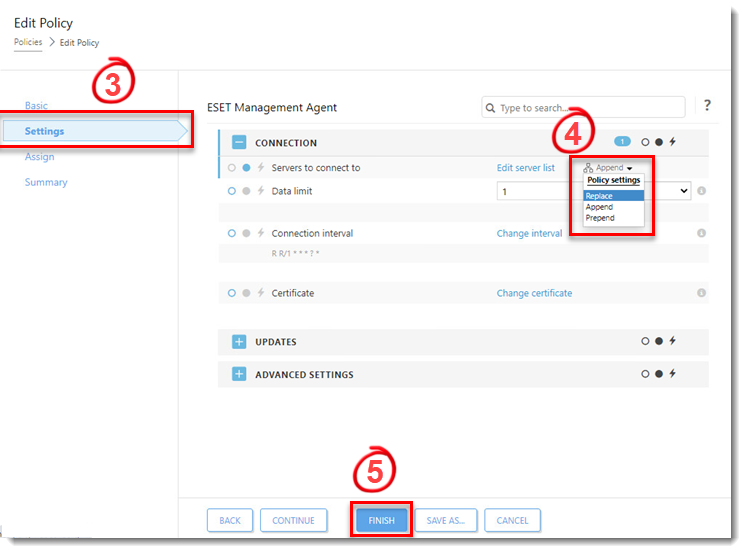
- Click Policies, select the applicable policy and click Edit.
-
Click Settings.
-
In the Policy settings drop-down menu, select Replace.
-
Click Finish to save and apply the policy.
- Remove the ERA Proxy Virtual Appliance (remove the virtual machine from the hypervisor).