Issue
- After contacting ESET Technical Support, you may be asked to recreate your issue and provide us with the ECP logs from your failed activation
- Enable Licensing Advanced Logging - for ESET endpoint products version 7.0 and later
- infoWebClientFlags.zip - a diagnostic method for ESET endpoint products version 6.6 and older
Solution
![]() Home users: Click here
Home users: Click here
infoWebClientFlags.zip
-
Download the infoWebClientFlags.zip folder and save it to your Desktop.
-
Press the F5 key to access Advanced Setup.
-
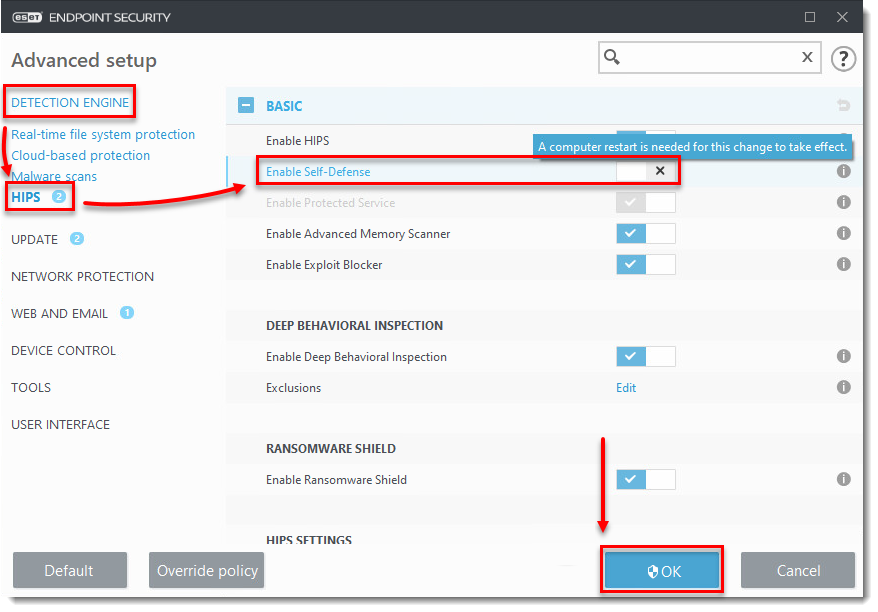
Click Detection engine (formerly Antivirus or Computer) → HIPS and click the toggle next to Enable Self-Defense to disable it. Click OK.
- Restart your computer.
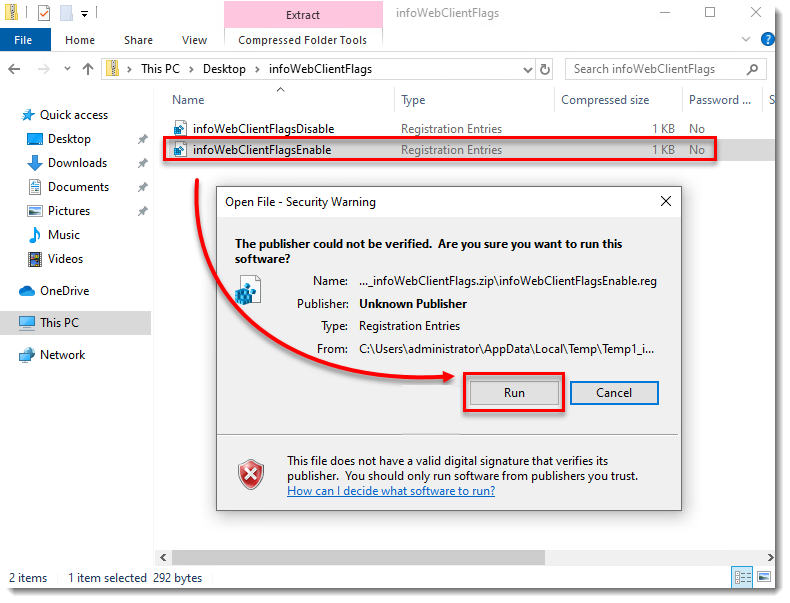
- Open the infoWebClientFlags folder you saved in step 1, double-click infoWebClientFlagsEnable.reg and click Run.
- Restart your computer.
- Activate your ESET product again to reproduce the issue and generate the log.
- Open the infoWebClientFlags folder, double-click infoWebClientFlagsDisable.reg and click Run.
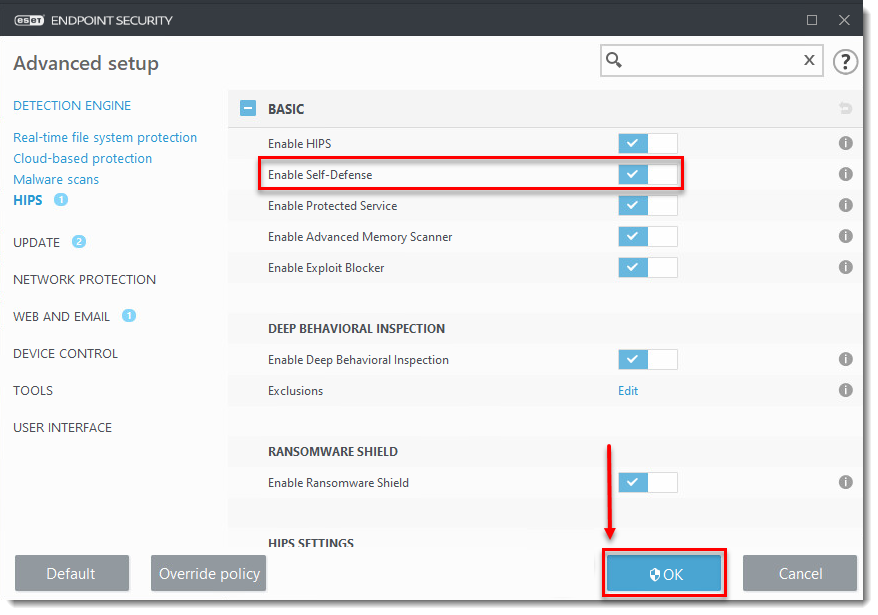
- Repeat steps 2-5. Confirm the toggle next to Enable Self-Defense is enabled.
- Navigate to the ECP folder, by default this folder is located at C:\ProgramData\ESET\ESET Security\ECP, you may need to make hidden files visible to see this folder.
- Select all the log files, right-click them and then select Send to → Compressed (zipped) folder from the context menu to create a .zip file.
- If you have not already done so, open a case with ESET Technical Support before you submit your .zip file.
- Attach the .zip file to an email reply to ESET Technical Support. A Technical Support representative will examine the log and respond as soon as possible with the recommended action based on their findings. If you are unable to attach a zipped log file, change the file extension to .file (for example, ECP.file).
Enable Licensing Advanced Logging
If the Licensing advanced logging option is not available, follow the steps in the infoWebclientFlags.zip section.
- Open the main program window of your ESET Windows product.
- Press the F5 key to access Advanced Setup.
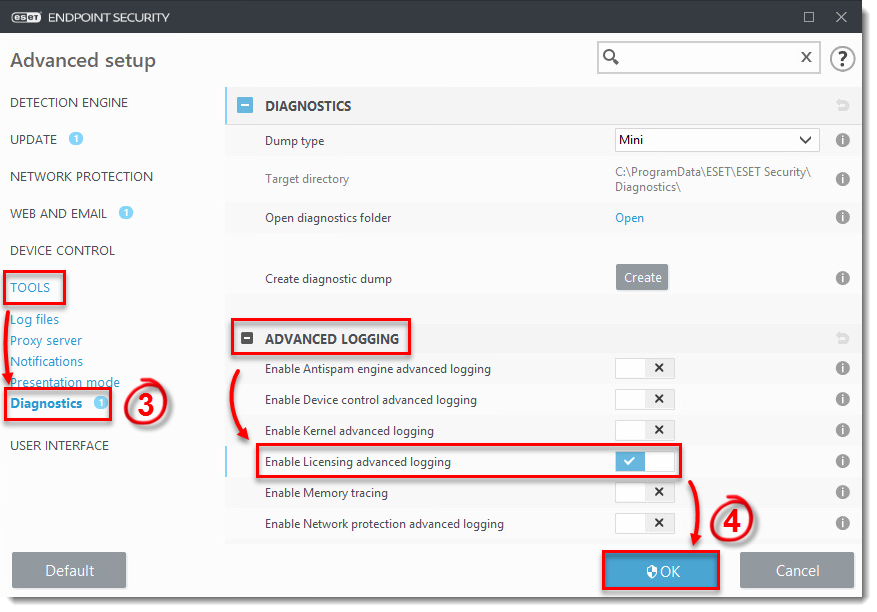
- Click Tools → Diagnostics.
- Expand Advanced Logging, click the toggle next to Enable Licensing advanced logging to enable it and click OK.
- Attempt to activate your ESET product again to reproduce the error and generate the log.
- Navigate to the ECP folder, located at
C:\ProgramData\ESET\ESET Security\Diagnostics\ECP. - Select all the log files, right-click them and then select Send to → Compressed (zipped) folder from the context menu to create a .zip file.
- If you have not already done so, open a case with ESET Technical Support before you submit your .zip file.
- Attach the .zip file to an email reply to ESET Technical Support. A Technical Support representative will examine the log and respond as soon as possible with the recommended action based on their findings. If you are unable to attach a zipped log file, change the file extension to .file (for example, ECP.file).